• Spring
  • Summer
  • Fall
  • Winter
  • Red
  • Orange
  • Yellow
  • Green
  • Blue
  • Purple
  • White
  • Brown
  • Black

What is That and How Do I Eat It?

~ strangeandyummy farmer's market finds

Category Archives: Miscellany

With Every Beet of My Heart

13 Saturday Feb 2016

Posted by strangeandyummy in Fall, Miscellany, Red, Roots and Tubers, Spring, Winter

≈ 3 Comments

Tags

beet, bull's blood, creamy, crunchy, earthy, heart, nutty, raw, red beet, root, round, Valentine's Day

Confession time: I’m a convert.

Red BeetIf you can believe it (I can’t), I once said (on this very blog!) and I quote: “Some raw food types grate them into obscurity or juice them in order to eat them, but I don’t recommend it. ”

Ah, the ignorance of youth! Or at least the fears of a beet newbie. You know what’s awesome? You know what is possibly the greatest salad in the history of salads?

Raw Beet Salad.

Raw.

DSCF8560

Bloody.

grated beetsRed.

Cut beetrootBeets.beetroot closeupI know! I astound even myself. Or, rather, Mark Bittman does.

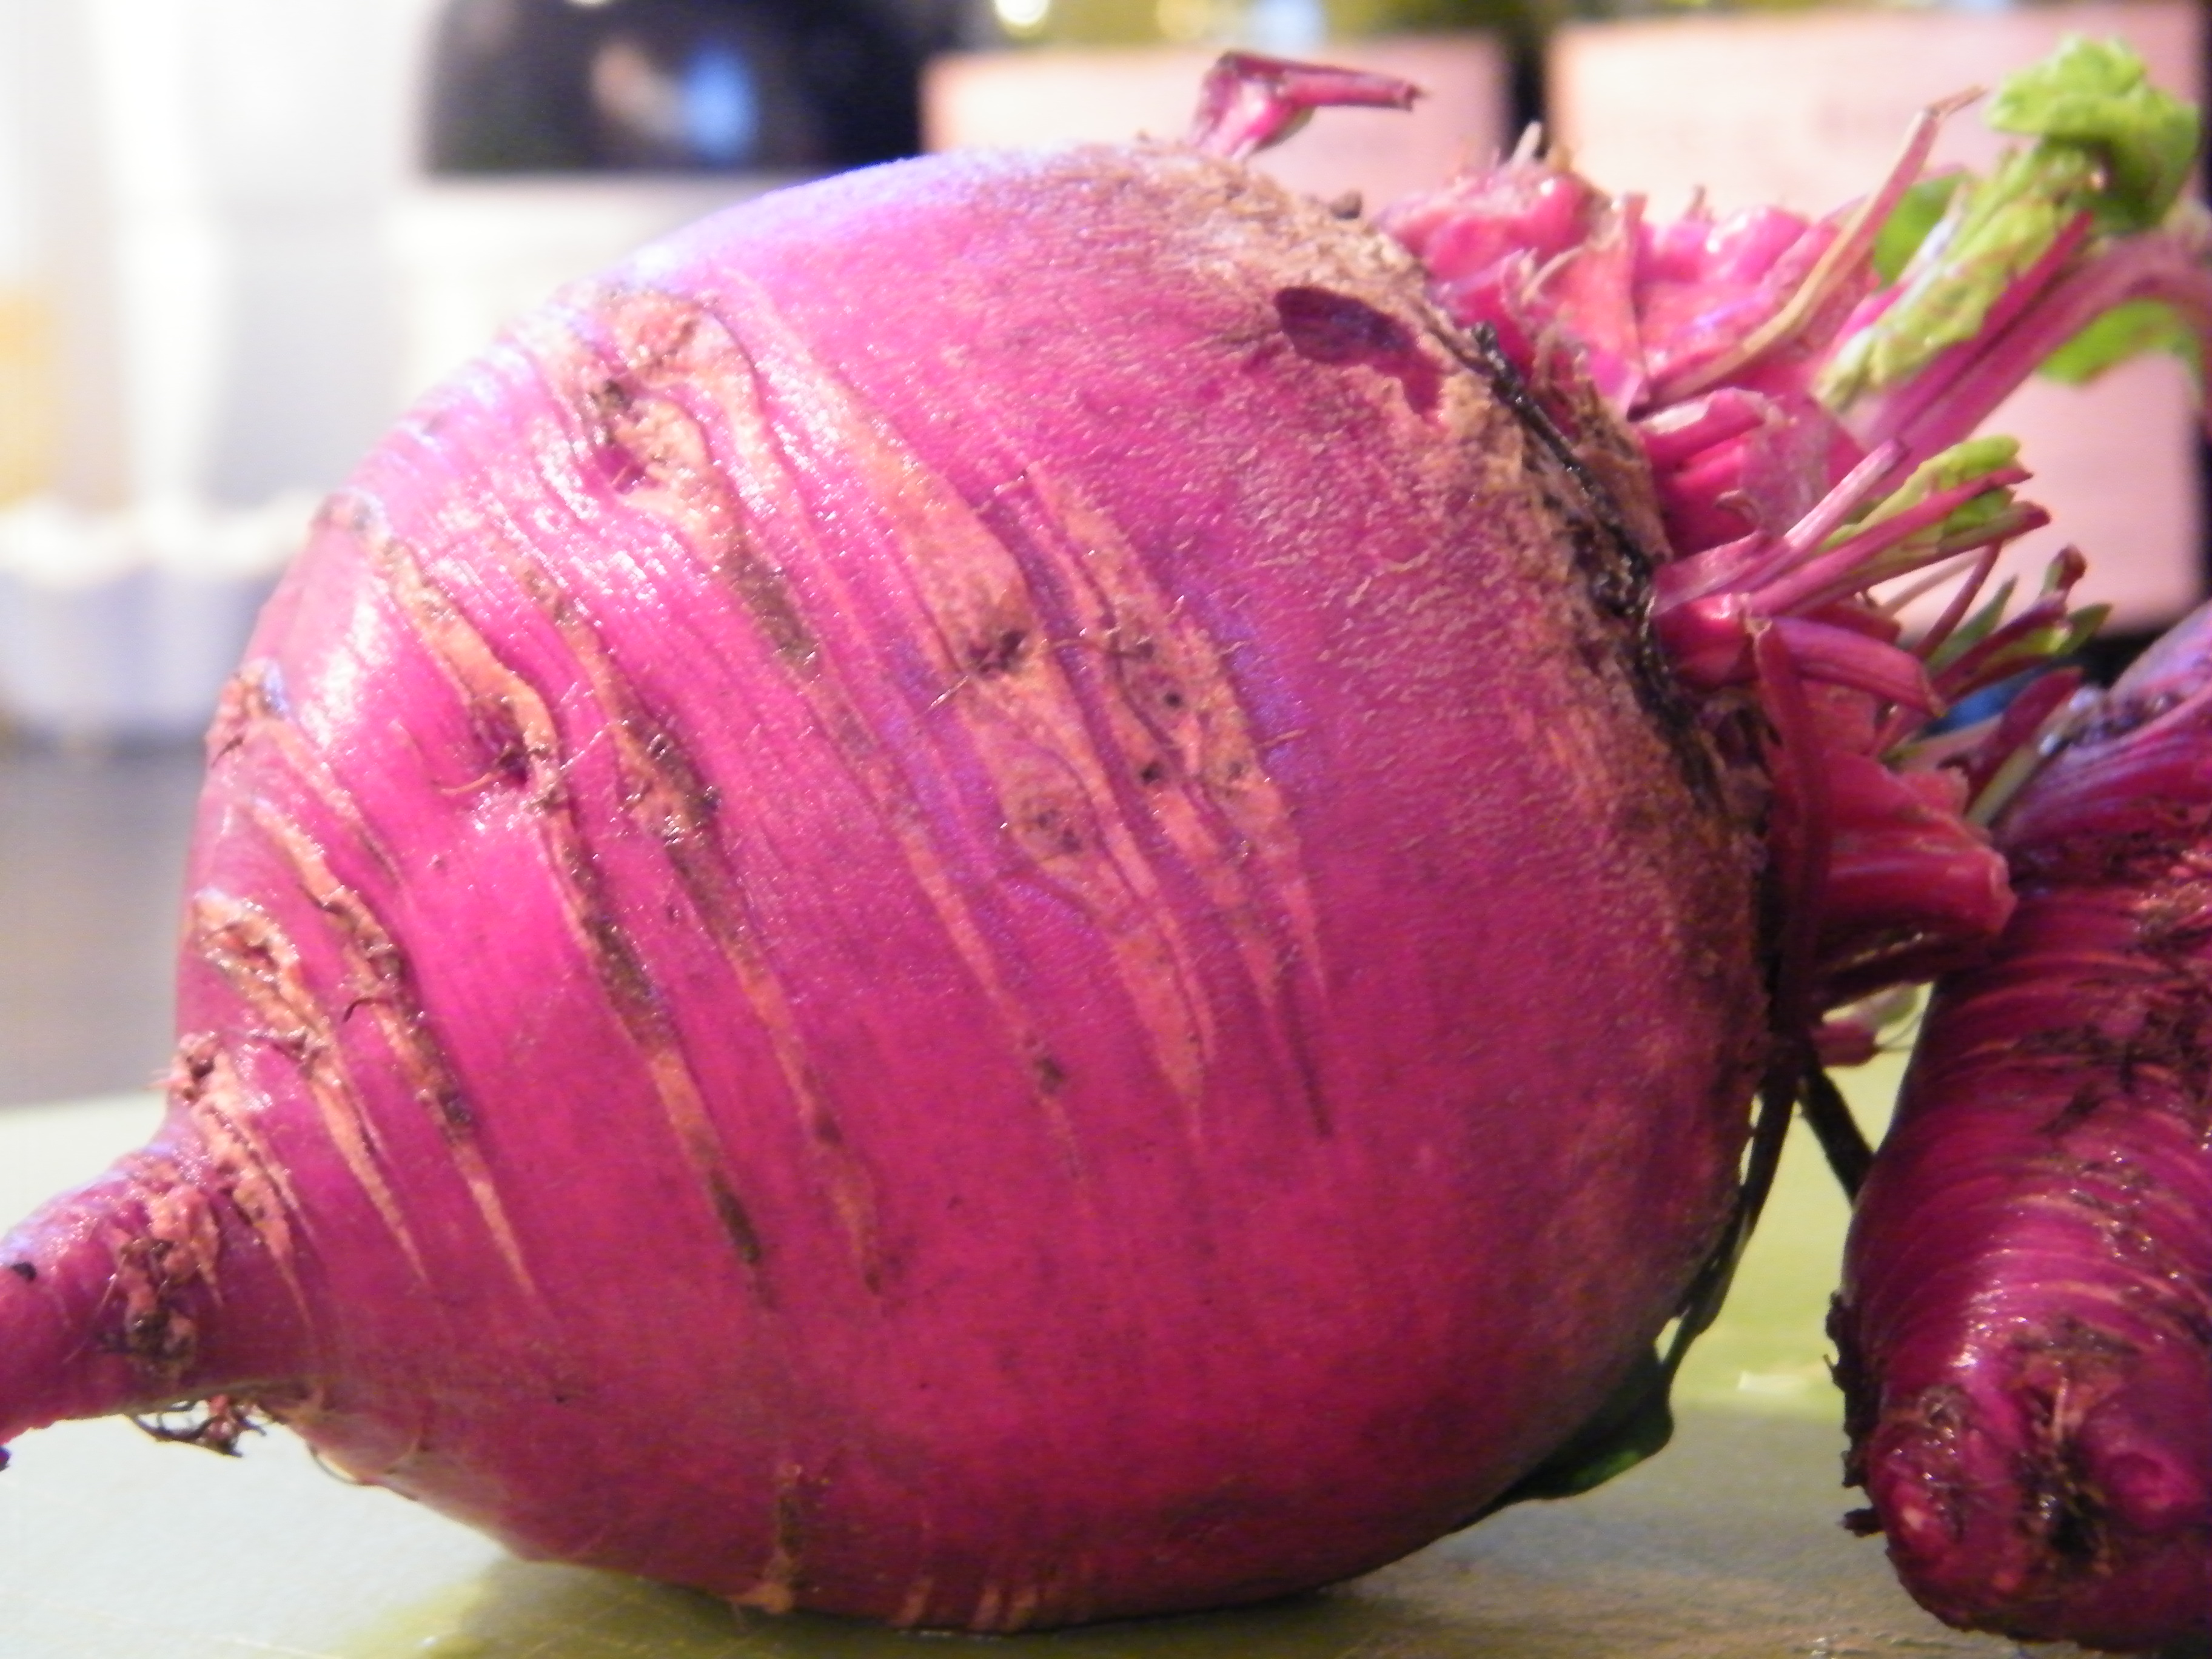
Red beets are indeed bloody and gory (and, not to be too déclassé, but seriously – put a note in the bathroom that you ate beets yesterday. Seriously. Especially if you have kids. You’ll think someone’s hemorrhaging. Everyone thinks someone’s hemorrhaging the first time you eat a lot of beets. If you’re pregnant? Forget about it. You’ll be on the way to the emergency room before you remember that you’re only chock-full of vitamins, or, ahem, no longer quite so chock full of vitamins). But the redder they are, the sweeter they are, and though I used to prefer Golden Beets and I still think Candy Cane Beets are just the cutest, if you’re going raw, you’ve got to go red, baby.

DSCF8566This isn’t just because of the taste, though it’s mostly that. The other reason you should go for the red beets (or beetroot if you’re British) is that the other kinds change color really darn quickly. We’ve tried the below salad with golden beets, and they turn greenish-mud and look kind of like a bowl of vomit. The white parts of the chioggia beets turn brown, and when grated you lose all their cuteness (though they might work okay if mandolined and eaten quickly – I can’t say, I haven’t tried it).

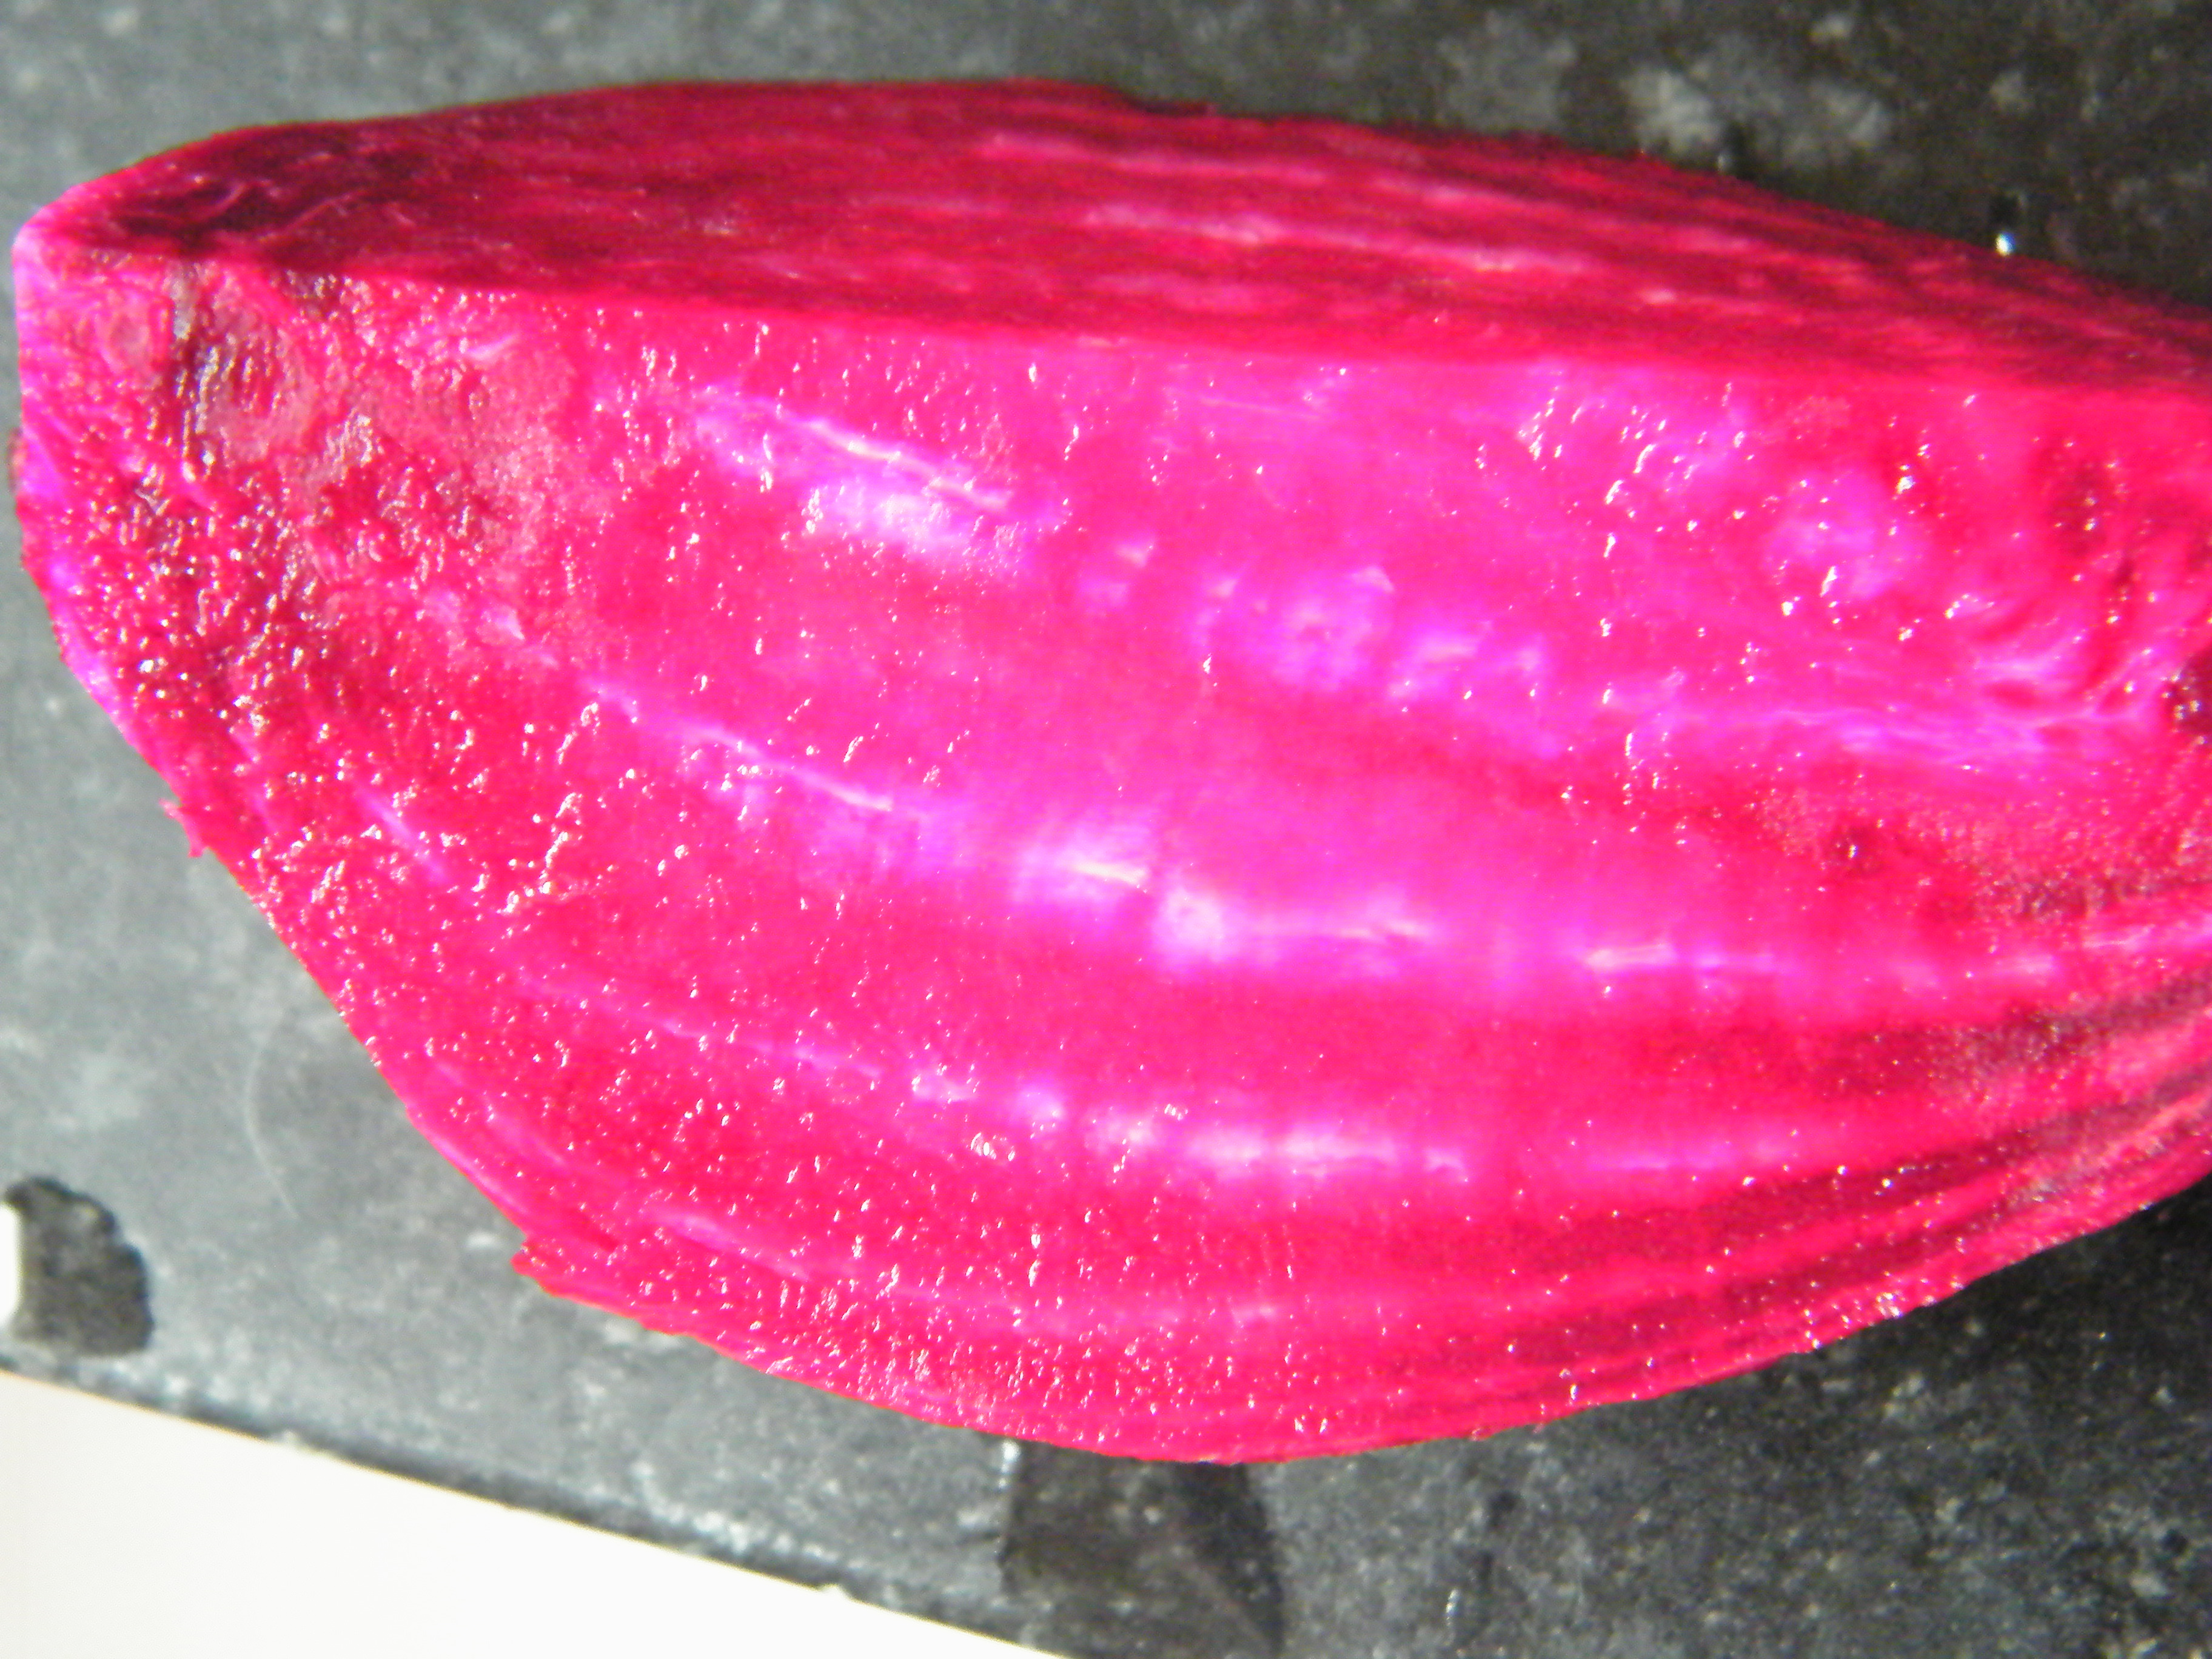
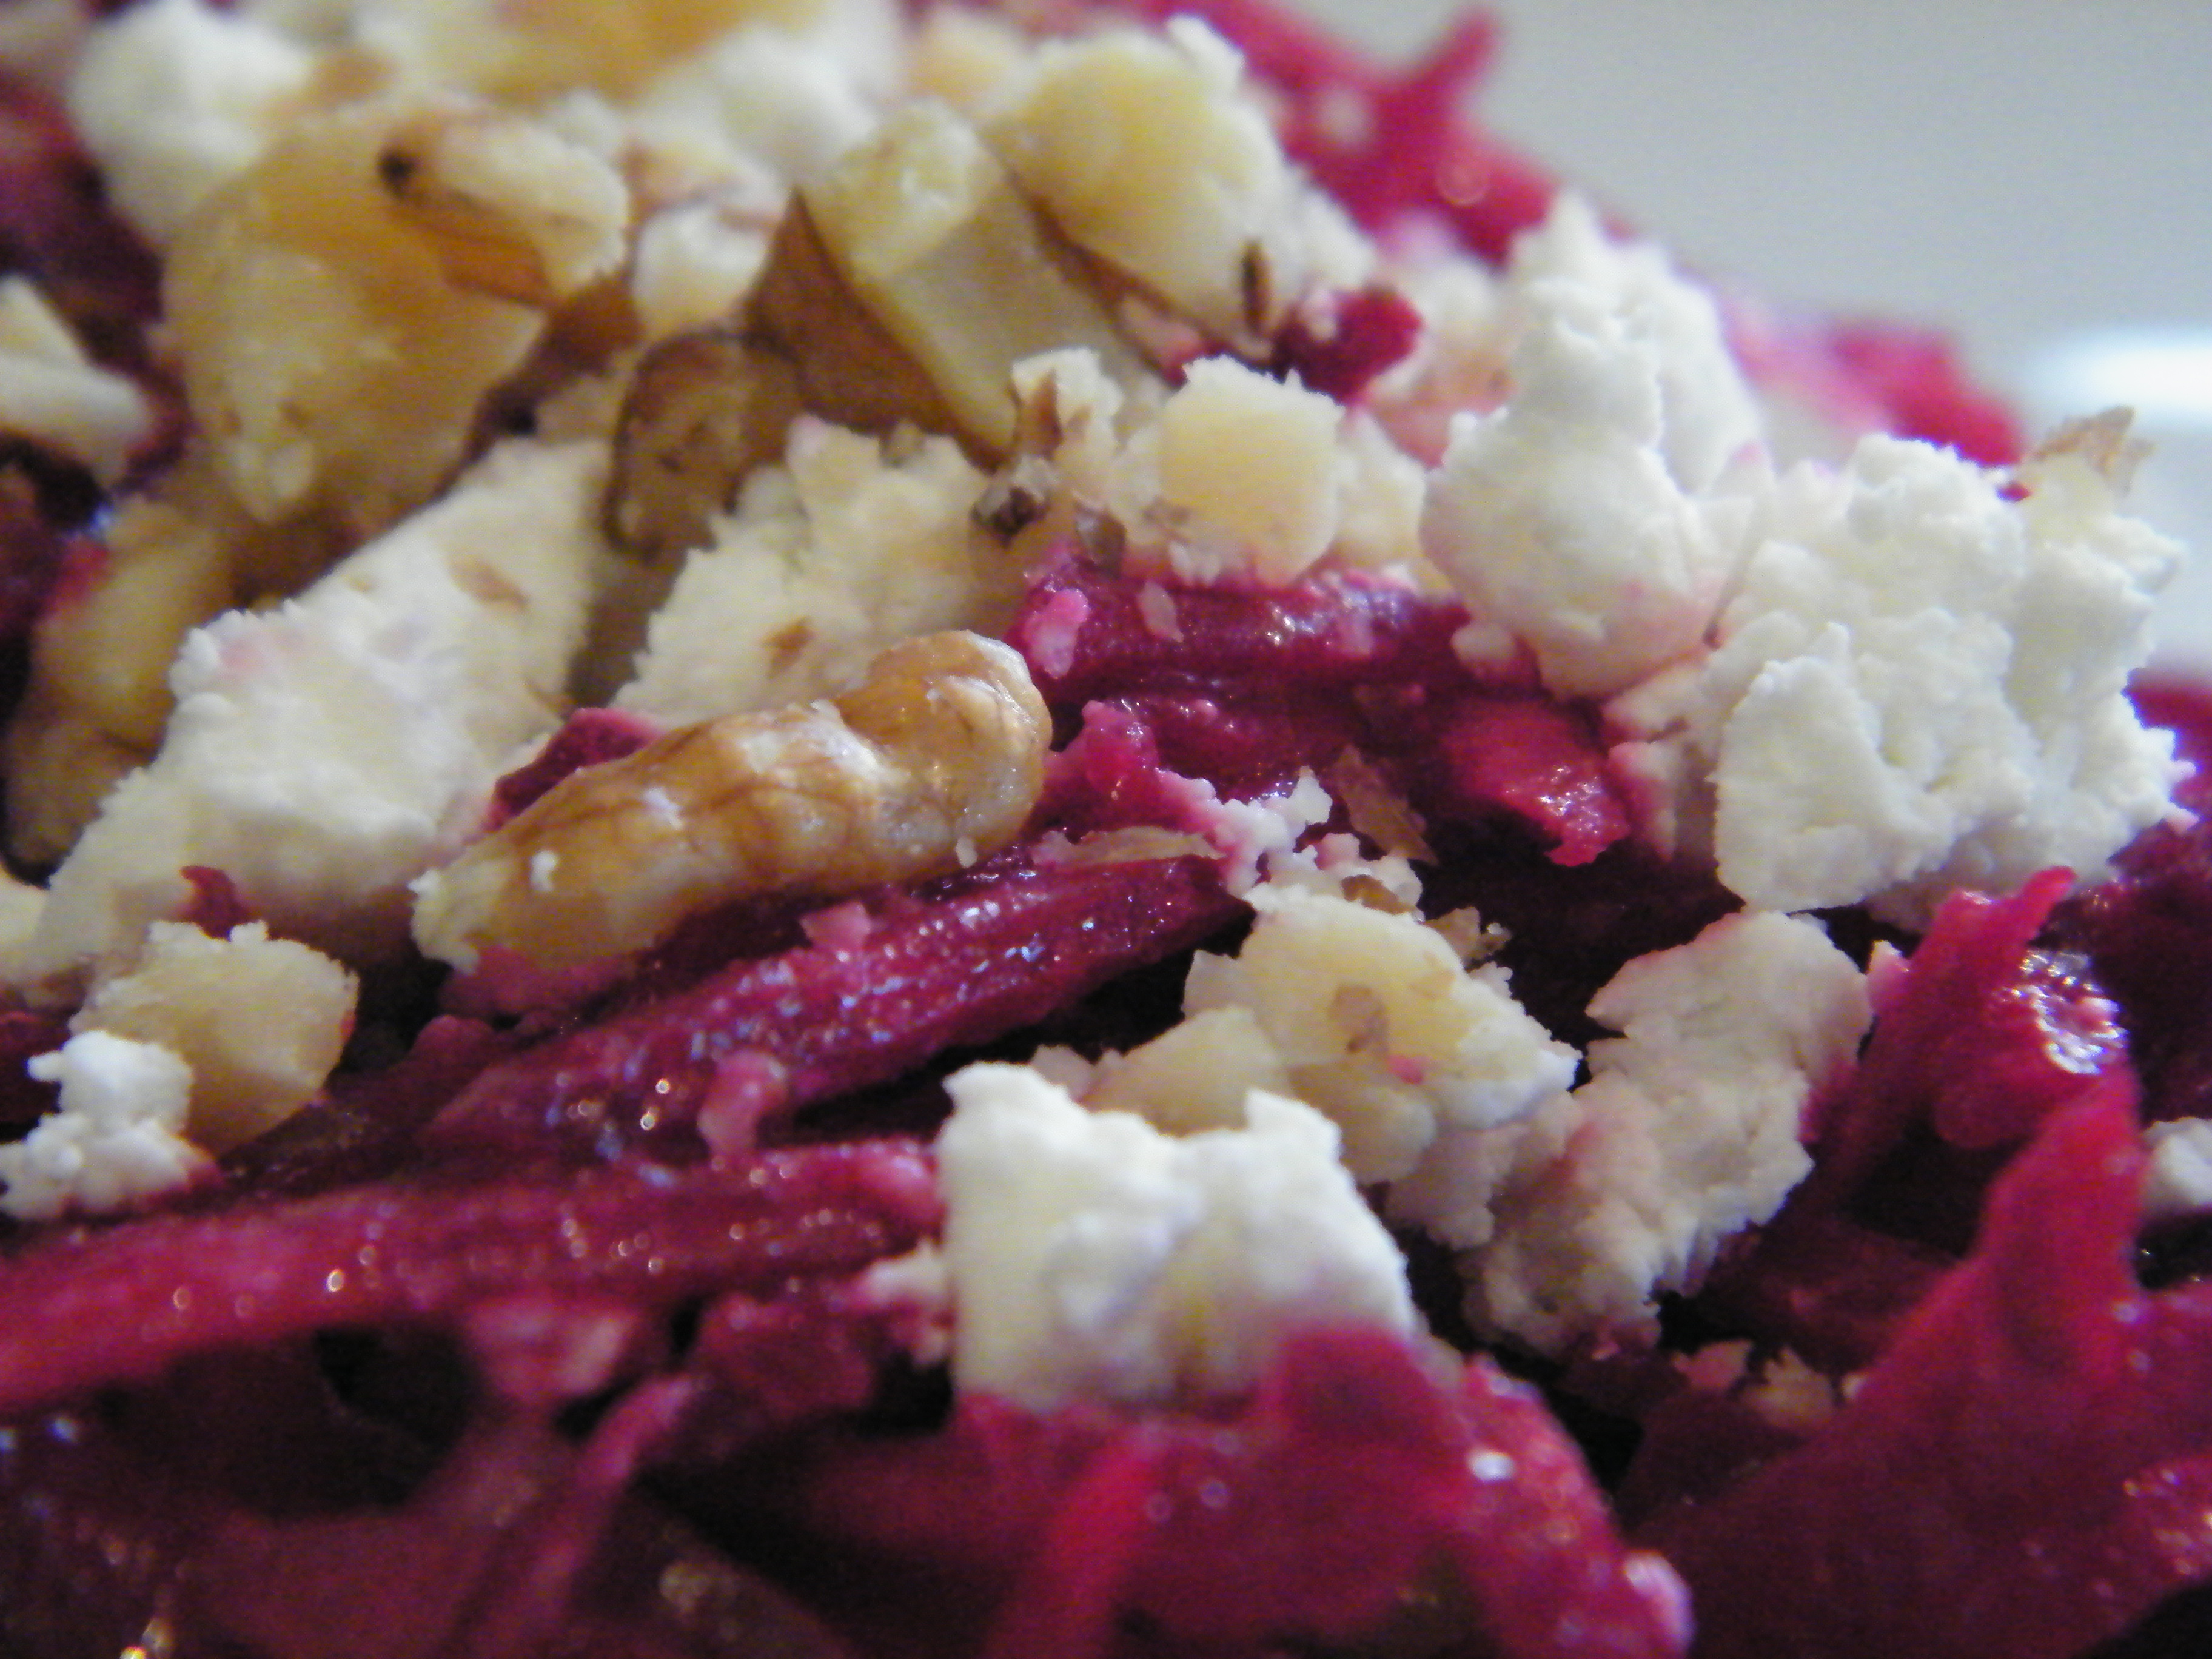
But the red beets – grate them or slice them thin enough, and you have sweet, crunchy, earthy, beets coupled with a fresh and bright dressing, offset by the smooth, tangy creaminess of little dabs of goat cheese and rounded out by hearty, silky walnuts. It’s perfection.

Valentine’s Day, however, deserves a little something extra. {Drumroll, please}

Heart Beet SaladRed is great; hearts are better.

Heart Beet Salad
adapted from Mark Bittman’s Raw Beet Salad

I’ve adapted this recipe for 2 adults and 2 young children, because that’s what I serve – If it makes too much for a romantic dinner for two, save the hearts you mangled and the parts you trimmed off the beetroot, grate or slice thin, mix with the dressing, and store in the fridge. It will keep for a couple of days – but mix with the dressing first. Unlike leaf salads in which the dressing makes it soggy, the vinegar here helps keep the beets from losing their color – but only for a day or two. Then they’ll get soggy, too.

Dressing:
1-2 large shallots, thinly sliced
Salt and freshly ground black pepper
1-2 teaspoon Dijon mustard, or to taste
1/2-1 tablespoon extra virgin olive oil
1-2 tablespoons champagne vinegar (the original recipe uses sherry vinegar; we prefer champagne; red wine vinegar is too strong)
1-2 sprig fresh tarragon, minced
1/8-1/4 cup chopped parsley leaves (a nicely-sized ripped off bunch)
*the measurements vary depending on how much dressing you like. Start on the low end of all if you’re not sure or don’t like everything drowned. Make the higher amount if you don’t mind leftover dressing, and then dress to taste.

2-3 medium beets – if you’re making hearts, the more spherical, the better
1-2 inch log of goat cheese, crumbled
1/4 c walnuts, crumbled

In a small bowl, whisk together salt, pepper, mustard, oil, and vinegar. Taste to adjust seasonings (keep in mind you’ll be adding herbs – taste for ratios of oil to vinegar, and saltiness, not so much for exact flavor). Stir in shallots. Avoid mixing herbs into dressing to save a step – the whisking and tossing bruises the leaves and makes them lose a little of their floral sweetness.

To make beet hearts:

Peel beets. Cut off the top and bottom where the greens sprout and where it gets spindly – you want a nice-looking circle with two flat sides.

beet circlePlacing one flat side down, cut in half (lengthwise if it’s not a perfect circle). Working with one half-circle, cut the bottom round edge off at a diagonal – this will be the bottom edge of half a heart. beet heart

Trim the top edge to remove the corner and round it out.

Beet Heart Half Repeat with the other half-circle.

Beet Heart CompleteTurn round side facing up and slice into very thin slices. Place two halves next to each other to form hearts on the plate.

My heart on a plate

Crumble goat cheese and walnuts on top, drizzle with dressing, and sprinkle with minced herbs.

Grated Beet Salad
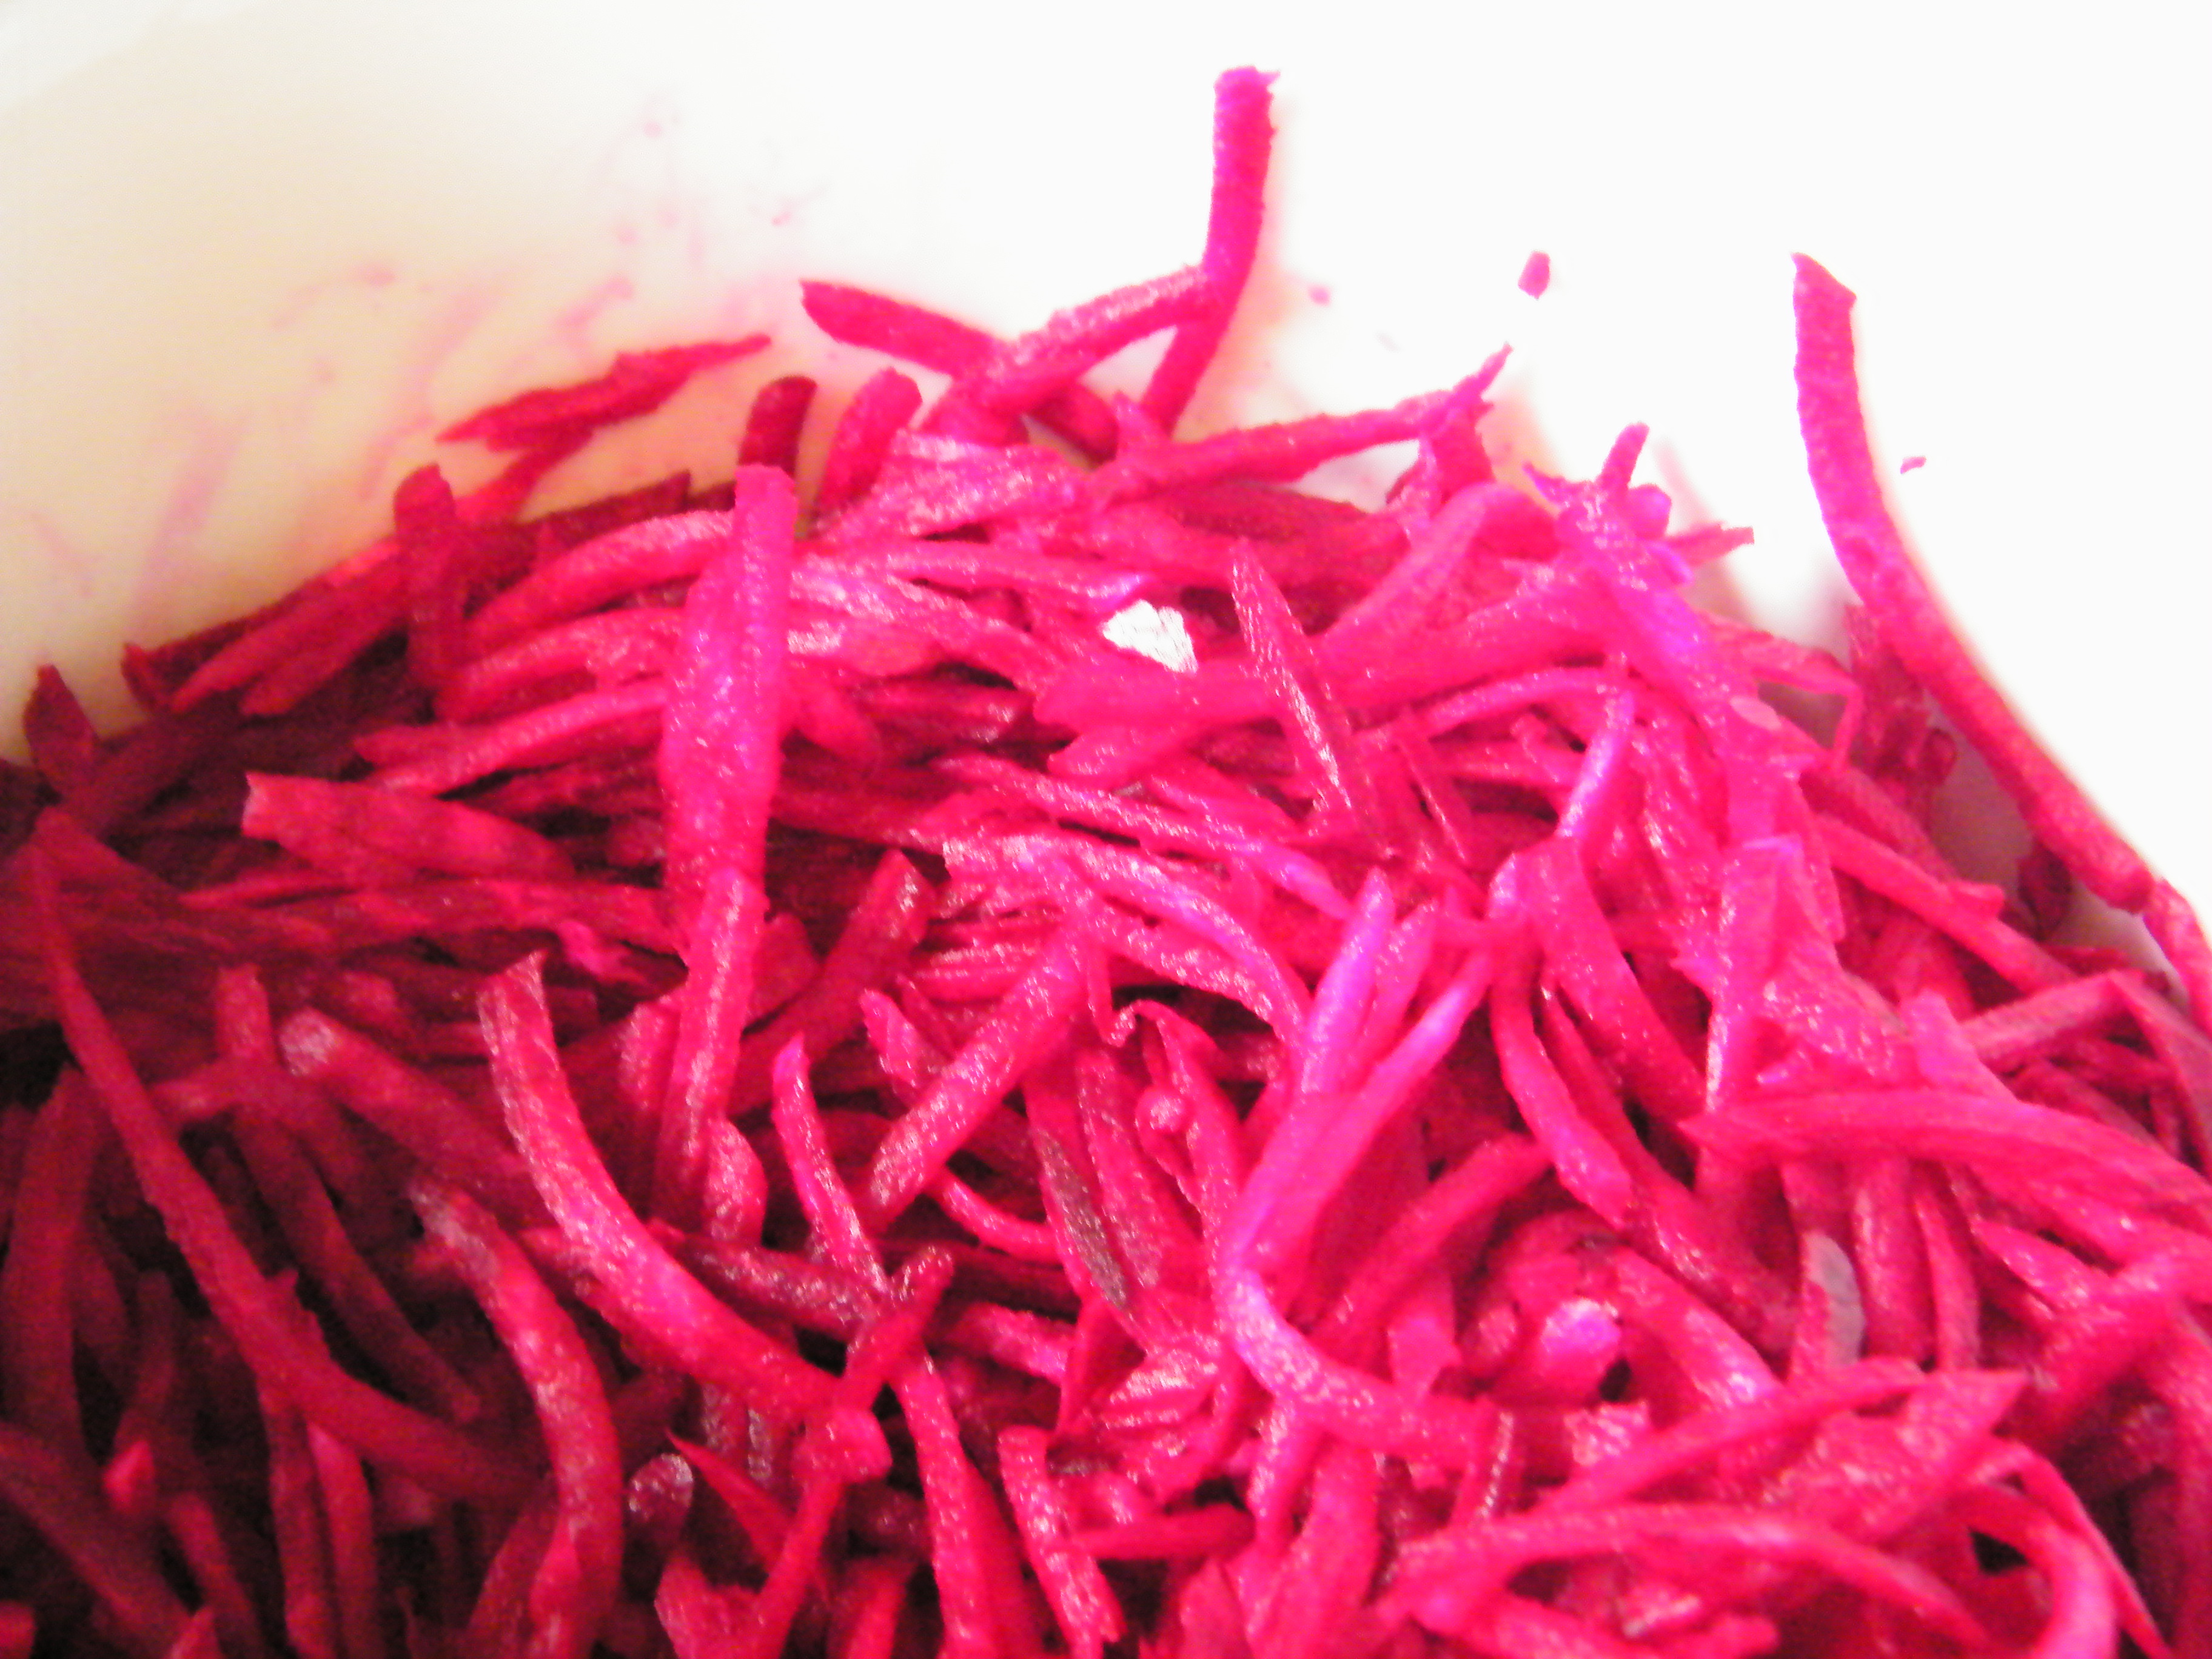
If you want to just make the grated salad version:

Peel the shallot and the beets and put them through the shredder blade of the food processor, or pulse to grate. Don’t overprocess.

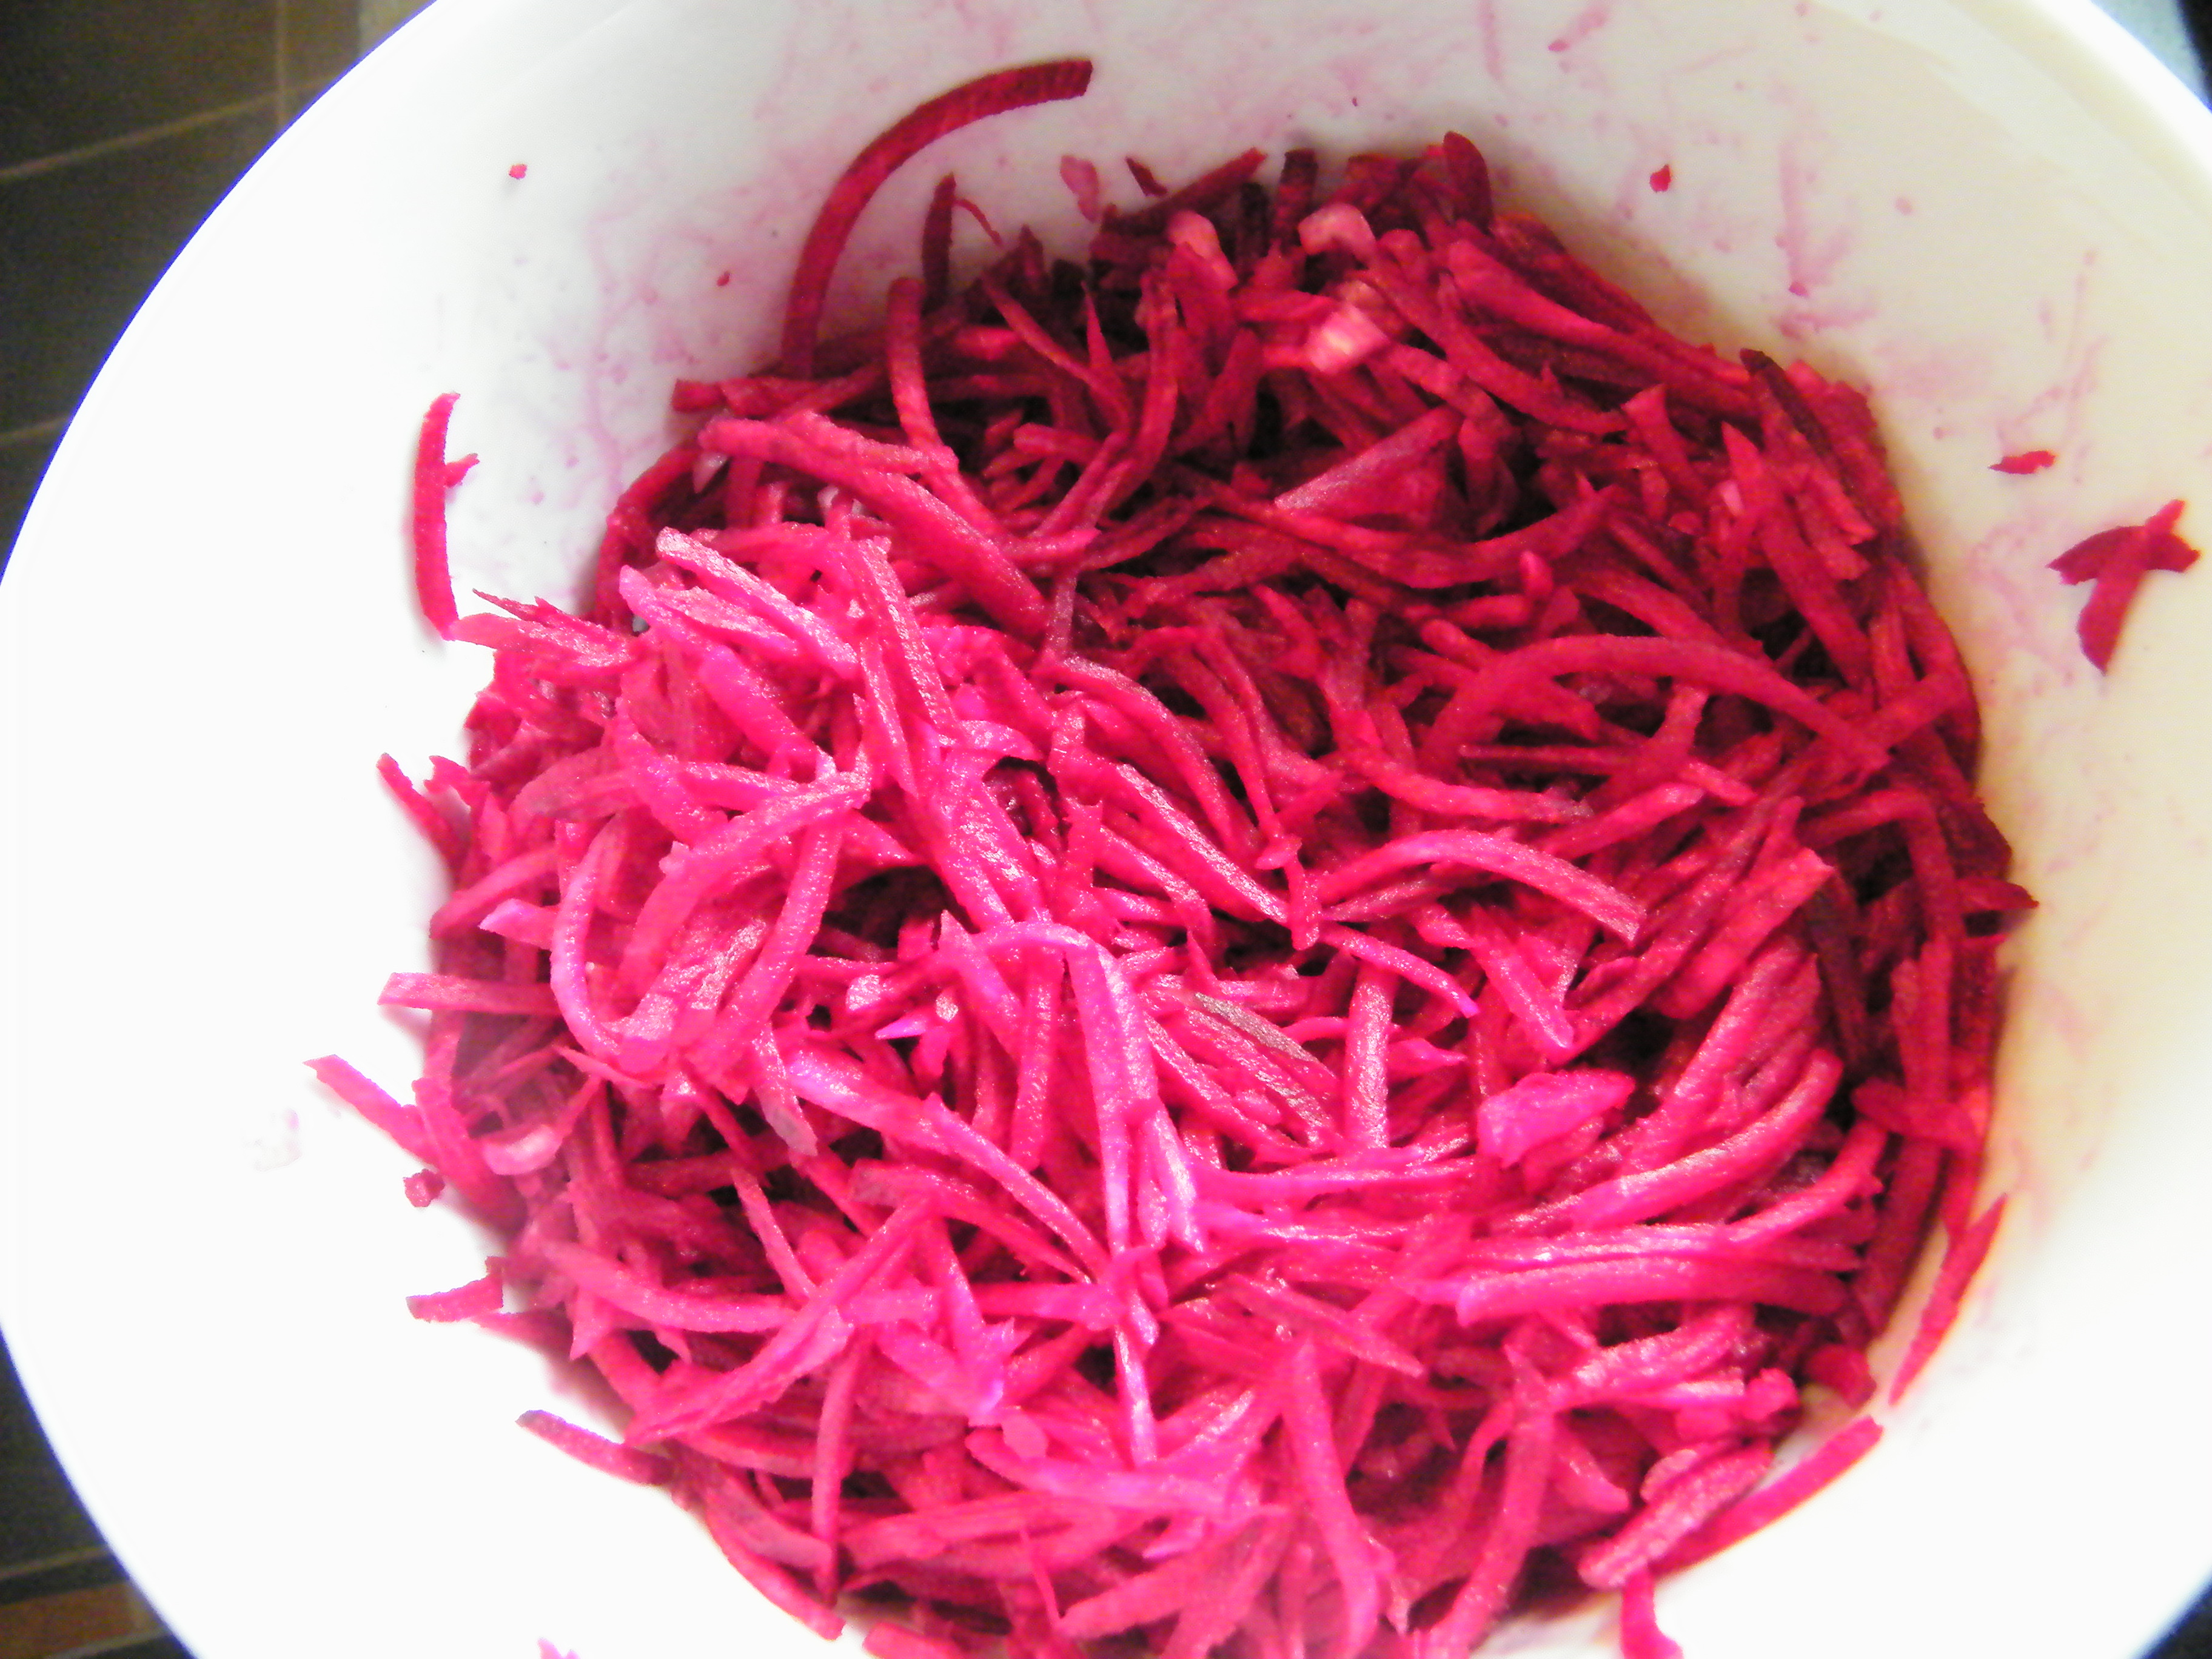
In a separate bowl, whisk together the dressing, leaving out the herbs. Toss the dressing with the shredded beets, then toss briefly with herbs. If you’re making it for a crowd, you can sprinkle the goat cheese and walnuts on top now, and serve, but if you’re making individual plates, dish up the beets first, then crumble goat cheese and walnuts on top so that the beets don’t turn the cheese pink. (Vegans: the original has no goat cheese and is also awesome.)

Info on peeling, seasonality, etc. is the same as Golden Beets.

———————————————————————————————-

A note: It takes a lot of time and effort to create these posts. I share the information I’ve found because I want to be helpful, but I’m also a professional writer, and other people pay me for my work. Please, please, STOP STEALING MY POSTS. I don’t disable copying because the majority of lovely, honest people who come around might want to copy and paste the recipes to their computers – but I also really, really don’t like thievery. If you find my information useful, please give credit where it’s due, and post a link to my page! The vegetables, the universe, karma, and your mother will thank you. And I won’t have to get all high-security up in here or shut the whole thing down.


Share this:

  • Facebook
  • Pinterest
  • Twitter
  • Tumblr
  • Reddit
  • More
  • Email
  • Pocket
  • Print

Like this:

Like Loading...

Figs in a Blanket

26 Wednesday Jun 2013

Posted by strangeandyummy in Black, Brown, Fall, Fruit, Green, Miscellany, Summer

≈ 3 Comments

Tags

earthy, fig, pink, raw, rich, slimy, smooth, soft, sweet

Growing up in a humid, mid-Atlantic suburb on the East Coast, the only figs I knew of were the Newton varietal – but man oh man were they tasty!  So when I moved to California and starting expanding my fruit and vegetable repertoire (not a difficult task, when my chosen produce at the time consisted of apples, berries, and iceberg lettuce), what could be tastier, I thought, than the inside filling of a cookie fruited cake.

black figsBleh.  Raw fresh figs do NOT taste like fig newtons minus the cake part, just FYI.  Some people, lots of people in fact, love them, but I am not one of them.  So I thought I hated figs.

But as with  most things in life sliced figs(I swear to you, I promise on all that is good and holy, at some point soon I will post a whole series of posts that are kosher and/or vegetarian and/or vegan and/or don’t negate all their yummy nutrients by simply mixing with bacon and/or goat cheese…but today is not that day) they just needed to be wrapped in pork product to change my view.

Raw figs have a hint of sweetness, and a somewhat earthy, flowery flavor.  When very ripe, they’re quite syrupy and gain sweetness, but to me the flavor is like a mushroom masquerading as a pear, with a suggestion of banana.  fresh figIt’s the mushroom quality I don’t care for, along with the slightly slimy texture broken by the rows of seeds that makes me feel a little like I’m biting into a raw sea creature.  Dried figs, on the other hand, are basically candy, a concentration of sugar so sweet and yet so complex that I knew there was something in there worth exploring, even if it wasn’t eating the fruit raw out of hand.

Do something to a fresh fig, however, and you’re in entirely different territory – and when I say something, I mean almost anything.  Poach in red spiced wine for a winter dessert served over ice cream, roast with any number of meats for a restaurant-quality entree, or bake into pies, galettes, tarts, cakes, or custards for a multi-layered flavor extravaganza of a dessert.  Figs are incredibly versatile, and incredibly delicious if you pair them with anything that stands up to their complexity.

figs and prosciuttoThere are several varieties of figs, ranging in color from dark almost black, to almost lime green.  They’ll get softer and softer as they ripen, and are at their sweetest when fully ripe (edible even to the point of mush if you plan on baking or something), but they don’t travel that well once they get close to that stage, so look for a little softness without bruises.  They should feel slightly heavy for their size, and should smell slightly sweet, not sour.  Very firm figs will not ripen further, so don’t buy them.  To prepare them, I like to slice off the hard bit of stem at the top, but otherwise everything is edible, skin, seeds and all.

I love sweet and savory together.  Medieval cuisine, aka gamey meats and dried fruit? Awesome.  Mediterranean couscous salad with raisins?  Bring it.  Chicken salad with grapes? My favorite.  My husband? Not so much.  And by not so much, I mean I sneak the fancy prepared salad bar at Whole Foods when I have to buy lunch, and that is the extent of my exotic pairings.  He doesn’t even do pork chops with applesauce or lamb with jelly (which, come to think of it, neither do I, so I guess our marriage is saved).  So imagine my delight when I not only discovered this dish, but discovered that he loved it.  Sweet, salty, savory – it could be a dessert if you put a sweet balsamic glaze on it, but makes an even nicer salad on top of a bed of arugula and a simple balsamic vinaigrette; but we like them just the way they are: delicate appetizers that you can pop in your mouth, the prosciutto crisp around the edges and the juices of the meat and fig mingling into a salty sweet syrup that pools beneath each morsel.  As fancy appetizers go, they’re fast, decadent, and would be elegant if we didn’t end up licking our plates afterwards.  A true endorsement, indeed.

figs are doneFigs in a Blanket

      • Fresh figs
      • Goat cheese
      • Sliced prosciutto (2 slices per 3 whole figs)

Options: balsamic vinegar, crusty bread, arugula, blue cheese

Slice the figs in half lengthwise.  Slice each slice of prosciutto into thirds lengthwise.  Place a small portion of goat cheese in the center of the fig.

goat cheese figWrap the fig and cheese in a thin slice of prosciutto

DSCF6335fig in prosciutto

fig wrapped in prosciuttoand place in a 400 degree oven for approximately 10 minutes, or until the prosciutto begins to brown and crisp at the edges.  (We cook them on an aluminum foil-wrapped sheet in the toaster oven for easy cleanup – it gets messy.) Serve warm, but not immediately – the centers get very, very hot and we always burn ourselves when we pop them in our mouth too quickly.

Other options?  Drizzle with balsamic for a little acidity to cut the sweetness, serve with crusty bread to sop up the syrup that will form on the pan, or serve over arugula for an elegant appetizer/salad.  Some versions call for blue cheese instead of the goat, so feel free if that’s your preference, but we’ve tried it both ways and in my opinion, the goat lends a sweet tanginess that goes better with the fig.  If you use blue, I would definitely add the drizzle of balsamic.

figs in a blanket

For fresh figs:

Peel/Trim?  No.  Everything is edible, though I do like to cut off the top stem – just a centimeter or two.
Edible seed?  Yes.  Technically, it’s an inside-out flower, but whatever, you can eat the whole thing.
Edible when raw?  Yes.  Best when very ripe.
Worth the price of organic? Unclear.  Figs aren’t that common,  so they don’t show up on various “Dirty Dozen” or “Safe” lists at all, and from looking into growing them, it looks like they’re easy to grow in the right climate, and the main problems that affect fig trees can’t be controlled chemically, so it’s probably a reasonable assumption that conventional figs are not heavily doused in chemicals.  If you’re buying dried, however, I would err on organic because whatever’s there is going to be concentrated in the drying process, as well as probably have sulfites added, as most conventional dried fruit does to keep them moist.
In season: Early Summer briefly, and then Late Summer through Fall for the main crop – though in a place like Southern California where they grow well, you can usually find them all summer long.
Best with: Almonds, hazelnuts, vanilla, orange, cinnamon, black pepper, rosemary, arugula or other sharp greens, gamey or strong meats, rich/creamy cheeses or desserts (custard, ice cream, etc.), deep red, jammy wines (port especially)
How to Store:  In the coldest part of the fridge for up to 3 days, max.  Don’t wash them before storing – if they get wet, they’ll mold quickly.  If they’re already soft or squishy, use immediately as they won’t keep.

Share this:

  • Facebook
  • Pinterest
  • Twitter
  • Tumblr
  • Reddit
  • More
  • Email
  • Pocket
  • Print

Like this:

Like Loading...

Stinging Nettles

29 Friday Mar 2013

Posted by strangeandyummy in Green, Herbs, Leafy, Miscellany, Spring, Vegetables

≈ 2 Comments

Tags

citrus, flower buds, green, hairy, leaf, leafy, mild, sharp, stinging nettles, toothy

I don’t know that I’ve ever been more excited to eat something that I’m afraid to touch.NettlesI first heard of nettles as edibles (whee! That’s fun to say!) years ago when I was reading a book on the Irish famine.  I’m Irish-obsessed, in case you didn’t know (my daughter’s name is full-blown Irish Gaelic), and at the time I found it tragic that they ate weeds to survive when the potato crop failed.  But in a different Irish famine book (yes, obsessed), there was some mention of nettles as actually a staple food before the famine (if you don’t know Irish history, it’s tragic.  TRAGIC tragic.  The English were right bloody arseholes.) because they’re one of the richest sources of iron, vitamins A and C, and a full 10 to even 40 percent protein (and to that I say, what the what??  Vegetarians, get in here!).  They’ve also long been a staple in herbal medicine, since they supposedly are one of the best treatments for hay fever, and also for arthritis.  I was intrigued.  Nettles seemed pretty awesome.

Silica StingersExcept that they will sting you.  The taxonomy derives from the Latin for “I burn” and they’re chock full of little stingers especially on the new growth.  Standard rule of thumb for harvesting is to wear gloves, but I don’t own rubber gloves for cooking, and I was frightened.  The farmer at the market made fun of me dismissed my fears and said they weren’t that bad, but I wasn’t taken chances.  So here was my oh-so-graceful and professional method for dealing with nettles:
1. Let farmer with callused hands and scoffing bravado put them into bag.  Don’t put other veggies in same bag in case the prickers brush up against things and stick to my innocent chard or beets.
2. Remove from bag by grabbing only the bottom two inches of stem and awkwardly hold the whole bunch under the faucet to wash.  Rinse by shaking vigorously, thereby blessing the whole kitchen with nettle holy water.
3. To prepare for cooking, just as awkwardly hold giant nettle stalks over the largest frying pan I have, hot with oil, and chop off hunks with kitchen shears, trying not to get burnt by the spitting oil because the nettles weren’t really dry from the vigorous shaking and in case you haven’t heard, oil and water don’t like each other and in a hot pan they take it out on me.

Miraculously, this method worked out really, really well.

Nettle StalksThe nettles lose their stingers within about 30 seconds of cooking, so you could probably cook them, then slice them more neatly if you liked, but I’m not fussy about presentation so much, and I don’t like getting burned by hot, thornless nettles any more than I like getting stung with raw nettle thorns…  Most sources DON’T recommend my version of preparing them (I can’t imagine why) but recommend blanching instead:

  • Plunge nettles into already boiling water for about 30 seconds to 1 minute to get rid of the stingers)
  • Plunge into an ice bath to stop the cooking
  • Roll in towels or paper towels to dry them off

At this point, they can then be sauteed, sliced, frozen for later, whatever, and they’ll be a brilliant green to boot.  I 1) am lazy 2) never have ice on hand and 3) broke my favorite and largest mixing bowl last week, so plunging and bathing and creating more dishes [4) don’t have a dishwasher] is not part of my repertoire.  But if you are the opposite of me in any of those criteria, you can blanch like a normal person.

Nettle branchNettles taste a bit like the lovechild of spinach and an artichoke.  They don’t have the chalky feel of spinach and are milder in flavor, but they do have a little of the mineral/metallic/plastic tang that artichokes always seem to have.  There’s a hint of lemon in there as well, and though they’re a little grassy, they don’t in any way taste like grass or weeds – though if you buy nettles instead of picking them, make sure you pick out the long strands of actual grass that seemed to show up in all the bunches.  Nettles are toothy-leaved and roundish-stalked, not long, flat blades. (Did I, I know you’re thinking, shrug and assume those long blades were perhaps a rogue type of weird nettle stalk among my branches?  Yes, yes I did.)  Look for healthy-looking plants that have not yet begun to flower (flowering makes the leaves turn bitter), the younger the better for sweetness and mildness of flavor.  You can just use the young leaves, not the full stalk and tiny flower buds the way I did, if you want to keep the flavor as mild as possible and still reap all the nutrient benefits.  Nettle soup is a classic way to use them, or nettle pesto once they’ve been blanched, but I liked them sauteed:

Lemon-Parmesan Pasta with Stinging Nettles
Nettles
Olive Oil
Freshly grated parmesan (not the green tub)
Lemon
Garlic cloves
Spaghetti

  • Boil water and start the pasta.  Once you’ve added the noodles to the water, start your nettles:
  • In a very large pan, saute chopped nettles in roughly a tablespoon of olive oil (Use as many nettles as you like – like any leafy green, they cook down quite a bit).
  • When the nettles are wilted, squeeze the juice of one to 1 1/2 lemons into the hot pan.
  • Add a little more olive oil, along with chopped garlic (we used 2-3 cloves for just 2 1/2 people, but we love garlic).  Cook until the garlic smell hits you, just a minute or so.Lemon-Parmesan Pasta with Nettles
  • Drain the pasta, reserving about 1 tablespoon of the pasta water (you can save yourself the trouble of “reserving” boiling hot water by just draining the pasta lazily so a little of the water stays in the pot).  Add the pasta and reserved water to the frying pan, and mix.
  • Spread the pasta dish out in the frying pan to get the most surface area, and grate fresh parmesan on top.  Fold the pasta dish into the serving bowl as if it were an omelette – slide half in, then fold the other half on top – then toss immediately.  This gets the parmesan integrated into the food so you don’t just have hunks of parmesan in certain bites and none elsewhere.
  • Top with salt, pepper, and a little more parmesan if you like.

Next time, I’m making Dungeness Crab and Wild Nettle Frittata or Stinging Nettle and Asparagus Risotto.  They both sounded awesome, but I didn’t find the recipes until I’d already eaten my bunch.  But I’ll buy more.  They’re too tasty not to try again, and besides, I refuse to be intimidated by a vegetable.  I’ll brave you yet, nettle thorns!  Just not, you know, this season.

Stinging Nettle LeafTrim? You can trim a bit of the tough base and eat the rest, or trim off everything but the leaves – your choice.  But watch out for the stingers!  They’re most prevalent towards the tips, so you can grasp the bottoms without getting stung.  Use gloves, or my wimpy method as above.
Edible when raw?  No.  You will get stung, and possibly get burning welts in your mouth and throat, even if you puree them – it’s an acid that causes the burning, and it needs to be cooked to be deactivated.  Unless, of course, you’re part of a contest.
Worth the price of organic? Probably.  Though they’re basically a weed, so there’s no real reason someone should be using a bunch of sprays on them anyway, I’d still go for organic since you’re eating the leaves where the residue will sit.  If you can’t find them organic, I would definitely do the blanching technique and probably toss that water rather than using it for tea (as some people do).
Best with:  Frankly, kind of everything.  They’re such an ancient food and grow in so many places that recipes abound, from Italian pestos to Scottish soups to Indian curries.  I like to eat as seasonally as possible, so I like them with other spring flavors like young garlic ramps, lemon, fresh fennel, asparagus, peas (if you don’t hate them)…  Nettles are a bit more delicate than some other leafy greens, so I personally avoid stronger flavors like anchovies or my beloved bacon as well, but that’s only because nettles don’t need it the way bitter greens do.  It certainly would taste fine if you decided to go that route.
In Season:  In cooler climes, you can probably find them Spring into early Summer, maybe even again in fall, but here in Southern California, you’re looking at a window of just a few weeks in early Spring, so jump on them while you can.
How to Store: In the fridge, in a produce box or plastic bag,  they should keep for a week or more uncooked.  Once they’ve been blanched, use or freeze pretty quickly.
Note: If you get stung, dock leaves are the miracle cure, but since most people don’t have those lying around – make a paste of baking soda and water and apply to the area, and once the inflammation goes down, make sure there are no stingers stuck in your skin.  If so, remove with scotch tape.  There’s no danger in getting stung other than the pain, so it should go away with no ill effects in a couple of days regardless.

Share this:

  • Facebook
  • Pinterest
  • Twitter
  • Tumblr
  • Reddit
  • More
  • Email
  • Pocket
  • Print

Like this:

Like Loading...

Eating the Vines (aka Pea Tendrils)

27 Wednesday Mar 2013

Posted by strangeandyummy in Beans and Peas, Flowers, Green, Leafy, Miscellany, Spring, Vegetables

≈ 1 Comment

Tags

crunchy, curling, delicate, greens, nutty, pea shoots, pea tendrils, snow pea, sweet, vine

True Confessions time:pea tendrilsI despise peas.  They are the eyeballs of the vegetable world, quite literally – tiny, pasty eyeballs that show up to ruin pea plantotherwise lovely dishes, like carbonara and shrimp with lobster sauce and, worst of all, the ubiquitous fish and chips “with mushy minted peas.”  How on earth does anyone think that sounds the least bit appetizing???

But I digress.  Spring as they may hearken, it will be a long time before you see a post about English peas on this blog, which is why I felt something of a personal victory in purchasing pea tendrils at the market on Sunday.

I’m not sure if they’re the tendrils of shelling peas or pod peas (HUGE difference to pea haters, by the way – snap and sugar peas are just fine, thank you), or if they just mix them all in the bin and it doesn’t matter, but to purposefully (and rather expensively) purchase things that might have some connection to the peas I deplore is dedication to experimentation, my friends.

curling tendrilsIn short: slap my ass and call my Sally.  Or whatever the expression is.

Yup, you heard it here first: they’re delightful!  I assumed they would taste sort of like peas, so I mixed in the leftover nettle greens I had on hand as well just in case I hated them, but I needn’t have, and maybe even shouldn’t have, as the two greenspea tendrils vines have very different flavors and yes, my plate seriously resembled lawn clippings.  But the pea tendrils had a delicate nuttiness, a vegetative crunch without the grassy flavor so common in most greens, an underlying mild sweetness, and tasted just simply fresh.  It was spring on a plate.  Add to that the graceful curve of the vines’ tiny fingers flash-sauteed in hot oil and fresh garlic, the bright deep green, the shy head of a white flower poking out from a tiny swaddle of leaves and the entire thing took on something of a gentile air.  I wanted to slow sip pea flowera pale sparkling wine while discussing poetry in a cool mid-afternoon sun.  (Instead of shoveling food into my face before I pass out from exhaustion and drinking my wine like it’s shots of tequila while watching DVR’ed shows with closed captioning because the kids are asleep and my house is too small?  Yes.)

Pea tendrils are the young shoots of pea plants, which makes me so happy because snow peas are one of the few things that I have grown successfully more than once, except I forget to water them and they never produce pods.  But now I can just harvest the vines! pea vine climbing The older they get, the tougher, and some people say to ditch the thicker stems, but I used everything in the bag I bought and the thicker stems were simply slightly crispier – mine were probably young enough that nothing had gotten woody or chewy yet.

Look for young, spry-looking pea shoots without wilt or yellowing.  Many people chop them before cooking, and if you purchased long strings of them, you probably should, but my farmer sold them in roughly 3-inch long pieces, and they were perfectly manageable on a fork and retained their beautiful curls on the plate – half the fun in the first place.  The best method for cooking them seems to be exactly what I found:  very hot oil, throw them in for a quick saute and a minute later add garlic until you can smell it (the whole process goes fast – maybe even just three minutes start to finish), put on a plate with salt, and enjoy.  People that like spices add red pepper flakes, too.  I tossed mine with some pasta for a vegetarian dinner.  You might also serve them with a fried or poached egg.  You see what I’m going for here?  Keep it simple, folks.  Simple and spring-like.  And if you have time for a little poetry, let me know how that goes.  I’m jealous already.

curling tendrilsTrim? Conventional wisdom says that if you can see flowers, remove the stems nearby as they’ll be too thick to be appetizing, some even include the tendrils.  I think the tendrils are pretty and had no problem with thicker stems, but if you’re eating raw I would follow the advice.
Edible when raw?  Yes, but trim off the thicker stems.
Worth the price of organic? Hard to say.  Peas are traditionally considered a “clean” food, but I think that’s because you toss the pod.  I would definitely go organic for the tendrils – they just seem to invite pesticide residue based on how they grow.
Best with:  Simple, spring-like flavors – fresh garlic, lemon, radishes, eggs, plain grains – brown rice is as nutty as I’d go; heavy starches like bulgur or barley or beans would overpower the delicacy of the shoots, in my opinion.
In Season:   Spring
How to Store: They don’t keep well.  Use the day you buy them, the next day at the most.  Store in the fridge if you’re keeping them at all, but honestly, they wilt very fast.

Share this:

  • Facebook
  • Pinterest
  • Twitter
  • Tumblr
  • Reddit
  • More
  • Email
  • Pocket
  • Print

Like this:

Like Loading...

Brussels Sprouts

12 Tuesday Mar 2013

Posted by strangeandyummy in Fall, Green, Miscellany, Spring, Vegetables, Winter

≈ Leave a comment

Tags

bitter, brussels sprouts, crunchy, earthy, green, nutty, tiny cabbages

This is how pathetic my life has become: when my husband goes out of town, I live it up by eating brussels sprouts.  Seriously. (Did you know there was an ‘s’ on the end?  No?  Me neither.  I mean, I know they were named for the city, but I always assumed the vegetable was “brussel sprouts.”  Ah the wonders of google’s super-condescending Did you mean brussels sprouts? as if google was channeling the annoying grammar kid in grade school…)brussels sproutsBut they’re lovely little nuggets of nutty vegetable goodness and he hates them, or did.  Conventional wisdom (read: the label on the bag when you buy them at the store) suggests popping them in the microwave for a few minutes with a hole cut in the corner for venting, and voila! Delicious veggies!  So here’s a tip: NEVER TAKE COOKING ADVICE FROM A PLASTIC BAG.  Even if it does have halved sproutfriendly-looking exclamation points and promising adjectives.

Brussels sprouts microwaved in the bag taste like, well, vegetables microwaved in a bag.  They’re sorta steamed and sorta healthy-tasting and sorta mushy and definitely edible and definitely fast, but when all is said and done they taste a little…sad.  And definitely need to be smothered in soy sauce.

Like any somewhat tough, somewhat bitter vegetable, the key to brussels sprouts is to roast them.  Sweeter roots and tubers like sweet potatoes and beets can be cut thin and survive a quick 20 minute roast and come out just fine, but with brussels sprouts?  You’ve got to roast the crap out of them.  trim


Cut off the ends,
trimmed v untrimmed
half sprout


Cut in half,


toss with a bit of olive oil, and pop them in a 400 oven for at least 30 minutes.  About halfway through cooking time, shake the pan to toss them around a bit, and then back in they go.  When they’re done, they’ll be absolute mush in the center, which sounds really unappetizing, but what happens is that all the bitterness dissolves away and the residual sugars caramelize in the heat and the mush you’re left with is a little sweet and a little caramelly and a little nutty and tastes awesome with anything with a little strength behind its flavor – red onion, goat cheese, walnuts, steak, or just very nice sea salt.  They’re very earthy when they’re left almost whole like this, and would probably be wonderful smoked.

shredded brussels sproutsBut if you don’t have time for a long oven roast, there’s another secret that we only recently discovered that makes them even better, and way faster and easier: shred them.  If you have a food processor, run them through the slicing blade.  The resulting pieces are thin enough to pop into any pan for a quick saute or stir-fry with whatever else you’re serving, or even edible raw.  I’ve swapped them out for the kale in my raw kale salad with fantastic results, used them in place of the cabbage in a cole slaw (since brussels sprouts are really baby cabbages anyway), and tossed the shreds into a spinach salad with warm bacon dressing for a little vegetable variety.  When shredded, the natural bitterness is not nearly as noticeable, and just lends a little sharpness; if you’re cooking, you’ll get to that sweet nutty flavor ASAP instead of waiting for the slow roast.

A quick recipe:  Throw some sprouts and a shallot through the processor, and into a pan with a little olive oil.  Cook until everything is soft.  Feel free to leave it without turning much, ‘cuz you know I like my bitter things a little burned.  Splash some champagne vinegar on there if you have it, or cooking sherry, or rice vinegar, or apple cider vinegar.  Sprinkle with salt.  Eat by the panful because it really is that good.tiny cabbages

Look for tight sprouts without yellowing or curling on the outer leaves and few spots.  If you’re buying them from the market instead of the store, you may see them in their natural state, which is attached to a giant stalk, which looks bizarrely attractive but is inedible.  If you do buy them on the stalk, you can cut each sprout off with a knife, or just twist and pull each one off – the little stems that sometimes come off too are edible, but will need to be steamed or roasted very well first.  You get a lot more bang for your buck when you buy on the stalk, but a lot more work, and frankly, my fridge isn’t big enough to hold it…so no pics.  Sorry.  When we move to a bigger house and get a bigger kitchen, I swear I’ll buy a giant specimen just for you.

Trim? Yes.  Slice off the bottom brown edge.  Some people say to just put an ‘x’ in the base, but that seems like more work to me and I don’t like tough stems.  Remove any wilted leaves.
Edible when raw?  Yes, but better sliced thin or shredded first.
Worth the price of organic? Apparently not, though I would have thought otherwise.  Organic brussels sprouts are particularly hard to grow, so they’re not that common, and because each little sprout is packed so tightly, they don’t harbor a lot of bad stuff.  So give ’em a good wash and save your pennies.
Best with:  Strong flavors with a little sweetness that can stand up to the bitter earthiness but bring out the sweetness of the sprout – shallots, lemon, soft cheeses, pine nuts, walnuts, bacon/ham/piggies…  Strong flavors that have a bitter edge, like marjoram, turmeric, or even my beloved garlic, can heighten the sulfuric edge, making them taste a little like rotten eggs if you’re not careful.
In Season:  Fall through Spring.
How to Store: In the fridge, in a produce box or loosely sealed plastic bag, they should keep for ten days to 2 weeks.  If they start to yellow at the edges, peel off the outer leaves and eat within the next day or two.

Share this:

  • Facebook
  • Pinterest
  • Twitter
  • Tumblr
  • Reddit
  • More
  • Email
  • Pocket
  • Print

Like this:

Like Loading...

Parsimony and Persimmons

02 Saturday Mar 2013

Posted by strangeandyummy in Fruit, Miscellany, Orange, Winter, Yellow

≈ 1 Comment

Tags

crisp, exotic, fuyu, kaki, persimmon, raw, sharon fruit, soft, sour, sweet

Alright, I took a serious long blog break.  I have unedited photos and half-written posts galore for you all, but somehow (oh, I don’t know, running a new business while parenting a 2 year old and a newborn?) I couldn’t seem to find the time to clean up the posts enough to post them.  So an entire winter has gone by full of turnips and cabbages and various hard squashes and I have left you, the four loyal readers that are out there, bereft of deliciousness.

Fuyu persimmonAnd I’d like to say, but no longer!  But alas, I tried persimmons recently, and, well, I was unimpressed.

I’ve seen persimmons at the market for years now, though before moving to California I had only seen them in still-lifes.  They look like a yellowish to deep orange tomato, or, frankly, rather like a heart ventricle.  [Can you tell my father was a doctor?]  They’re apparently quite popular in Asian and Mediterranean dishes, and that makes some sense to me, as those cuisines tend to not have overly sweet components…but I like sugar in a fruit, and persimmons ain’t it.Persimmon

There are two main kinds you’ll find widely: Fuyu and Hachiya.  The Fuyu tend to be more tomato-y looking while the Hachiya are more oblong, but be sure to ask before you buy.  Both kinds shouldn’t be eaten until they’re ripe, as I guess ‘green’ persimmons are horribly bitter (the Hachiyas are apparently so astringent that they’ll suck all the moisture out of your mouth! sounds horrid), but Fuyus will ripen to pretty firm, something like a pear when it’s just ripe but before it gets juicy, where Hachiyas should be soft and mushy before you eat.  The Fuyus can be eaten when they’re soft, too, but my guy (yeah, that’s right, I’ve got a persimmon guy) said they’re better when they’re a little firmer.  Look for green leaves, not brown, on a Fuyu, and let it get just a wee bit soft to make sure it’s ripe.  For Hachiyas, let them get mushy – go on solidity or lack thereof, not color.

Persimmon seedI didn’t expect the seeds inside, so I’m glad I sliced it open.  I went with Fuyus since spoonable fruit seems like, well, baby food, and I deal enough with that already, thank-you-very-much.  Let me be clear, persimmon lovers, before I get hate mail: I didn’t HATE the persimmon.  I just found it…useless.  It tastes something like an apple or a pear, but without the crispness or juiciness of either.  It’s basically just an innocuous fruit that’s twice the price of more familiar specimens.  That’s it.   You can eat them raw in hand like an apple or slice so you can remove the seeds, and many people like to cook them down into puddings and tarts.  I’ve seen colanders heaped with them at people’s houses and heard exclamations of excitement when the season hits, so I guess I’m turning it over to you, dear readers: What the heck do you do with these suckers to make them worth your while?  ‘Cuz I’m cheaping out.  No more persimmon experiments for me unless it’s going to be fantastic.

persimmon slicesPeel?  No, but you do want to chop off the leaves on top, and if you plan on cooking them, they’re often peeled for texture reasons.
Edible seed? No.  There will be 6 to 8, but they’re pretty big so you can pick them out easily.
Edible when raw?  Yes, though Hachiyas are more often cooked.
Worth the price of organic?  Unclear.  They’re not common enough in the U.S. to make some of the standard Dirty Dozen lists in any capacity – since apples are #1 on the list and other soft-skinned fruits rank in the top 20, I’d err on organic if you plan on eating the skin.  But they’re notably disease and pest-resistant for gardeners, so it’s quite likely that even conventional ones don’t go too heavy on the sprays.
In season: October through February.
Best with: cinnamon, ginger, nutmeg, cardamom, black pepper (warm spices); apple, pear, orange; cream in puddings, panna cottas and cheesecakes
How to Store:  On the counter until ripe, in a paper bag to speed up ripening.  Once ripe, Fuyus can go in the fridge for up to a couple of weeks; Hachiyas can go in the fridge for a few days.

Share this:

  • Facebook
  • Pinterest
  • Twitter
  • Tumblr
  • Reddit
  • More
  • Email
  • Pocket
  • Print

Like this:

Like Loading...

Haricots Verts, Golden Wax and Other Sorta Green Beans

21 Sunday Oct 2012

Posted by strangeandyummy in Beans and Peas, Fall, Green, Miscellany, Purple, Summer, Yellow

≈ 3 Comments

Tags

beans, earthy, green, haricots verts, long, purple, raw, snap, string, thin, wax beans, yellow

I used to hate green beans as a kid.  Frankly, in most cases, I still do.  I don’t blame my mom for this – she bought high-quality frozen green beans as I recall – but to be honest?  They taste like vegetables.  Like the vegetables of kids’ tear-induced tantrums – a little sharp, a little bitter, and very, very green.  And they squeak.  Seriously.  Some people actually know them as squeaky beans.  And God forbid, in my opinion, you buy them canned.  Add to the squeaky bitterness a metallic aftertaste, and it’s like eating medical equipment.

I discovered 2 problems with my green bean past.  1) I was eating the wrong kinds, and 2) I was cooking them wrong.  Most of the time, if you buy something labeled green beans, it’s probably Kentucky Wonder or Blue Lake – a relatively fat, fleshy bean with a succulent pod surrounding thin, tiny seeds.  I’m sure plenty of people like the somewhat meaty, earthy flavor, especially when smothered in cream of mushroom soup and fried onions, but I am not one of those people.  I am, however, something of a Francophile, so I’m pretty sure many of those same green bean loving people think I’m merely being pretentious by saying that I hate green beans but I love Haricots Verts.  Which, yes, translates to “green beans,” I know.

But Haricots Verts are a different breed entirely from the fleshy cut variety that taints many a side dish.  For one thing, they don’t have to be green.  They come in purple and yellow and speckled and all sorts of beautiful colors.  Haricots Verts and their slender brethren are thin, dainty, unimposing in their somewhat parched state.  They crisp easily or soften and blend in with the crowd when necessary while still maintaining a wee bit of vegatative flavor.  They’re milder than their heartier cousins.  They still squeak, but I like to imagine more of a dainty accident than the bold mouse-like squeak of their friends.

As for eating them wrong, every blog and recipe I can recall commands steaming, blanching, boiling or microwaving.  And to that I respond: bleh!  It’s a good way to release some vitamins, sure, and to soften them up, of course, because they can get a bit stringy or a bit of a chewy-wood thing going on when they’re not cooked enough.  Sure.  But…bleh.  What a way to make them taste like earthy, mineral-y mush.  Nope, the trick I discovered?  Burn them.  Burn them all.  (And if you’re not picturing a creepy Donald Sutherland in Backdraft right now, you don’t watch nearly as many movies as I do, and also, I envy your uncluttered brain.)

I don’t like burnt food.  I scrape burnt toast, pick around burned roasts, hell, I throw out burned cookies and if you know me that’s practically a hangin’ crime for all the rules it violates, but green beans, as far as I can recall, are my one exception.  Get a little burn on them and all that metallic minerality takes on hints of something akin to a savory caramel, the last wee traces of succulence get dessicated into crispness, and you’re left with something sharp and sweet and so tasty we always end up eating all the green beans before we even touch the main.

When buying haricots verts and their friends, look for fleshy, bright beans that snap easily.  They shrivel and get tough and bendy as they dry out and get older, and as much as I like them drier, you want to do the drying, in the pan, not nature on the vine.  Any variety that’s young and slim will do (have I lived in Hollywood too long?) but I like ones labeled Haricot Verts,  Haricots Jaune (the thin yellow ones at the top), Golden Wax for something a bit fleshier (the ones in the red bowl), or these Purple Queens for Halloween – they look almost black.  All of them, really, are varieties of filet beans, so you can look for those, too.  Snip off the ends with the stem still attached, and burn away.

Burnt Green Beans

Any color Green beans
olive oil
Herbes de Provence (or at least Rosemary)
garlic cloves
sherry (optional)
goat cheese (optional)
sea salt

Heat enough olive oil in to lightly cover the bottom of a pan, preferably cast iron (you want a pan that will get nice and hot, and that’s not a brand new non-stick – the non-stick doesn’t give a great burn, though it’s serviceable if that’s all you’ve got).  Toss the green beans into the pan, and let them sit.  This is the hard part.  DON’T TURN THEM, toss them, or otherwise touch them.  Make something else, do the dishes, whatever, until they start to get a little burn on the bottoms.  (If your beans are on the fleshier side, you may want to add a healthy dose of sherry here to steam them open a little, then let them burn afterwards.)  Toss/flip and let them start to get a little burn on the other side – you don’t want them burnt beyond recognition, but you want some blistering/black color going on.  Chop the garlic (I like 2 cloves, but one will do.)  Sprinkle liberally with herbes de provence and stir.  Add the garlic and cook very briefly, until you can smell it, maybe 1 minute tops.   Put on a plate and sprinkle well with sea salt.  If you like goat cheese, mix some in just before you remove from heat – they’re AMAZING with goat cheese, but just as nice on their own if you’re not the dairy type.  Added bonus?   They don’t work well if you fuss over them, so screaming babies, rambunctious toddlers, and a big, balloon glass of wine can all be addressed while your green beans get nice and crispy.  THAT’S the kind of side dish I like.

Trim? Yes.  Snip off the stem end.  If they’re larger or fleshier, you may want to peel the string down the side as well, but younger specimens don’t need it.
Edible when raw?  Yes.
Worth the price of organic? Yes.  Green beans don’t make the Dirty Dozen, but they make the Dirty Twenty, and that’s enough chemicals for me, thanks.
Best with:  Stronger flavors – goat cheese, lemon/citrus, garlic, ginger, vinegars.  Woodsy flavors  like rosemary, sage, thyme and mushrooms complement nicely.  They hold up well as a side dish from everything to the lightest sole to the meatiest steak, so there are really no holds barred.
In Season:  Summer, though in warm-season climes like here in L.A, that actually means Late Spring and Early Fall, since the hot months are too hot for the vines to flower.
How to Store: In the fridge, in a produce box or loosely sealed plastic bag, they should keep for a few days.  If they start to get bendy or a little shriveled, they’ll still taste fine if you crisp-cook them as above; if you can see bean seeds outline through the tight, shriveled skin, they’ve crossed the hump and are no longer very tasty.

Share this:

  • Facebook
  • Pinterest
  • Twitter
  • Tumblr
  • Reddit
  • More
  • Email
  • Pocket
  • Print

Like this:

Like Loading...

Swiss Chard (now with Sweet Potato! and of course bacon…)

16 Tuesday Oct 2012

Posted by strangeandyummy in Fall, Green, Leafy, Miscellany, Red, White, Winter, Yellow

≈ 3 Comments

Tags

bright, broad leaf, chard, dark, green, leafy, nutty, rainbow, stalk, swiss, veined, wide

There’s a lot of repetition in my recipes and posts, if you haven’t noticed already.  Greens are greens, and they all go nicely with bacon.  That’s not my fault.

Swiss chard is no exception.  Of all the bitter greens you’ll find at the market, swiss chard is the mildest and the prettiest.  Rainbow chard is the most common variety, simply because it’s so pretty.  Red, white and yellow stalks wink at you as they snake up the center of the phenomenonally large, deep green leaves.  Look for fresh looking leaves with slightly firm stalks – ignore a few rips, tears, or bug holes.  Chard leaves aren’t as hearty as something tougher like kale, so they do rip easily.  The stalks do bend a little, but they shouldn’t be bending on their own or wilting.  The leaves can range from almost purple in the red varieties to kelly green in the yellow or white, so look for those signature brightly colored veins, rhubarb-like stalks, and wide, soft leaves.

Wash well – I recommend at least 2 rinses – scrubbing the stalk with your thumb under the faucet.  They trap a lot of dirt.  

Chard is slightly sweet as greens go and a little nutty.  (I feel like I should make some sort of vaudevillian pun here.  I’ll resist the urge.)  Because it’s a little milder, it can sneak its way in to almost any recipe, though it really shines with other fall vegetables – winter squashes and pumpkins, walnuts, root vegetables.  I had planned to use this chard in a sneaky green way by slicing it up very fine, mixing with ricotta, stuffing it into giant pasta shells, covering with sauce and cheese, and baking.  But we had our very first fall day in Los Angeles last week – cold and rainy and absolutely delightful – and I wanted something far more Autumnal.  (I don’t think that word means what I think it means…  Autumn-y?  Sure.)  So instead, I made a Chard and Sweet Potato Gratin.  I made enough for the husband and I to have some for dinner, to save some for the toddler for tomorrow’s lunch, and maybe even a little leftover for my lunch.  No dice.  We ate the whole pan.  Oops.

Sweet Potato and Chard Gratin

This is not a real gratin because there’s no bechamel.  I like to think of it as lazy (wo)man’s gratin – mix ricotta with another soft cheese or a splash of whole milk and you have something not at all as rich and delicious as bechamel, but serviceable and super fast for a work night supper.

  • Sweet potatoes – I used 3 smallish/medium-sized for a 2 1/2 qt oval casserole dish, but if I’d used the giant ones in the bag I might have only used one.  You’ll have to eyeball.  And yes, botanically I think these orange ones are yams, but I call ’em like they’re labeled.
  • Swiss chard (I used 4 or 5 giant leaves)
  • Ricotta (I used about 1 cup)
  • Goat cheese (I used about 3 inches from a goat cheese log) – as above, if you don’t like goat cheese, you can sub in something else like farmer’s cheese – very mild – or just a splash of whole milk to thin it out
  • Cheddar or other melting cheese (I used about 2 oz)
  • 1-2 slices bacon (If you’re lucky enough to have a Trader Joe’s, get the bag of Ends and Pieces – a steal at something like $2.99 a pound and perfect for recipes in which you’re cutting up the bacon anyway.)
  • olive oil

Chop the bacon into bite-sized pieces and fry until almost crispy.  Preheat oven to 400.Slice the sweet potatoes into long, thin slices.  Drizzle a little olive oil on the bottom of your dish to coat.  Layer one layer of sweet potato into the dish.

Slice the chard into thin strips, discarding the bottom stalks. Layer half the chard on top of the sweet potatoes.

Place the goat cheese in a bowl in the microwave for 20-30 seconds to soften (not melt).  Mix thoroughly with ricotta.  Using about half the mixture, dollop spoonfuls on top of the chard and use the back of the spoon to spread them over the layer.

Sprinkle half the bacon on top.

Place the rest of the chard on top.  Layer another layer of sweet potatoes to cover.  Spread the remainder of the ricotta mixture on the sweet potatoes.  Sprinkle with the remaining bacon.  Grate the cheese or break into chunks and disperse over top to cover up any “holes.”  Bake at 400 until sweet potatoes are soft when stabbed with a fork and cheese is melted, about 20 minutes.

ugly but delicious!

For Chard:
Trim? Yes, at the bottom of the stalk where it gets tough and splintered, though some people lose the whole portion below the leaves as well.
Edible when raw?  Yes, when young.  It’s very chewy, however, so if you get large/older leaves, definitely cook the stalks, and probably the leaves as well.
Worth the price of organic? Yes.  Greens are generally considered high on the Organic Preferred list.
In season: Fall, Winter.
Best with: Fall foods – winter squashes, pumpkin, squash, sweet potato, even apples and dried fruit like raisins.  Walnuts, pecans, bacon or sausage for protein – earthy, smokier flavors do well.  Garlic, carmelized onions, goat cheese – sweeter flavors complement the greens’ slight sweetness.
How to Store: Like other greens, wash in warm water, give them a cold bath, and store in the fridge for a few days or possibly as long as a week, though that’s pushing it.

Share this:

  • Facebook
  • Pinterest
  • Twitter
  • Tumblr
  • Reddit
  • More
  • Email
  • Pocket
  • Print

Like this:

Like Loading...

Lemon Verbena

02 Tuesday Oct 2012

Posted by strangeandyummy in Green, Herbs, Miscellany, Summer

≈ 3 Comments

Tags

branching, citrus, leaf, lemon verbena, slender, sticky, verveine

There’s something so quintessentially farmer’s market-y about herb stands.  With their rows and rows of woody, leafy, flowery bunches, the scents mixing and wafting down the lanes, that absolutely evokes some hippie fantasy of strewing my front stoop with fragrance, medieval-style, and hand-crushing leaves into a peaceful cup of herbal tea which I will then sip on my hand-hewn wooden rocker while I watch the sun set over an uninhabited landscape.

But alas, I live in Los Angeles, so there’s no such thing as an uninhabited landscape, and frankly, I think herbal tea mostly tastes like lawn clippings.  Or punishment.  But I still love herbs – fresh ones and dried ones and flowering ones…  I grow them by the untended bunches, and then forget to use them in cooking because, let’s face it, they’re in the back of the yard that we never cut so I’d have to hike through calf-high grass to get to them, and I never remember I want to use them until I’m cooking dinner at ten o’clock at night (we keep odd hours in our household) so we’re also looking at slogging through dew, spider webs, and possibly encountering a pile of dog poop along the way.  Needless to say, I end up using my overgrown plants mostly as decoration, and annoyingly enough end up buying my fresh herbs.

But I was determined to find some more uses for the plants in my yard, and I started with lemon verbena.  All I knew about it when I planted it is that it smelled lemony (natch) and it would grow well in our I forget to water arid climate.  And it’s in my soap.  As a result, frankly, it smells kind of soapy.  But I think that’s just me.

This is actually an older picture. It’s now tied back with zip ties because it’s taking over the entire yard.

Well, grow well it did.  What started as a tiny little herb in a 4 inch pot that I was pretty sure wouldn’t last the month because I am a HORRIBLE gardener has become a tree threatening my tomatoes (the only thing I ever grow reasonably well.)  So I’ve got to use it for something.

If you’re buying it at the market, they’ll sell you a few small branches rather than the jungle that I own, but the first thing you’ll probably notice is that the leaves are sticky.  It’s weird.  They’re not sticky like honey, they’re sticky the way I imagine Spiderman’s hands.  And that proves I’ve lived with a nerd too long.  But it’s true!  They have fine hairs or something covering each leaf so they grip.  This is annoying when you’re trying to separate the leaves, but really really nice for the recipe that follows.

The leaves are pale to bright green, long and thin, and a little on the tougher side, as herbs go, so you’ll want to infuse them in something (tea, oil, vinegar) or chop them up small – they’re not particularly fun to chew, though they taste fine.  Though they smell almost overpoweringly lemony and sweet, the taste is actually slightly bitter and green with mere lemon overtones.  Imagine lemon zest if you also got a little pith in there.  It’s not a bad bitterness, just be forewarned if you’re expecting a lemon substitute.  It’s not.

But it’s lovely for an unexpected hint of lemon.  We added some to a rosemary pesto to give it a slight zing (recipe to follow with Rosemary post), but our favorite use for it (other than cocktails…yum!) was with salmon.  The grip of the leaves allowed us to layer them on top of a very nice fillet, bake/broil it quickly in the toaster oven, and voila!  A very, very quick meal that looked gorgeous and tasted very sophisticated.  The lemon verbena added a hint of citrus without blasting the fish with acidity, and the slightly vegetable flavor of the green leaves added a complexity that cut through the meatiness of the fish – though I think they’d work just as well if not better with a lighter fish or even chicken to play up the lemon flavor even more.  Next on the lemon verbena experiment train?  Lemon Verbena Sorbet.  I’m very excited, but also quite afraid it’s going to taste like old soap.  Anyone tried this before?

Lemon-Scented Salmon

Press lemon verbena leaves (sticky side down) in single layer on salmon fillet.  Feel free to place them prettier than I did.  Drizzle lightly with olive oil to protect the leaves from burning.  Bake or broil at 400 until fish is just barely cooked – it should be opaque pink rather than glassy in the thickest part, or flake easily with a fork.  Remove from oven, sprinkle with sea salt, and let sit 3-5 minutes to finish cooking.  If you prefer a more lemony flavor, squeeze half a lemon on top before serving.  You can eat the leaves if you like, or peel them off as you eat.

Parts Used? Mostly leaves.  The flowers are supposedly edible also, I just haven’t found anything on using them other than in teas.
Worth the price of organic?  I always think herbs are worth the price of organic since you’re using them in their raw form, often as an addition just at the end which means nothing is getting cooked out (which I guess makes no sense at all, but it’s my gut reaction), and sometimes in relatively large amounts.  If you’re drying them, all their properties are getting concentrated, which makes me even more inclined to go organic.  But it’s not like they’re on the Dirty Dozen or anything, so, you know, go with what makes you happy.
In season: Summer, though all year in warm climates.
Best with: fish, stone fruits (peaches, nectarines, cherries), sugar, infused in anything liquid that you want to smell like lemon (sugar syrup, oil, vinegar).
How to Store: Place the stems in water like flowers, or store wrapped in a damp paper towel in the fridge.  Cut branches don’t last long – maybe 2 or 3 days, and get woodier as they dry out, so use quickly.

Share this:

  • Facebook
  • Pinterest
  • Twitter
  • Tumblr
  • Reddit
  • More
  • Email
  • Pocket
  • Print

Like this:

Like Loading...

More Alien Babies!

08 Sunday Jan 2012

Posted by strangeandyummy in Fall, Green, Miscellany, Spring, Vegetables, White

≈ Leave a comment

Tags

bulb, crunchy, fennel, finocchio, stalks

Only this time they’re delicious.

I love fennel bulbs, even though sometimes the flavor of the seed or stalks can overpower dishes.  This happens a lot with soup, I think, but if you’re going to buy sweet sausages from the Italian place that makes them in-house (and why wouldn’t you?  Seriously, they’re delicious.  Which Italian place you ask?  ALL OF THEM.), buy the ones with fennel seed rather than without. 

I kind of feel like fennel is going to grow talons and attack me, but that’s probably because no matter how deep I stuff it into my bag at the market, fronds poke out from among the lettuces and apples and tickle me as I walk, completely freaking me out.   They will also attack you every time you open your fridge.  Those stalks are pretty mischievous.  Or under orders from their alien overlords.  Luckily, it’s the benevolent bulb you want to eat, not the tough, stringy stalks.  Some stores and sellers sell fennel pre-trimmed, but I don’t really recommend buying it that way since the cut edges get dry and shriveled pretty quickly.  If you’re into presentation, save a few of the more delicate-looking fronds to sprinkle on top of whatever you end up making with it.  If you’re thrifty, save the stalks to add to other vegetable leavings to make a vegetable stock, or use them in poaching liquid for fish or chicken.  They can overpower if they’re the main ingredient, but as an addition they’ll add a fresh almost grassy flavor that guests will find hard to place but can really make something simple taste complex.

If you’re not going to eat it right away, store it with stalks on so that it doesn’t get dried out, but don’t store it too long.  If it starts to go old, the bulb will get slightly shriveled with brown edges.  If the outer layers are too dry or brown, you can peel them off and still eat the bulb underneath, but fresher is obviously better.

Cut the stalks right where they meet the bulb – basically cut off anything green. 

Trim the tough bottom part of the fennel as well.  There will be something of a disc in the center, depending on how big your bulb is. 

This is the core.  Some people keep trimming and throw out anything solid-looking, or cut the bulb in half at this point and ditch the core; I don’t mind it as long as it’s not too tough.  I just chop the entire bulb into fourths or sixths if I’m cooking it and it will soften up, or slice it very thin if I’m slicing it to eat raw.

The interior of the bulb resembles celery.  It has a slightly tougher outer layer with a more succulent pocketed inner layer.  Pockets of deliciousness, that is!  

If you remember biology, it really should be used for the picture of cambium in textbooks.  Xylem and phloem anyone?  No?   I’m not a fan of celery, licorice, or dill, so I personally resent the comparisons on fennel’s behalf.  Fennel is related to all three of these stronger-tasting plants, and while it’s taste does closely resemble anise or licorice, it’s not nearly that potent.  If you like licorice, you may either love fennel or find it too bland.  If you don’t like any of the above flavors, like me, you may still love fennel.  It tastes like Spring.  It has a great crunch and enough moisture that it automatically tastes refreshing.  It’s slightly sweet, very slightly grassy, with just a tiny hint of licorice-like sharpness.   Just to clarify, the kind of fennel I’m talking about here is Florence fennel – it’s been cultivated to have this big delicious bulb.  Other types of fennel, including wild, have a slightly sharper taste and slightly different uses, though they’re just different variants of the same species.

There are lots of different ways to prepare fennel, both raw and cooked, but my absolute favorite is also extremely easy.  (You may be noticing a trend with my recipes.  I’m lazy.  I have a toddler.  I own a mismatched set of skillets I bought at Marshall’s and one nice omelette pan we received as a wedding gift that I subsequently used metal utensils on and ruined.  I don’t really do complicated.)  Slice the fennel as thin as you can without injuring yourself.  If you have a mandoline, your fennel will look much prettier than mine.  Break up the slices (they’ll come apart when you pick them up) so that you can pile them artfully on a plate.  Drizzle with olive oil.  Squeeze the juice of half a lemon on top.  Pick out the seeds that inevitably fell into your salad.  Top with a tablespoon (who are we kidding here?  I use more like half a cup.  It’s cheese!) shaved or grated parmesan (use fresh here, not the stuff in the green can) and sprinkle with a little chunky sea salt.  If you’re fancy, top with those saved feathery fronds so it looks pretty.  That’s it.  It doesn’t look very glamorous, but I could eat this salad almost every day.  Yes, it’s topped with half a pound of cheese (did I say half a cup earlier?  I probably lied), but if you have more self-control or perhaps more lactose-intolerance than I do, it doesn’t have to be.  It’s crisp, it’s summery, it goes with almost everything, and fennel is supposed to aid digestion and have other magical herbal properties including lots of vitamins, so that cancels out all the cheese I just put on there.  Isn’t that how vitamins work?

Peel? Trim.  All the parts are technically edible, but it’s the bulb that’s the tastiest.  Trim off the stalks and tough bottom part, and peel off any outer old layers if necessary.
Edible seed? Yes, though you won’t see it on the bulbs you’ll buy at the market.  Fennel seed, pollen, and other varieties will be the subject of another post.
Edible when raw?  Yes.  Raw or cooked are both delicious.
Worth the price of organic?  Probably.  The bulb sits just above ground, so it gets contact with both sprayed-on pesticides and things sitting on the soil.  Insects don’t love fennel (in fact, some gardeners use it as a natural repellant), so it shouldn’t need tons of pesticides to grow well anyway.
In season: Fennel is a cooler weather crop, so you’ll find it in Spring and Autumn.  Spring fennel is usually a little sweeter than Autumn fennel, since an unexpected heat wave can make the plant bolt, making it sharper. 
Best with: lemon, fish, chicken – milder flavors let the subtler bulb shine. 
How to Store: In the fridge for up to a week, though if you keep it that long you’ll have some old layers to peel off.
Note on Growing Your Own: Almost every plant on Earth hates fennel, so if you decide to grow it yourself, put it in a pot or raised bed alone, or plant it in a separate area from other plants, especially fruits and vegetables.  If you plant it anywhere near dill, they’ll cross-pollinate and neither will be the flavor you want.

Share this:

  • Facebook
  • Pinterest
  • Twitter
  • Tumblr
  • Reddit
  • More
  • Email
  • Pocket
  • Print

Like this:

Like Loading...

Welcome!

  • About
  • Contact
  • Sites I Like

Recent Posts

  • With Every Beet of My Heart
  • Teeny Tiny Prune Plums
  • You Can’t Go Wrong with a Name Like Candy Roaster
  • Figs in a Blanket
  • Fava Beans, and the Spring-iest Salad that Ever Was Sprung

Categories

Browse By Color or Season

  • Spring
  • Summer
  • Fall
  • Winter
  • Red
  • Orange
  • Yellow
  • Green
  • Blue
  • Purple
  • White
  • Brown
  • Black

What Is That and How Do I Eat It?

What Is That and How Do I Eat It?

Archives

  • February 2016
  • January 2015
  • June 2013
  • May 2013
  • March 2013
  • October 2012
  • September 2012
  • July 2012
  • June 2012
  • May 2012
  • January 2012

Meta

  • Register
  • Log in
  • Entries feed
  • Comments feed
  • WordPress.com

Create a free website or blog at WordPress.com.

Privacy & Cookies: This site uses cookies. By continuing to use this website, you agree to their use.
To find out more, including how to control cookies, see here: Cookie Policy
  • Follow Following
    • What is That and How Do I Eat It?
    • Join 31 other followers
    • Already have a WordPress.com account? Log in now.
    • What is That and How Do I Eat It?
    • Customize
    • Follow Following
    • Sign up
    • Log in
    • Report this content
    • View site in Reader
    • Manage subscriptions
    • Collapse this bar
 

Loading Comments...
 

    %d bloggers like this: