• Spring
  • Summer
  • Fall
  • Winter
  • Red
  • Orange
  • Yellow
  • Green
  • Blue
  • Purple
  • White
  • Brown
  • Black

What is That and How Do I Eat It?

~ strangeandyummy farmer's market finds

Tag Archives: sweet

Teeny Tiny Prune Plums

14 Wednesday Jan 2015

Posted by strangeandyummy in Blue, Color, Fall, Fruit, Purple, Stone Fruit, Summer

≈ 1 Comment

Tags

juicy, pit, plum, prune, smooth, speckled, sugar plum, sweet

I saw these babies at the market a couple of years ago and couldn’t resist taking them home:

DSCF9497
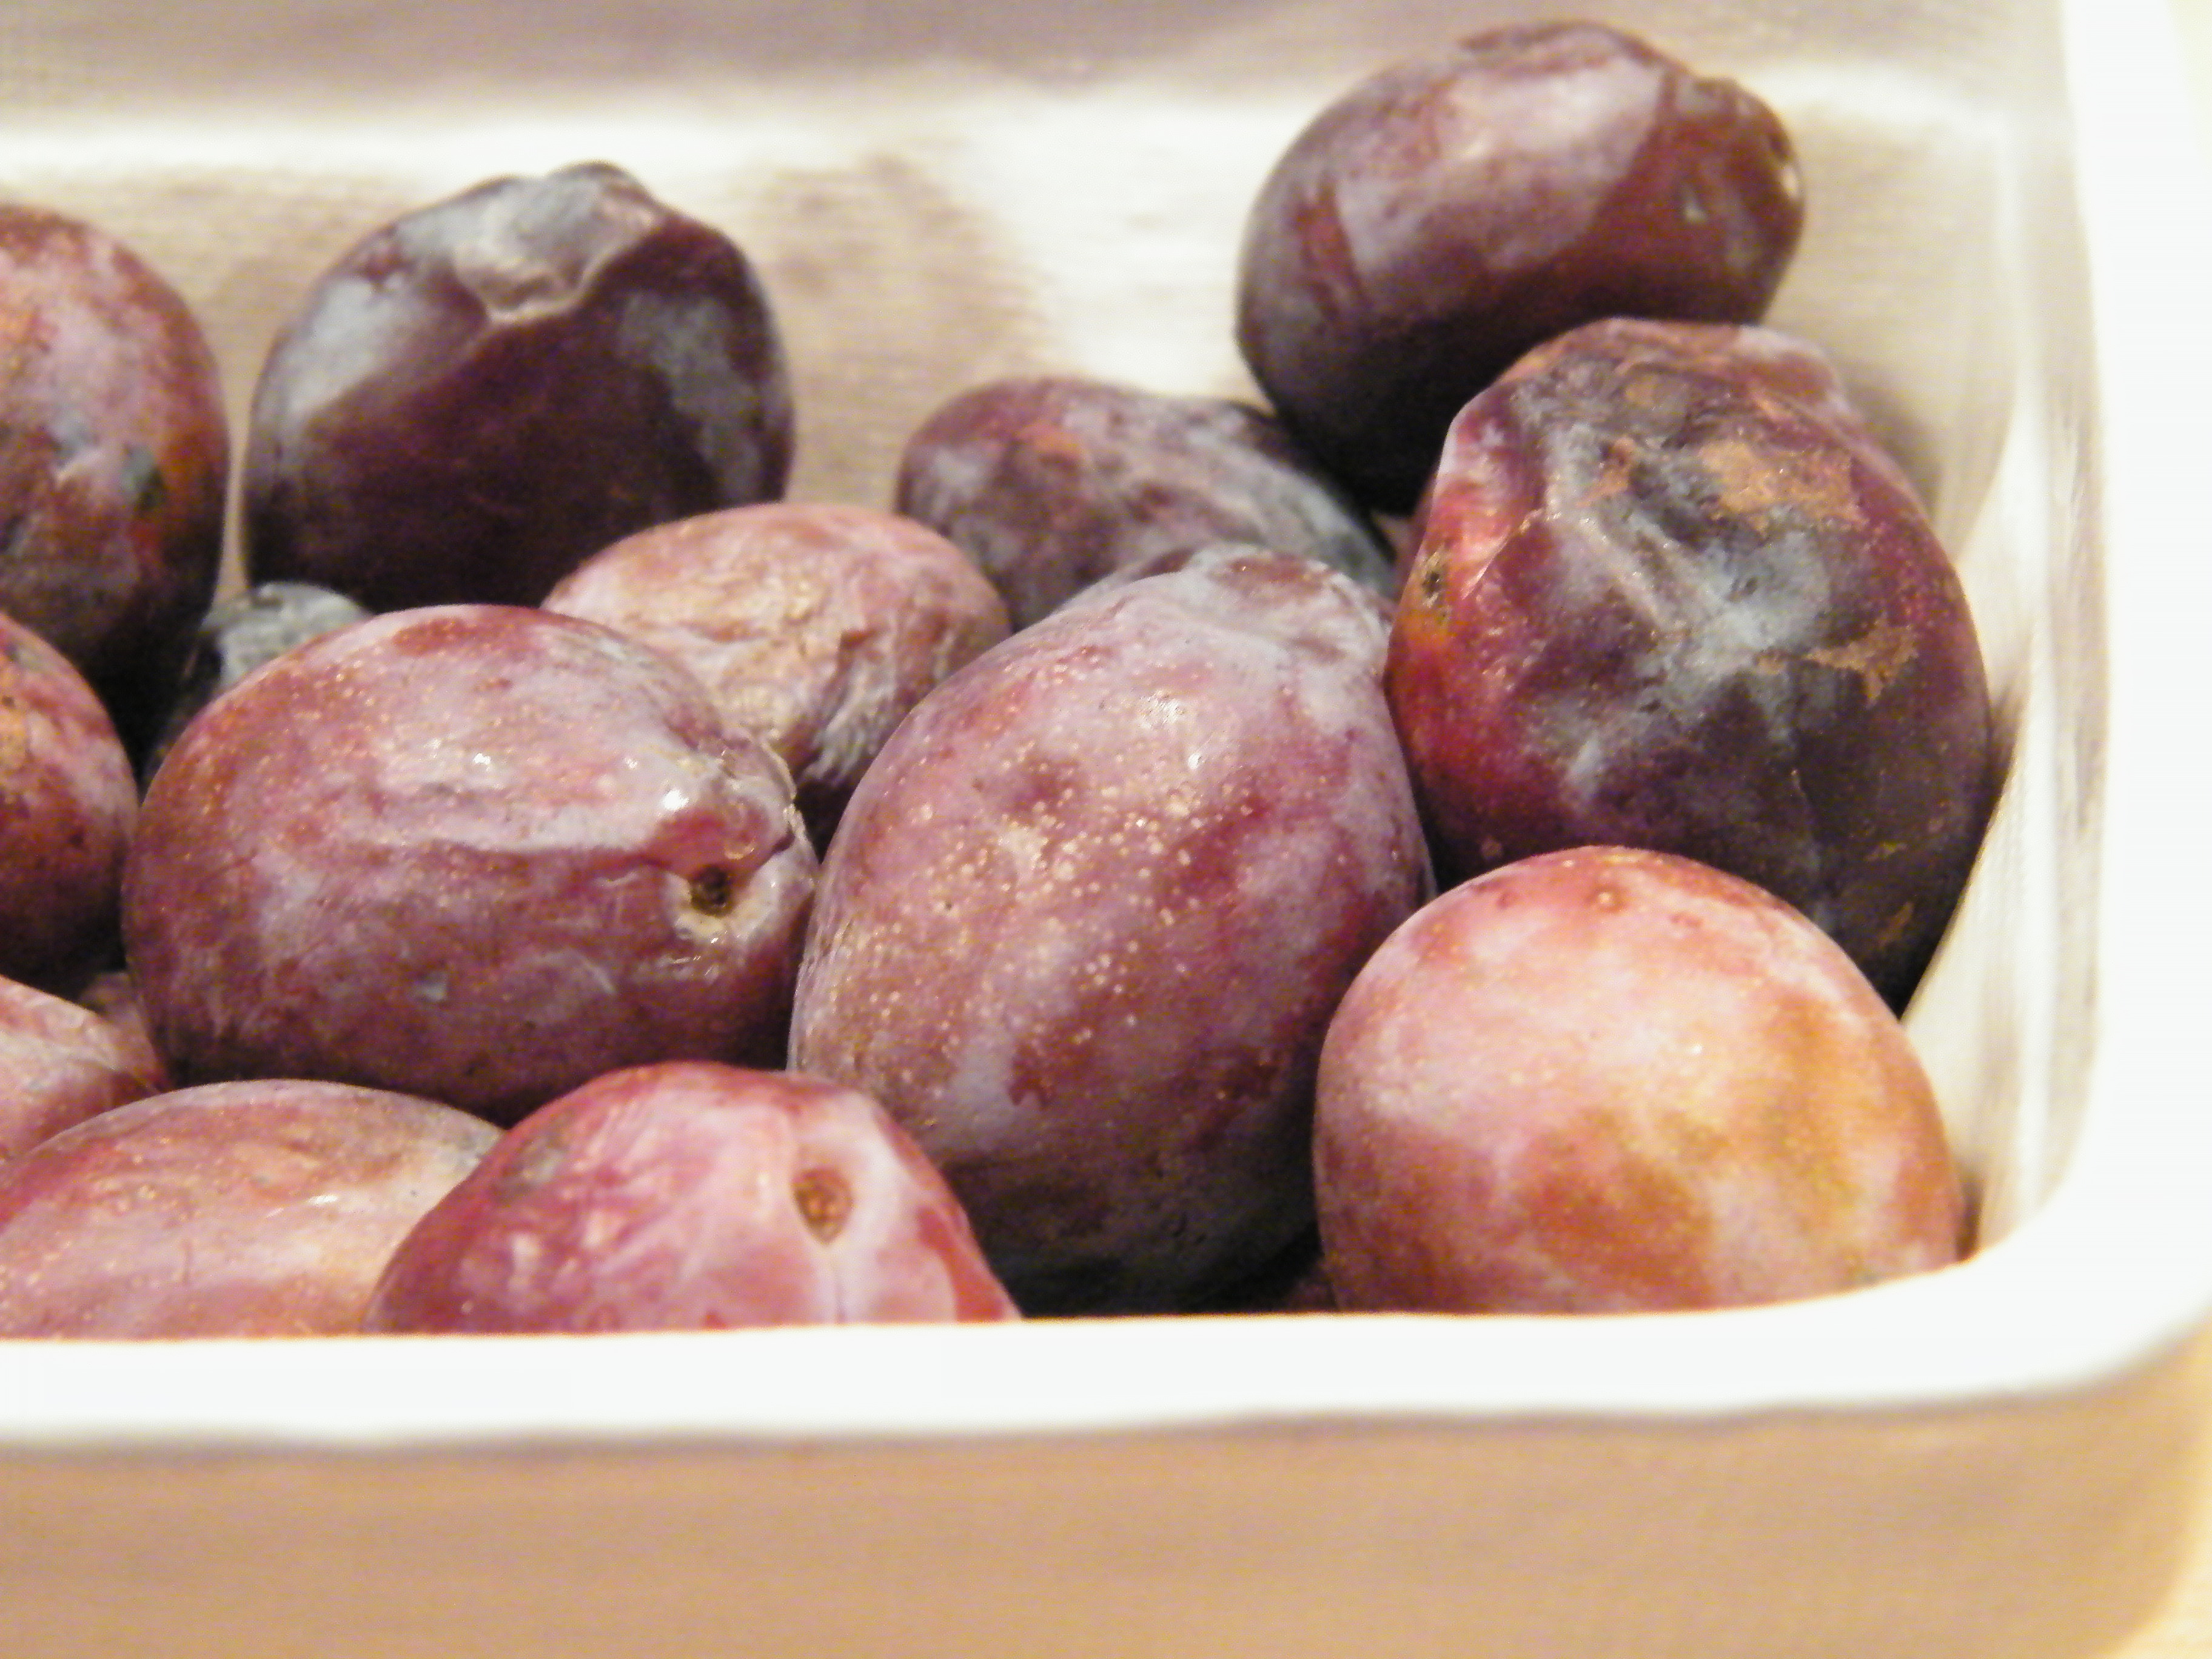
So cute!  And they looked great for quick snacking.  Unfortunately, though they were called French Sugar Plums, they weren’t very sweet, and the lack of juiciness was unexpectedly disappointing.  They tasted so nondescript that I didn’t know how to respond – they weren’t bad, but that’s because they weren’t anything.  They didn’t even really taste like plums, just like they were some generically labelled Fruit.

French Sugar PlumsBut because I’d bought a whole pound of them anticipating snacks to last us at least a week, I started surfing the Internet for how I could use them up.  They’re also known as Italian Prune Plums, so there were suggestions for turning them into homemade prunes, but that seemed a lot of trouble for a food I didn’t really love anyway. Italian prune plumsAnd then I found The Cake.

Apparently, I’m slow to a whole bunch of trains, because this recipe was published in the New York Times every year for about 20 years, but I only found out about it recently.  But it’s what these plums were made for.  Their tiny little oval shapes wink at you as the syrupy topping settles into the crevices left by their big, fat pits DSCF9544(you don’t see syrupy topping in the link?  That’s ‘cuz I changed the recipe.  Scroll down.), and the heat of the oven transforms their blah generic flavor into something layered, complex, concentrated with sugar but not overwhelmingly sweet.  In short?  It’s the best coffee cake in the history of the universe.

Except it wasn’t.  I mean, it was clearly delicious and was clearly what these plums were made for (being baked, broiled, roasted or otherwise made delicious by the magic of fire), but I found it a bit dry.  So finally I decided to fiddle and futz, and now, if I do say so myself, it is the greatest coffee cake in the history of the universe.  It’s amazingly easy, moist, beautiful, and easily swappable with apples, pears, or other fruits that are not particularly juicy – I wouldn’t use peaches or overly ripe pears or something along those lines because the juice runs out underneath the seam of the pan and makes you have to clean your oven afterwards.  But feel free to swap out another liquor or flavor of your choice as well – I’m not a fan of orange myself, but I think cranberries or pears and cointreau might be very nice…

Slice of Coffee CakeModified Plum Cake  adapted from Marian Burros
1 cup flour
1 tsp baking powder
pinch of salt
14 tbs softened unsalted butter
1 cup sugar (can reduce slightly)
2 eggs
1/2 cup 2% or higher Greek style plain yogurt or European-style yogurt (thicker kinds with no sugar or flavorings added – you could probably sub in sour cream if you can’t find either of these, but I haven’t tried it)
15-20 prune plums depending on size of fruit and your pan
1-2 tbs brandy, amaretto, or other liquor
1 tsp cinnamon for tossing, 1 tsp cinnamon for batter
2 tsp sugar
almond extract (could use vanilla or combination of the 2)
springform pan, lightly sprayed or lightly buttered

Preheat oven to 350.  Halve the plums (over the bowl to catch the juices). The easiest way to remove the pit is to simply cut in half, and twist:French plum


Prune Plum


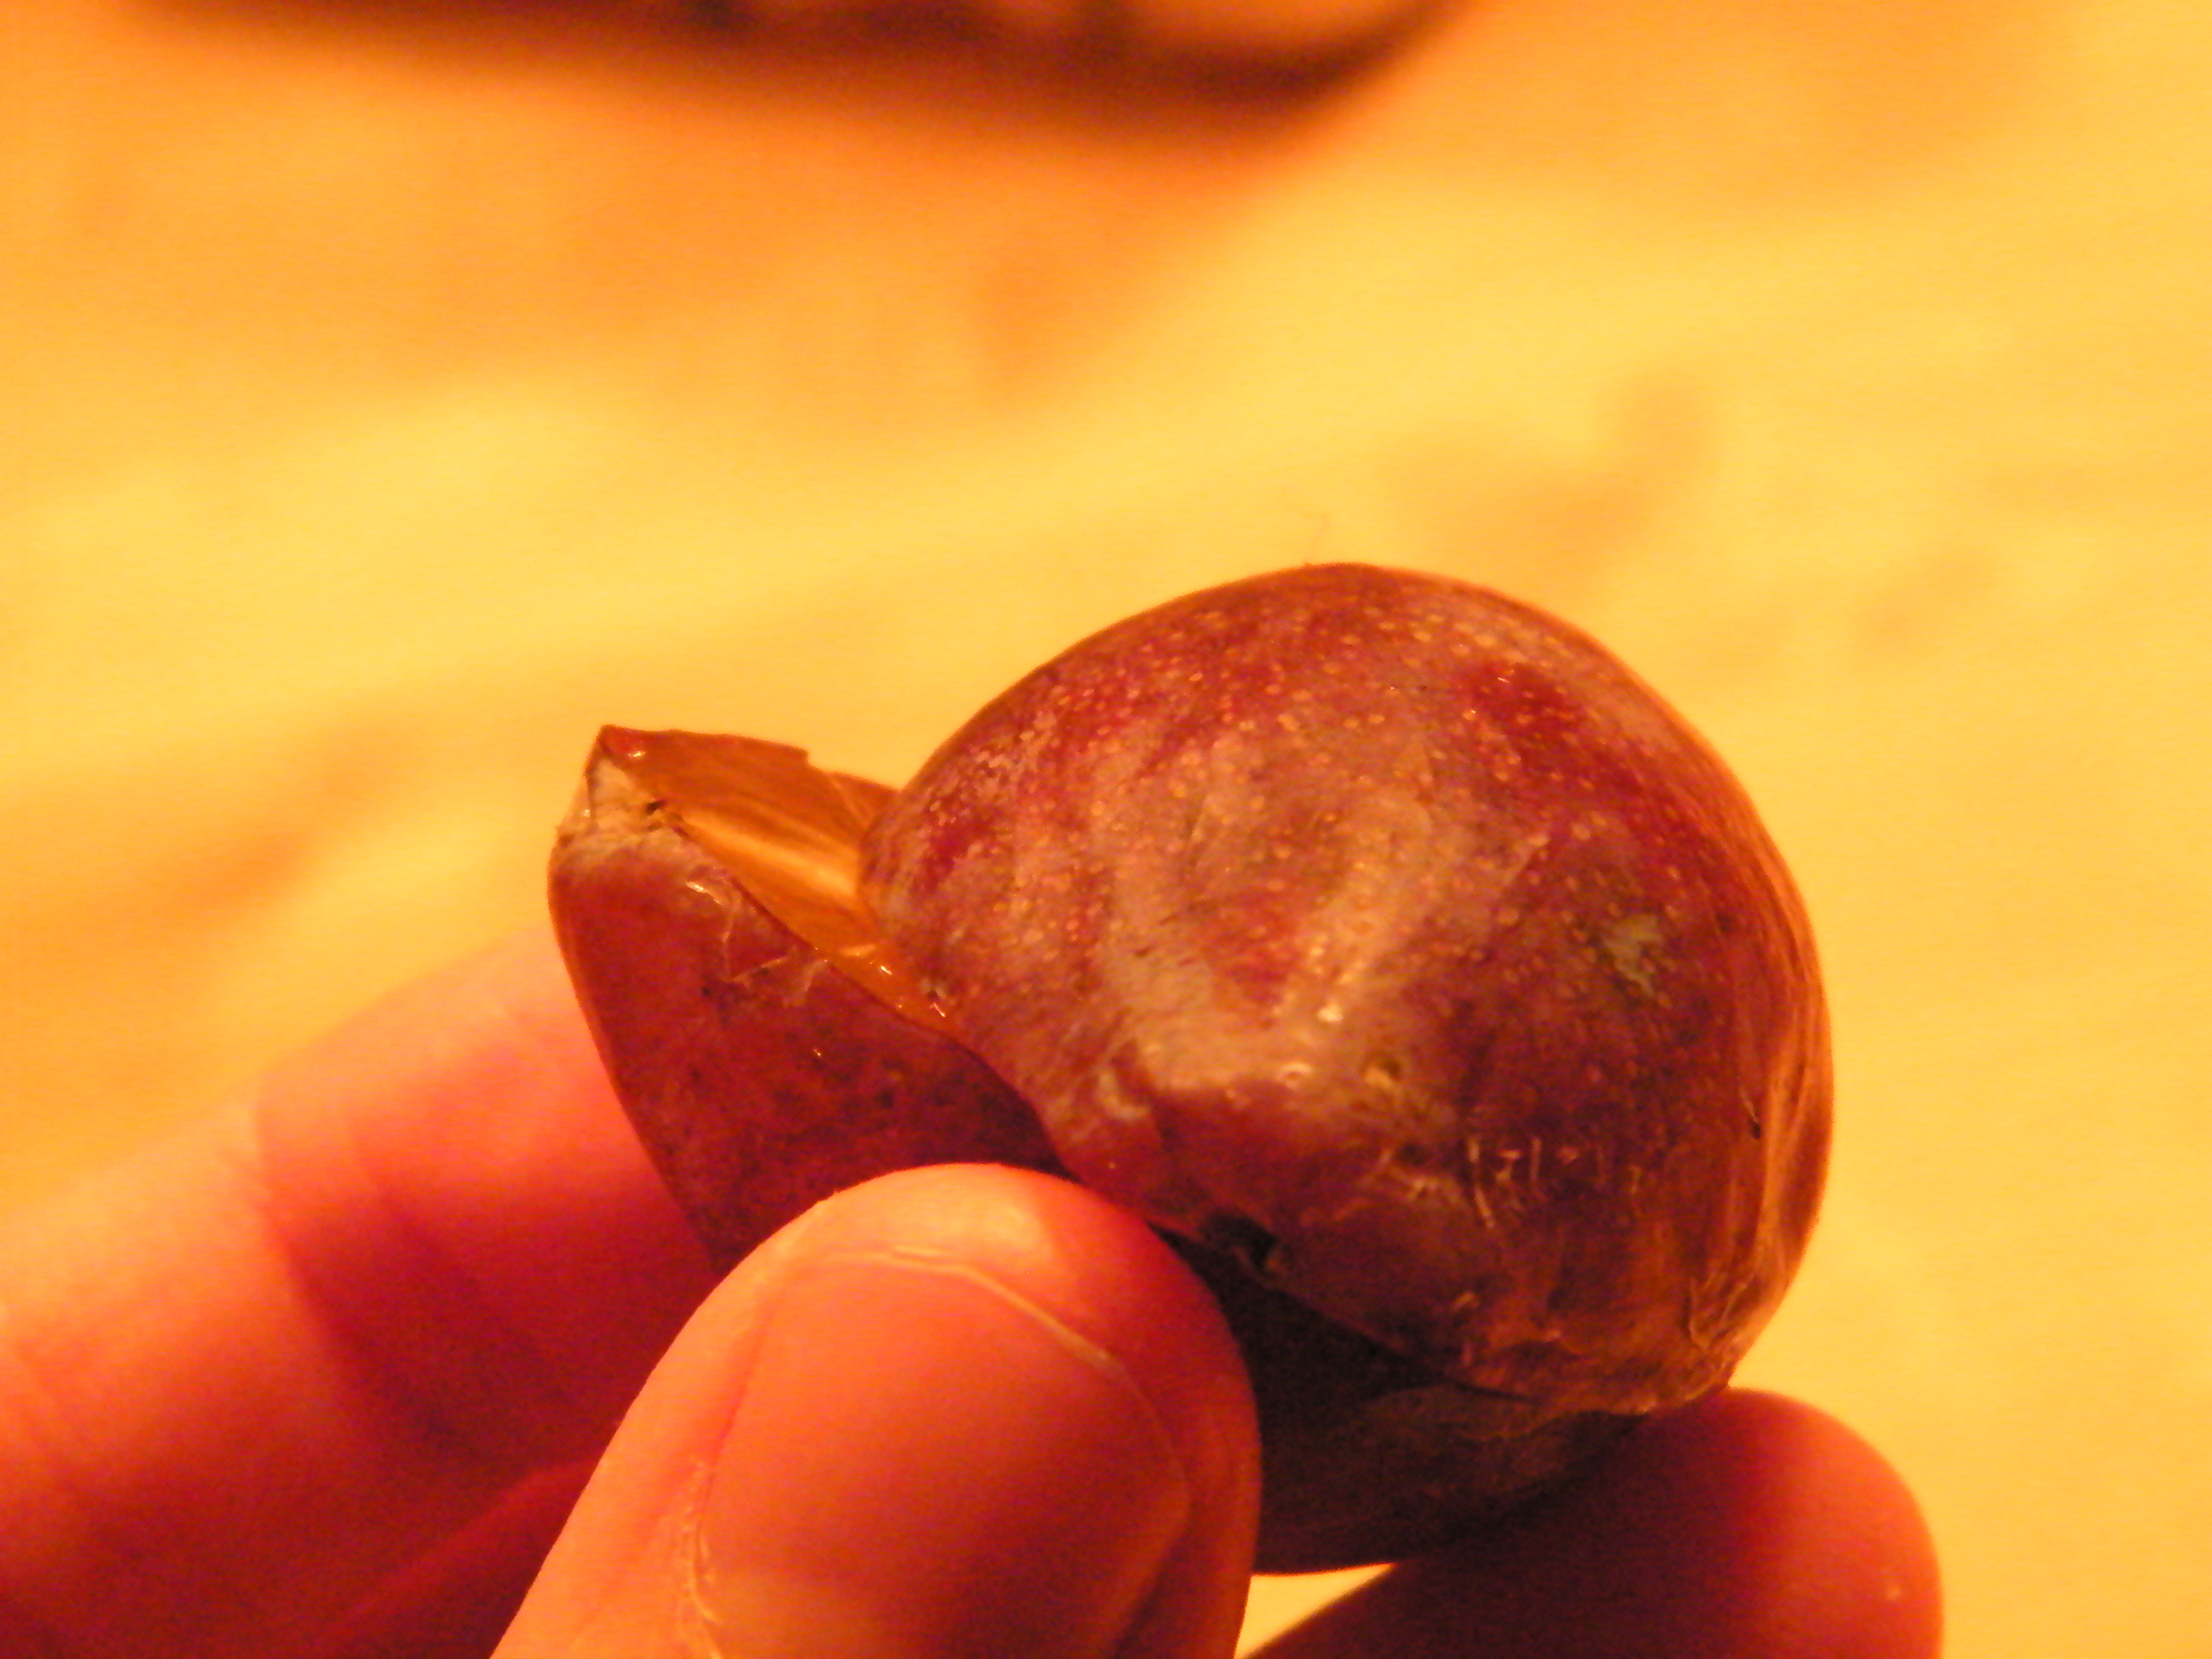
Then remove the pit.

Toss with approximately 2 tsp sugar, 1 tsp cinnamon, splash of almond extract, and generous splash of liquor. Let sit while you make the batter.

Mix flour, baking powder, salt and 1 tsp of cinnamon. Cream butter, yogurt and sugar and blend with well-beaten eggs.

Plum cake batter
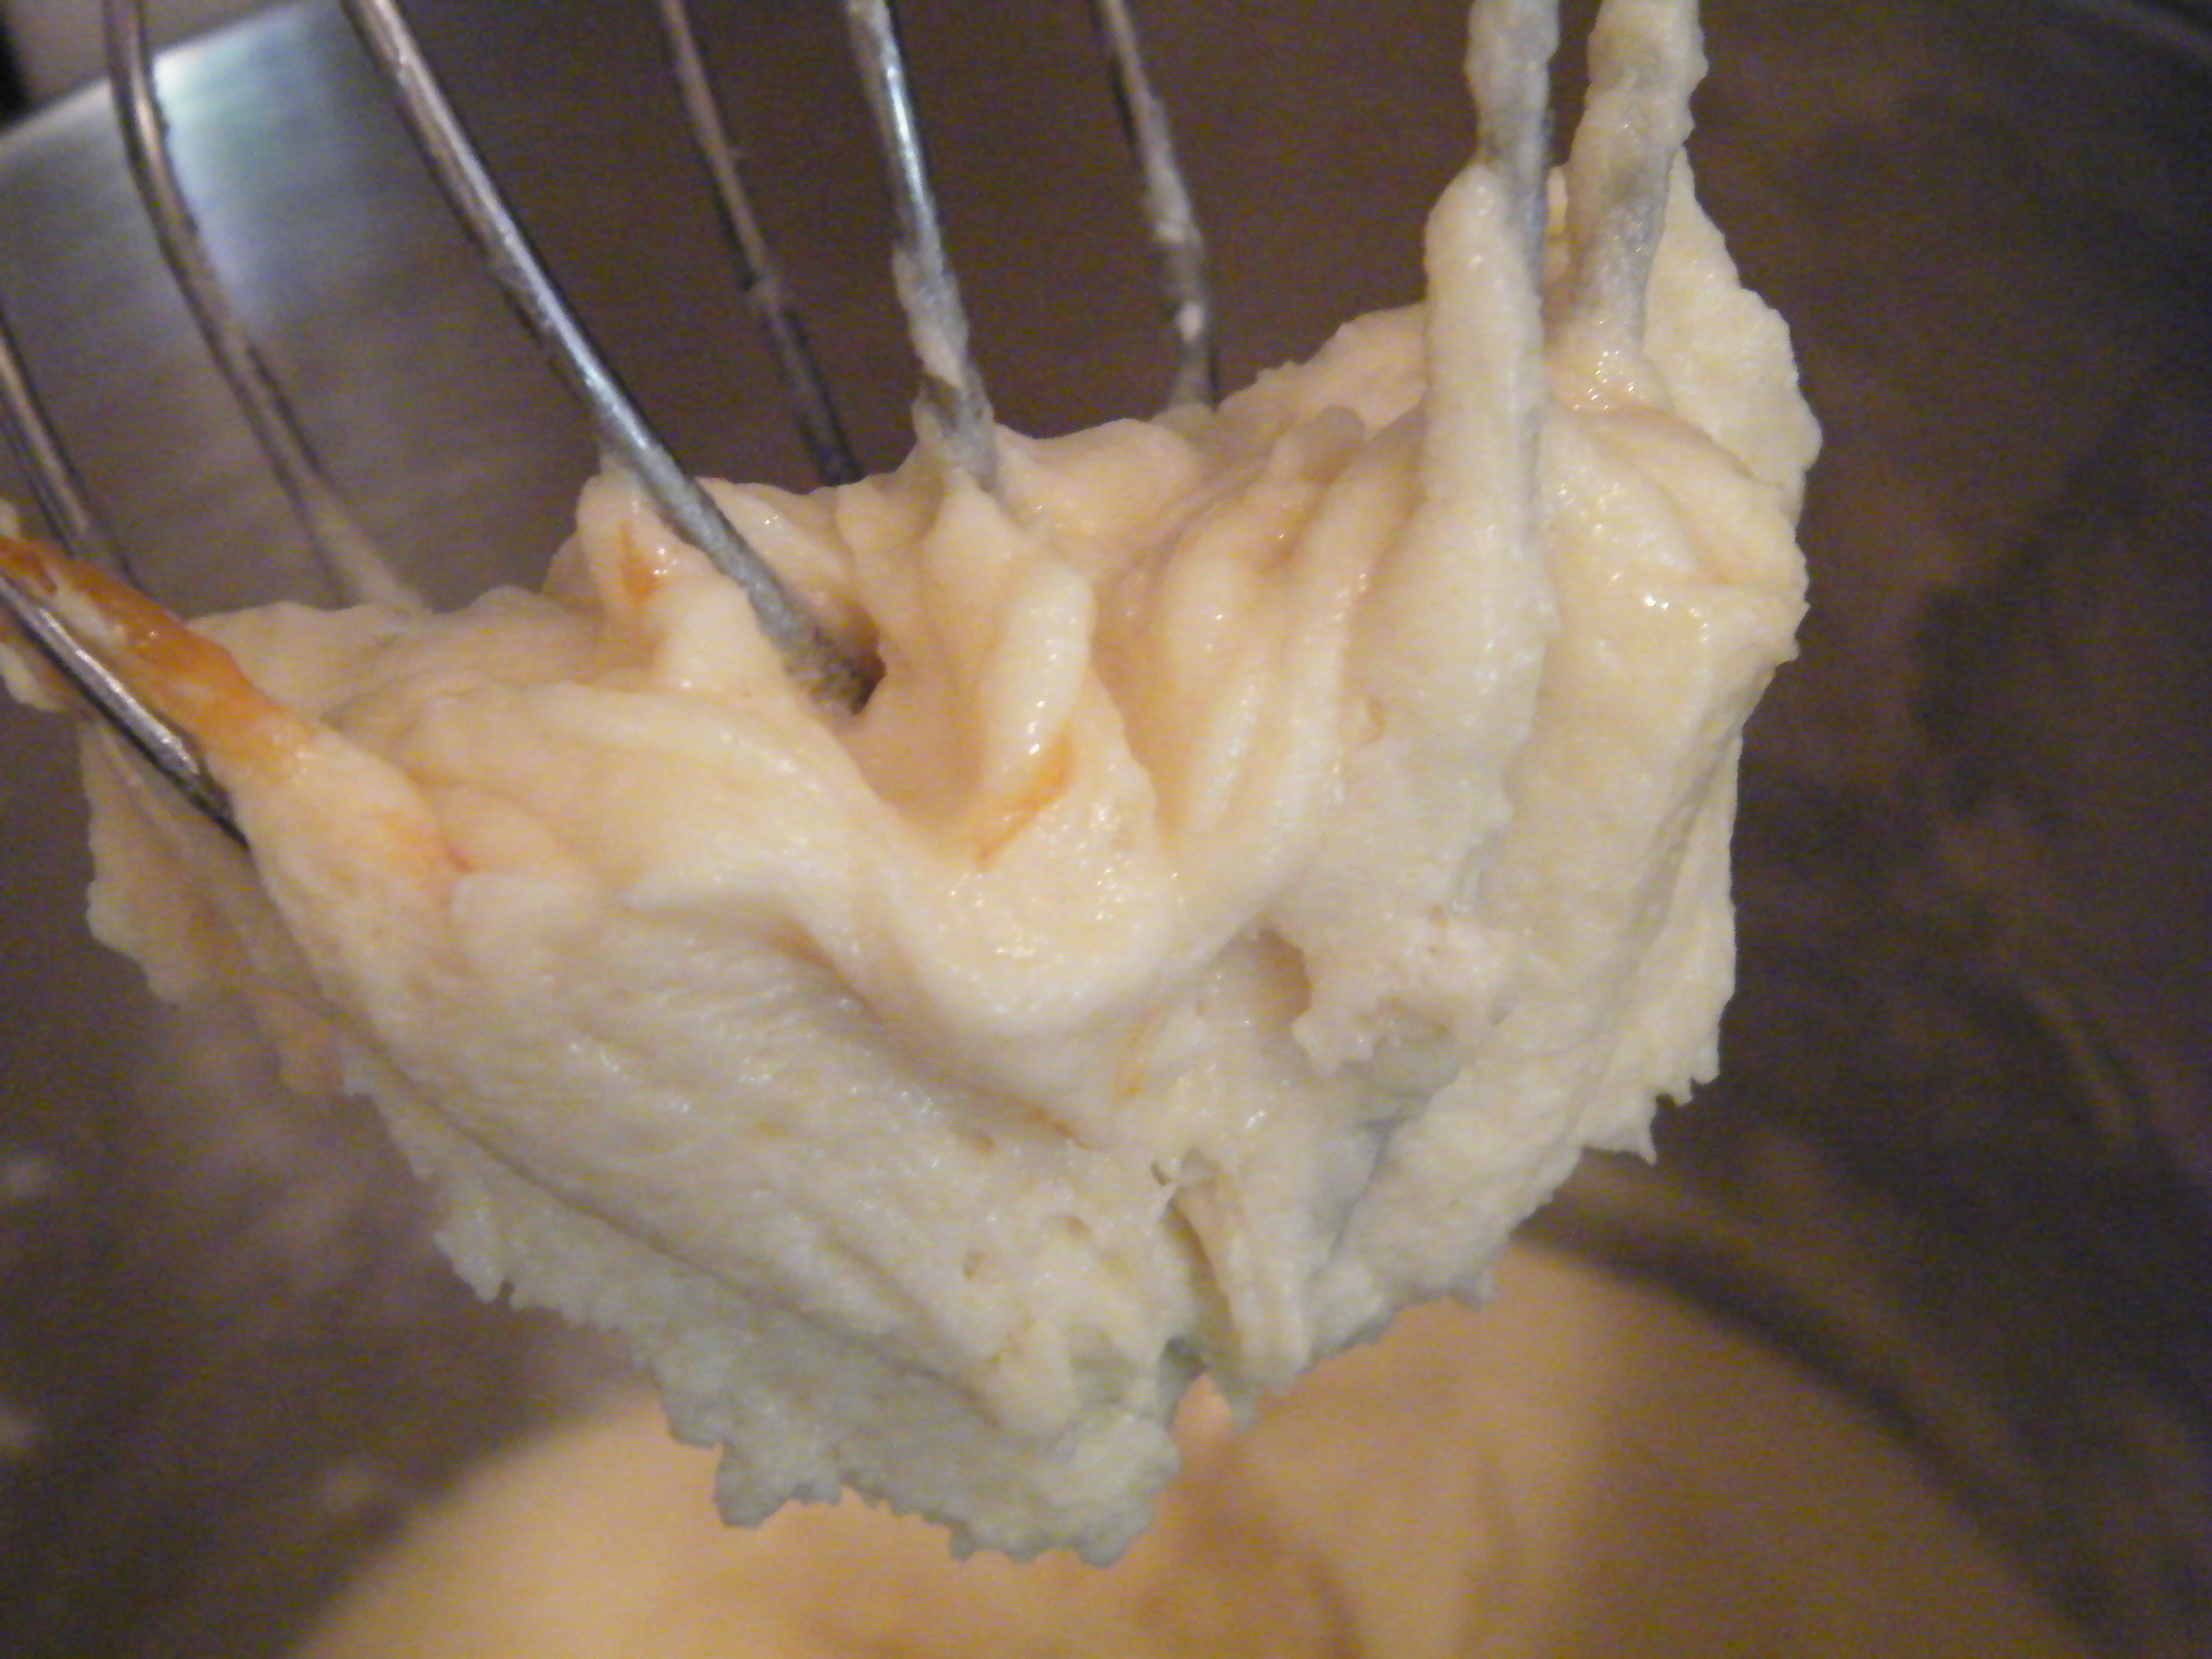
Add in flour mixture just until combined without flour streaks. Spread into the bottom of springform pan (it will be very thick).


Press plum halves skin side down in concentric circles (if you want it to be pretty)

pretty plum cake


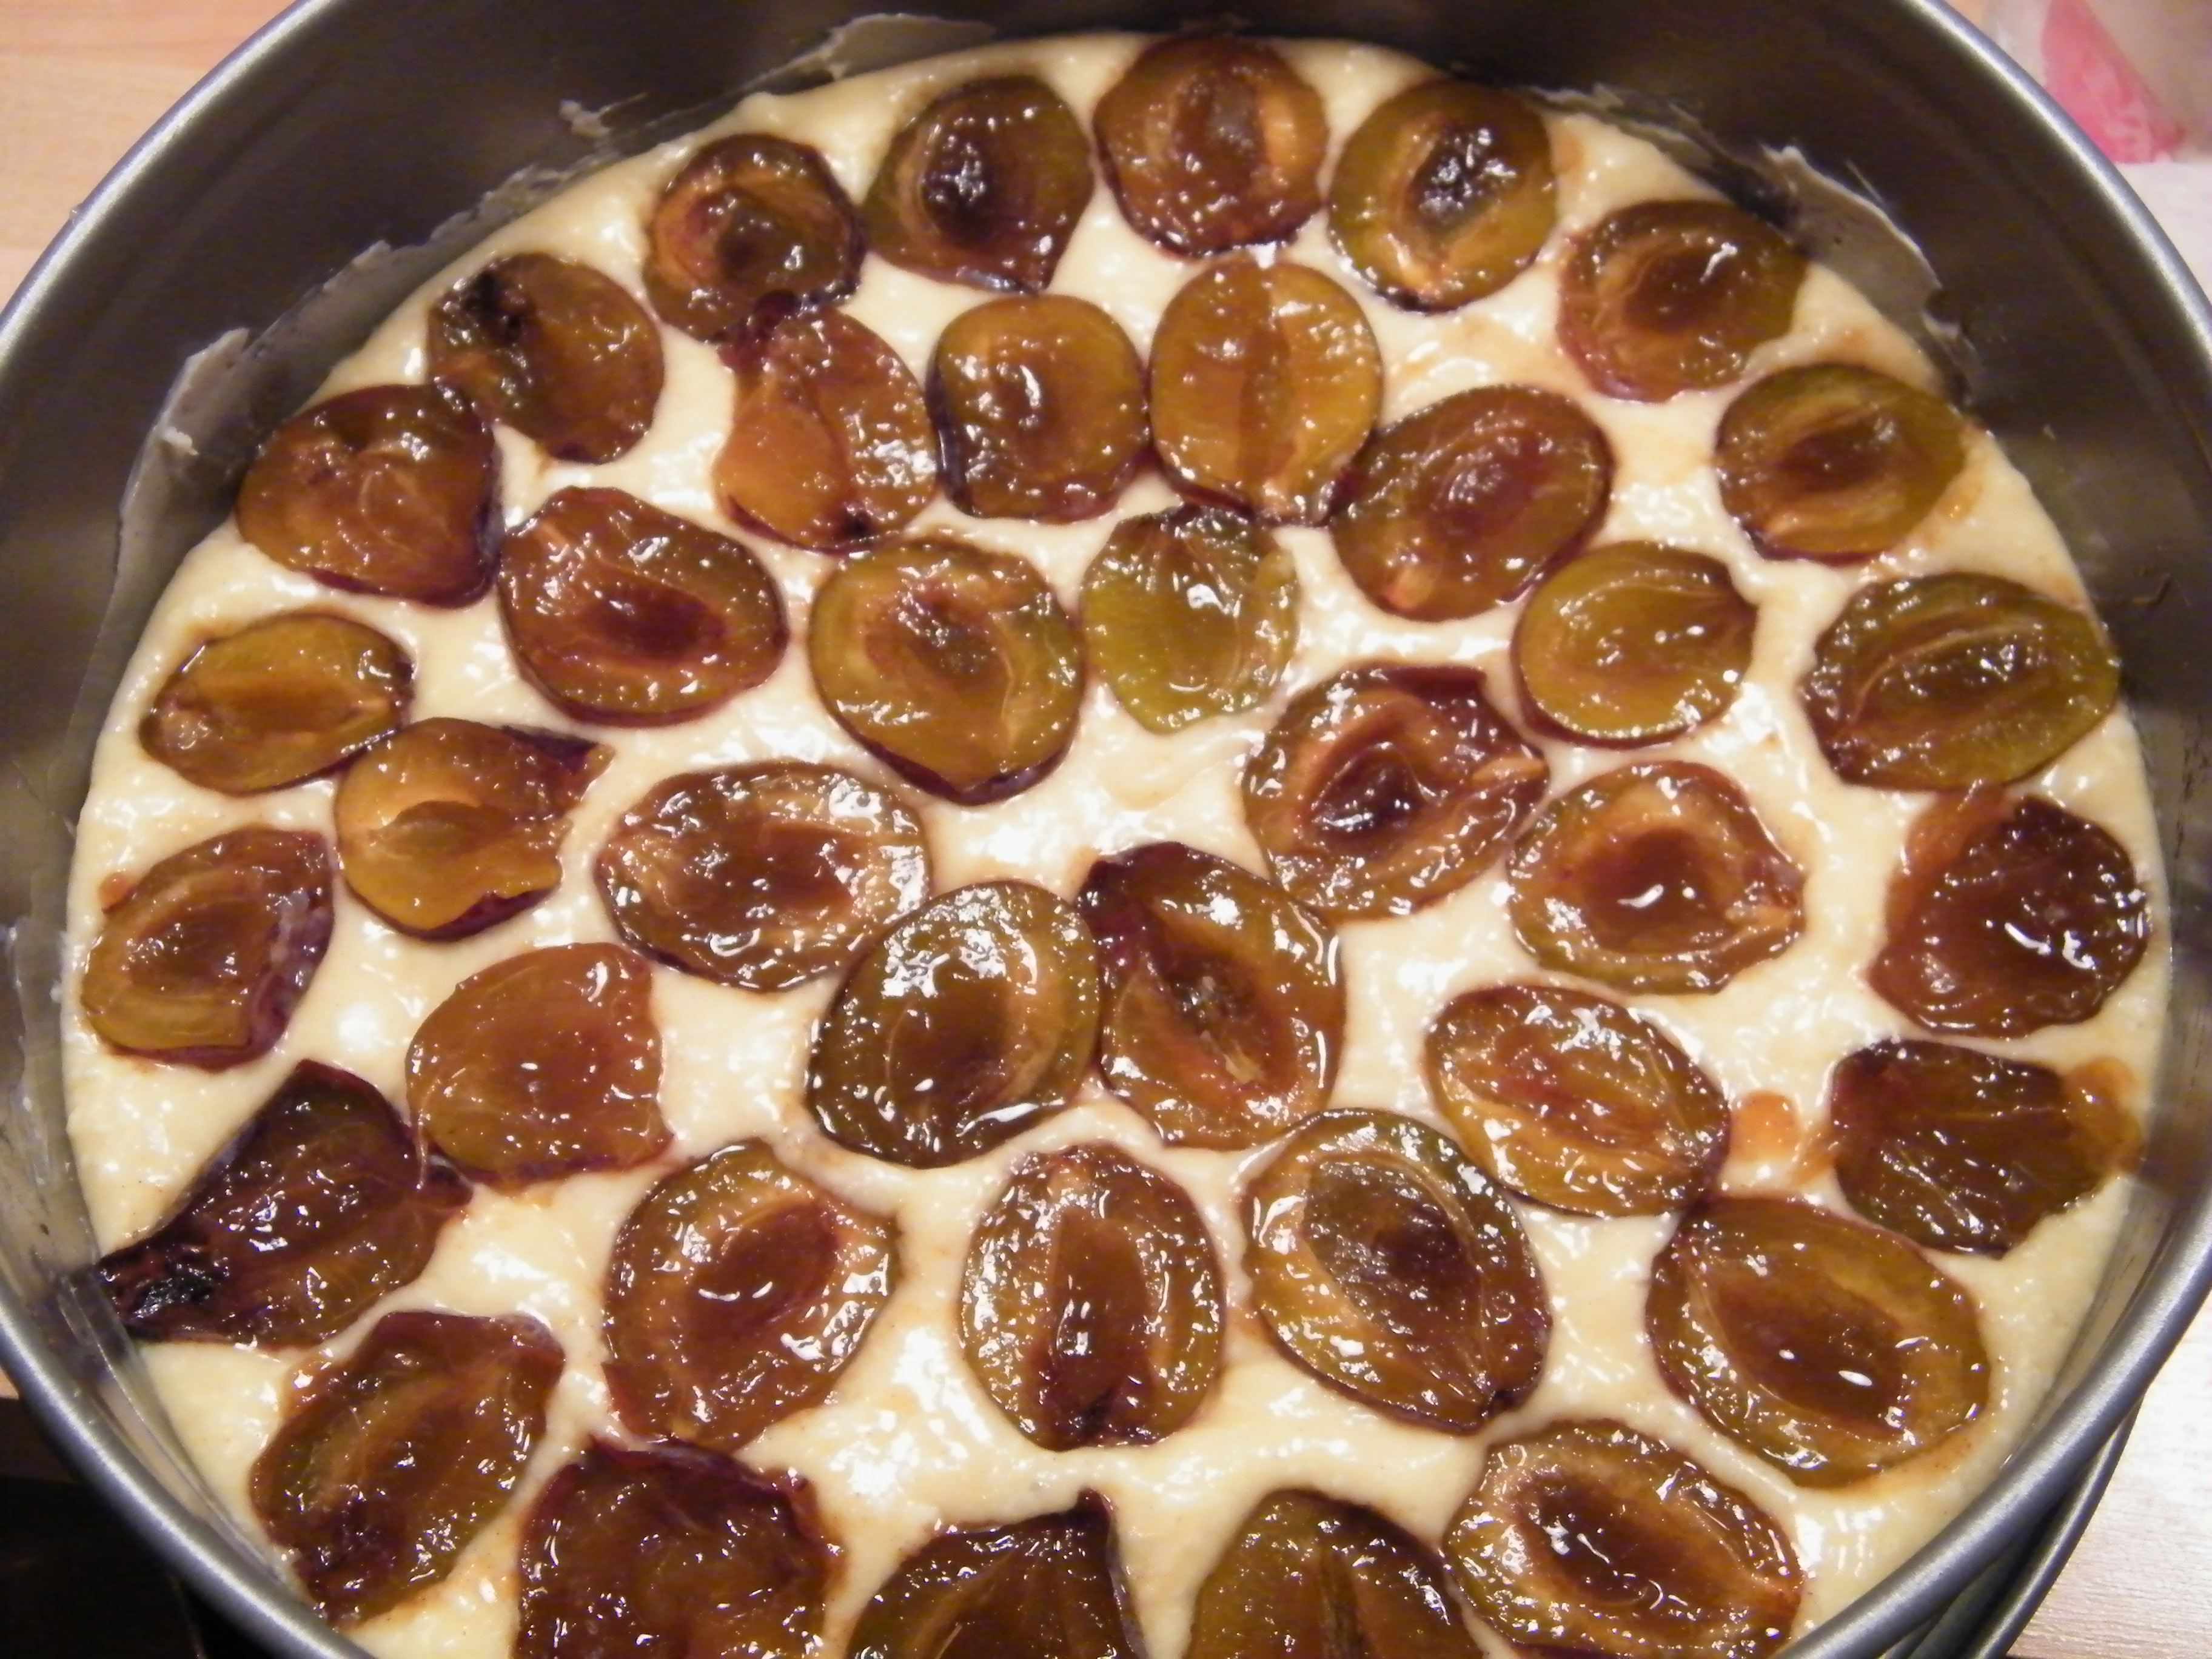
so flat sides of plums are level with batter.


messy Plum cake

Messy plums before cooking

halloween etc 137

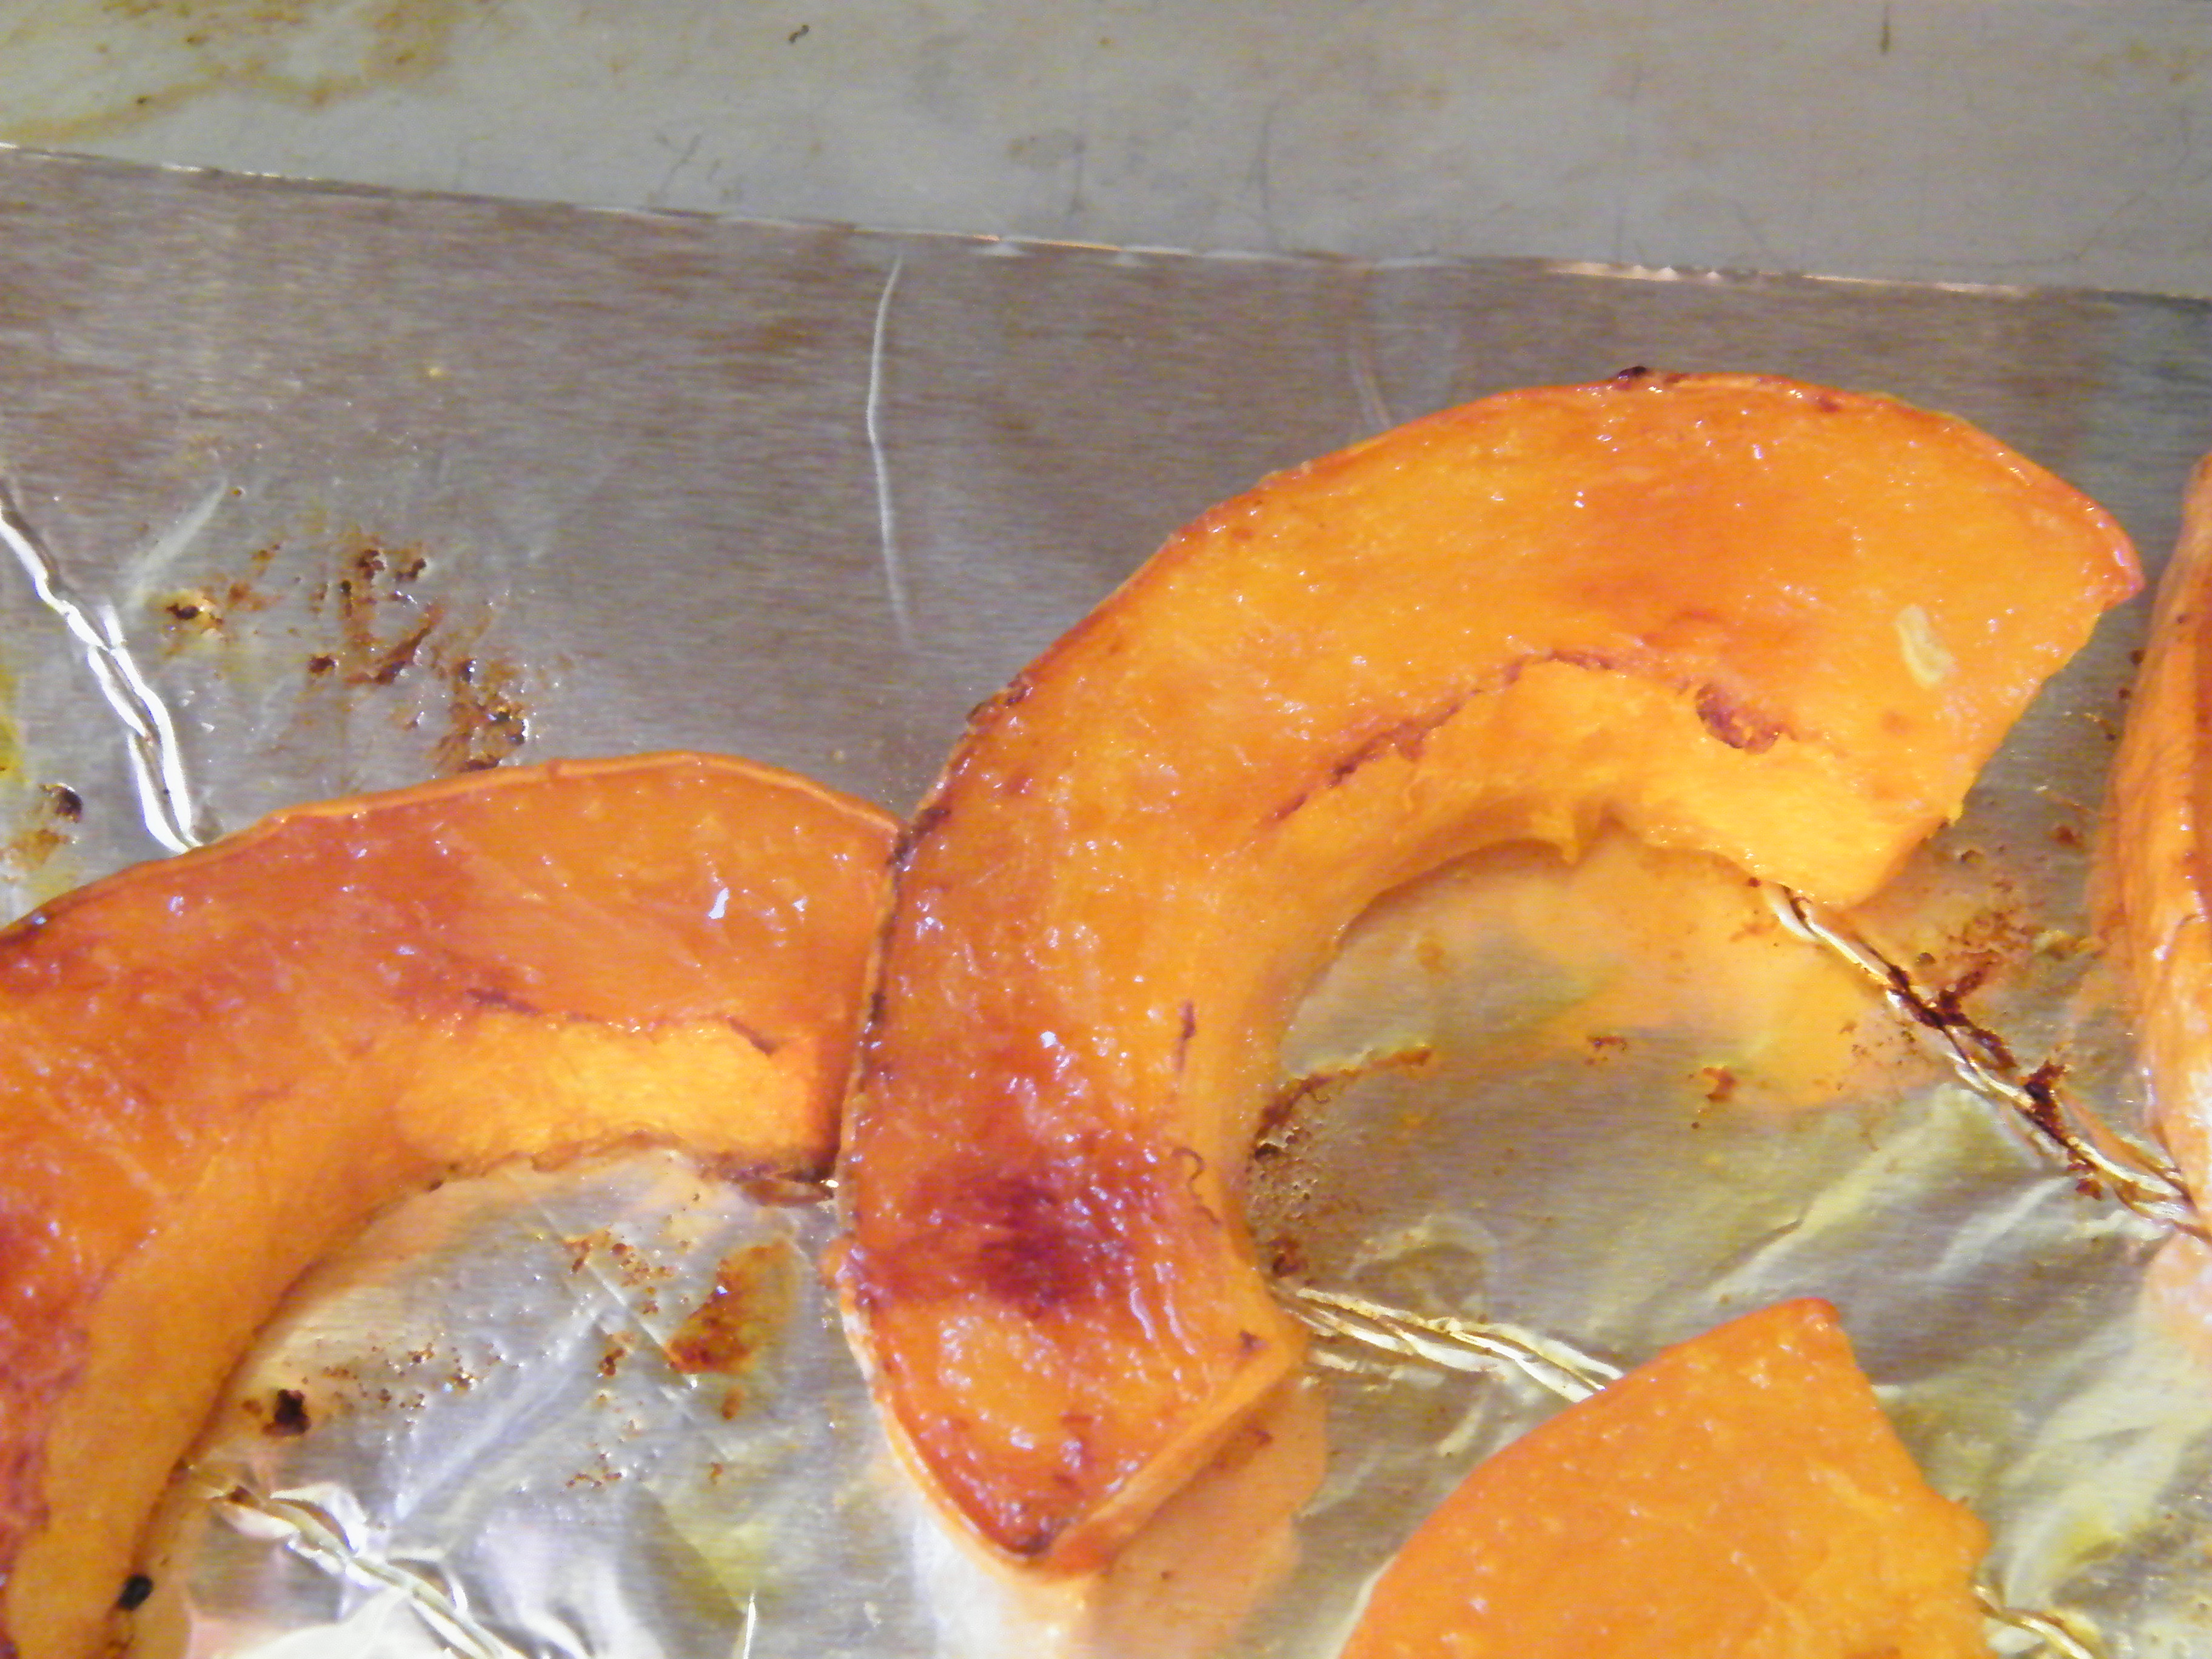
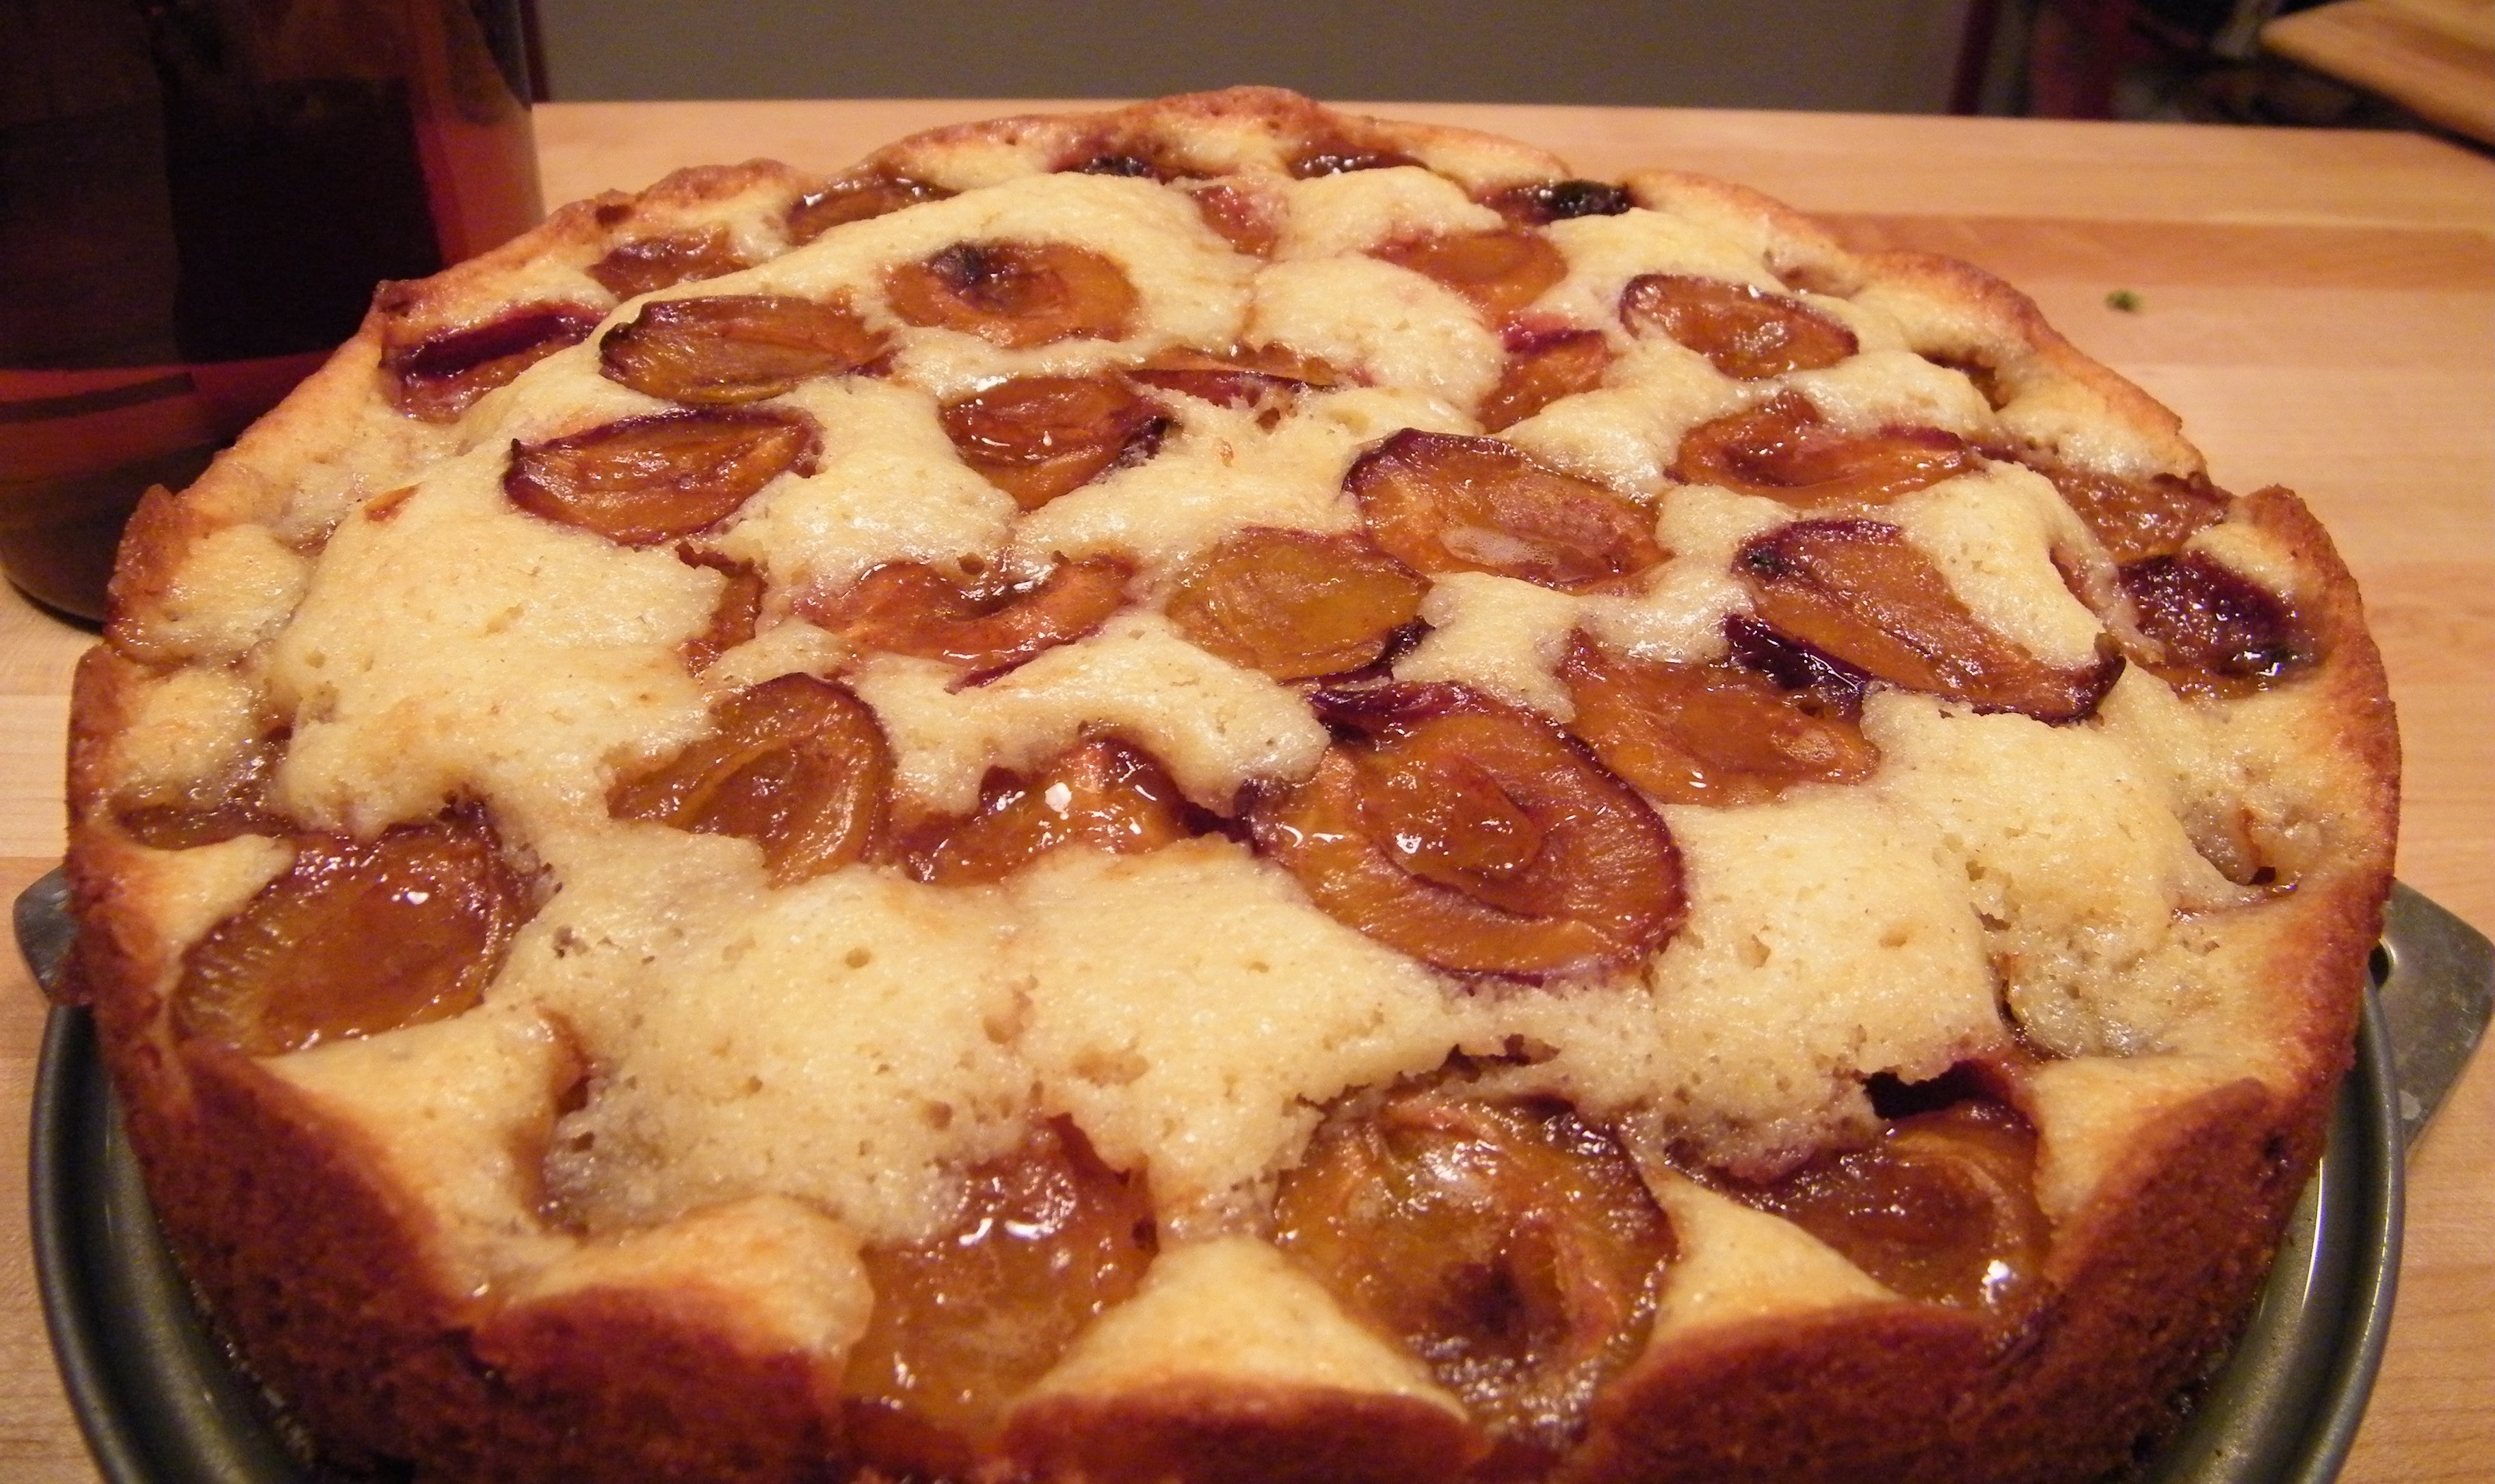
Messy plums after cooking


If your plums were overripe and fell apart while you were taking out the pit, that’s okay.  It won’t look as glamorous, but will still look nice and taste just the same.


Spoon remaining syrup in bowl over the top of the cake.  Bake at 350 for 40-50 mins or until set in the center and pale golden. Separate the edges from the sides of the pan with a knife while the cake is still hot and let sit for about 5 more mins before removing the sides. Serve warm or room temperature.

plum cakeFor French Sugar/Italian Prune Plums:
Look for small, oblong, slightly plump fruits.  They should have a little bit of give when you squeeze them, but not be soft. Wrinkled skin means they’re on their way to prune-town; too soft means you’ll definitely need to cook them (but these should really be cooked when fresh for best flavor anyway, and if you’re making cake or sauce, the wrinkled ones will plump right up with a little liquid…)  DSCF9516
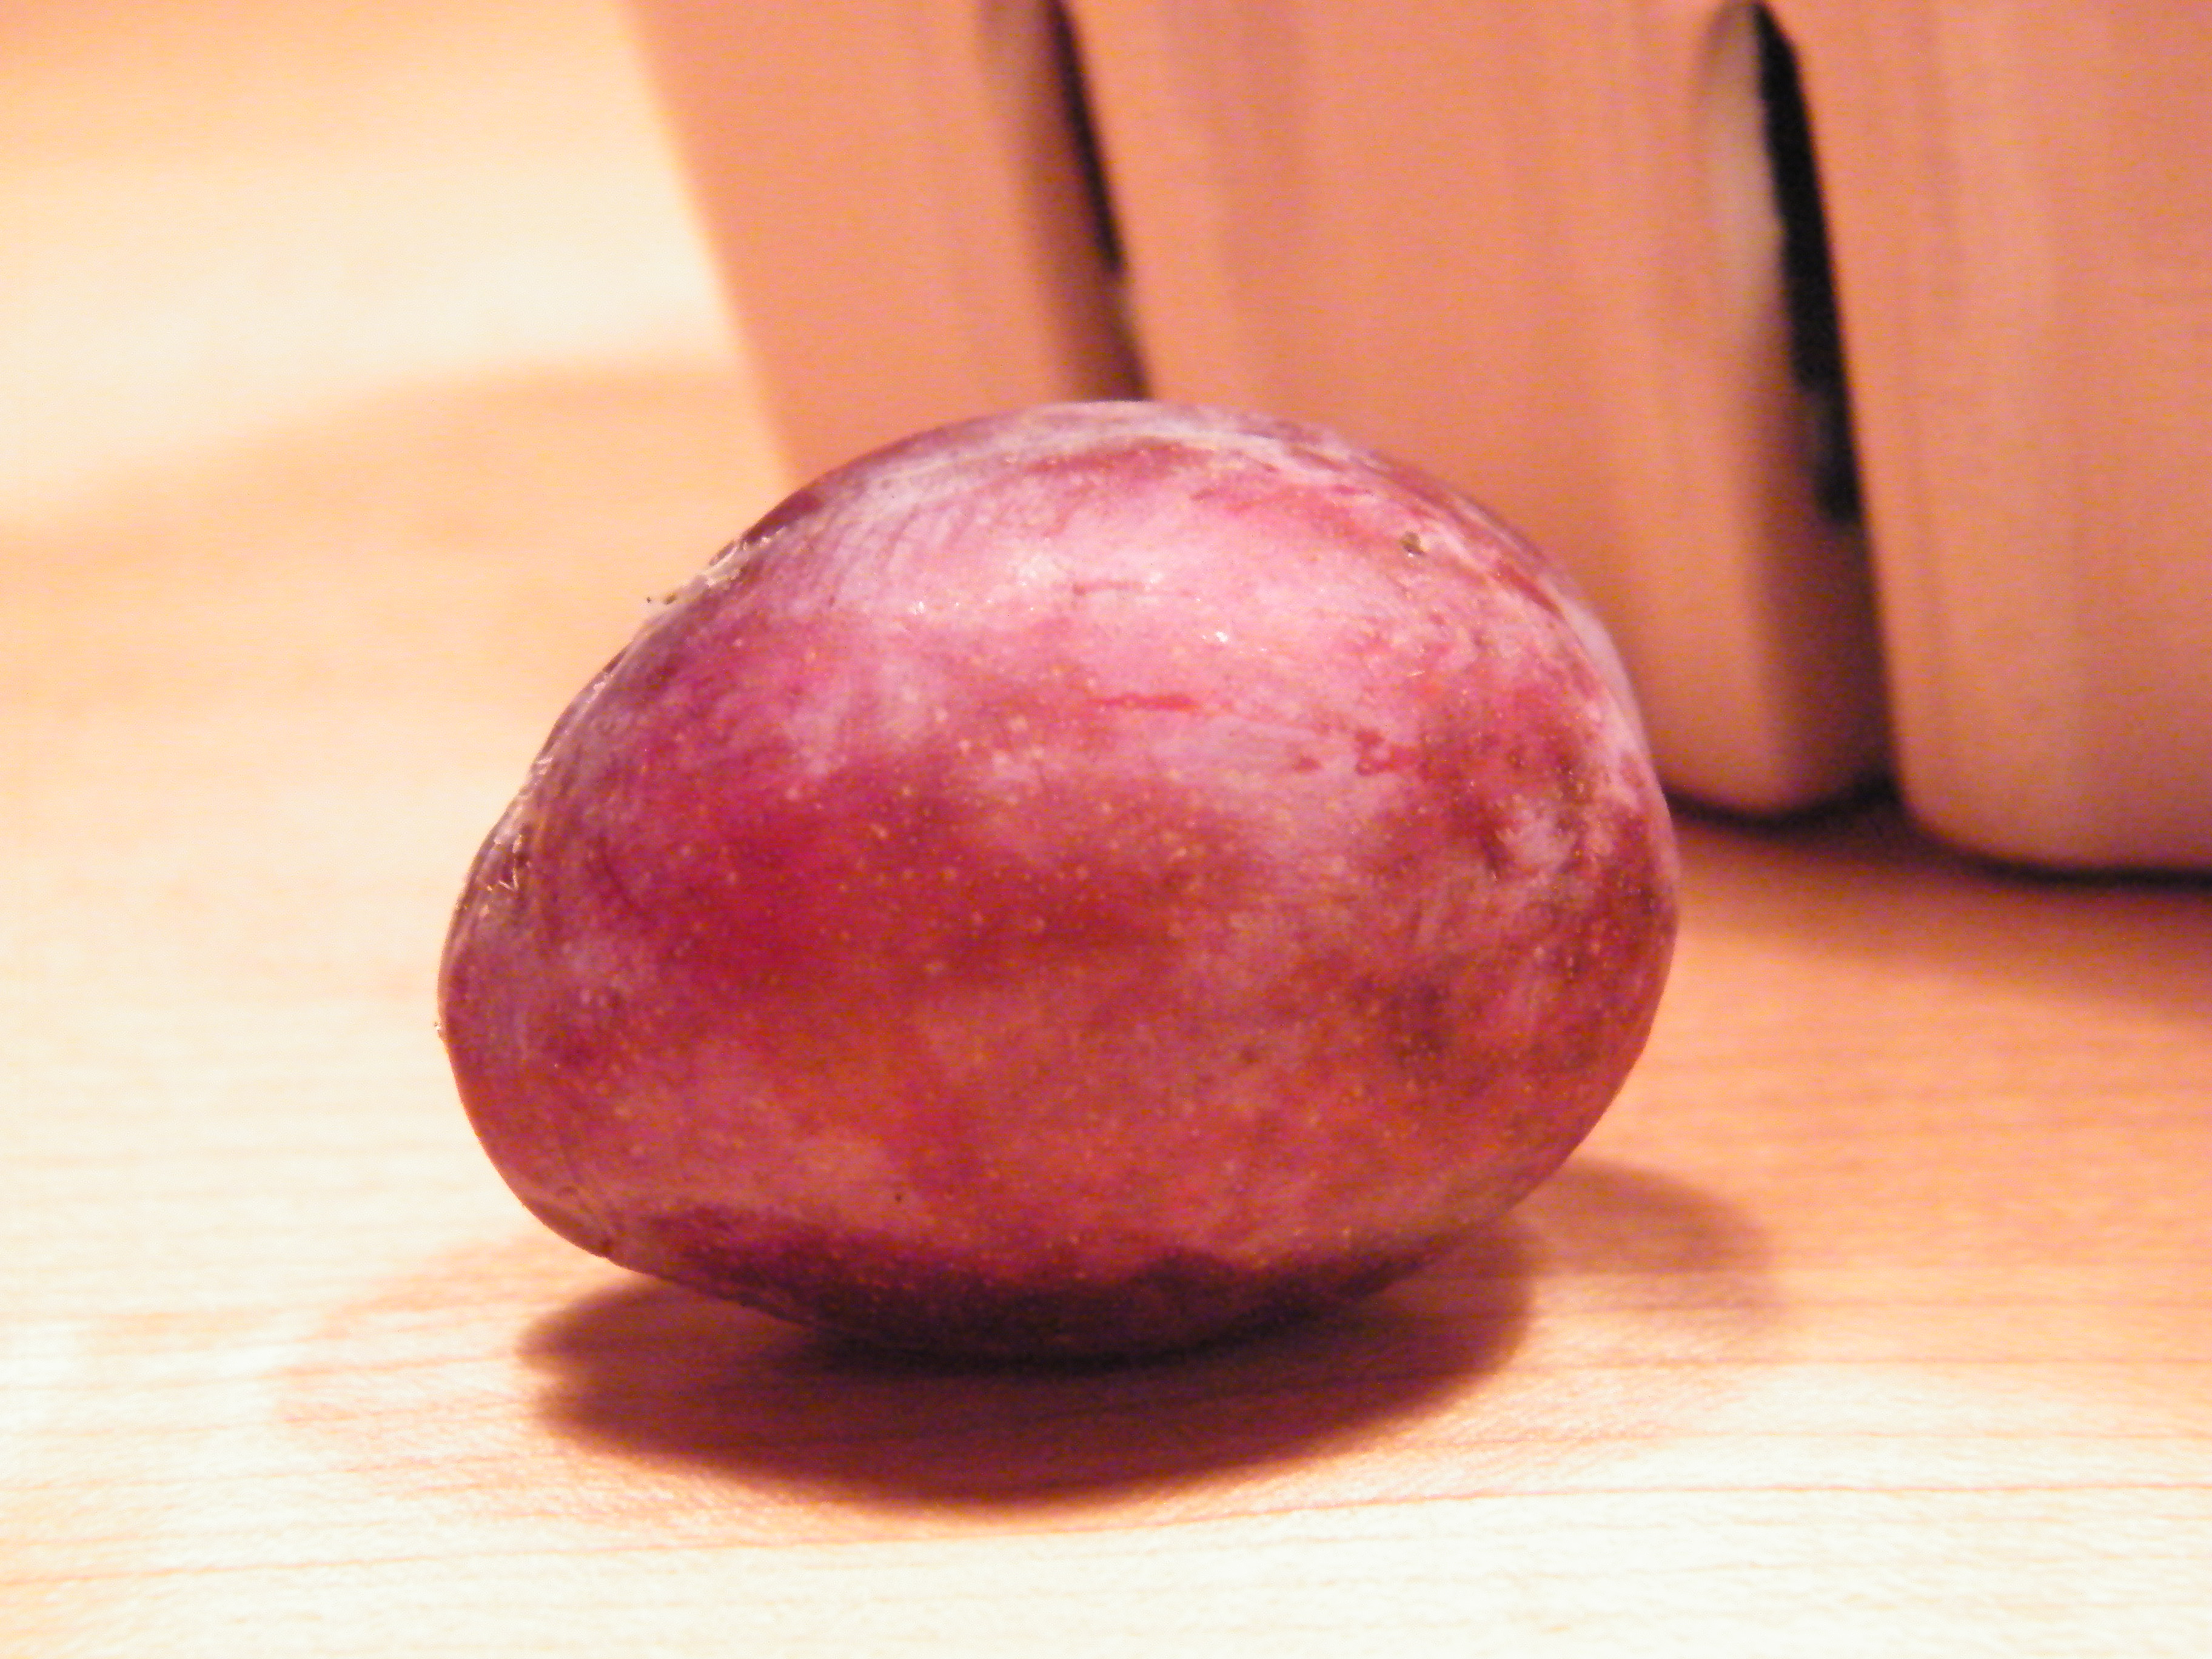
Small bruises and brown spots can be easily cut out; large scales are a bad sign.  The fruit is too small to save when it gets a large blemish. They don’t smell like much of anything when ripe -at most, a slightly acidic, plum-like scent.

Peel?  No.
Edible seed?  No.  It’s a stone fruit.  Less ripe plums will actually pop off the pit very nicely; as they start to overripen they will hang on, so stick with fruits a little on the firmer side if you want them to look pretty when pitted.
Edible when raw?  Yes.  If you’re just eating them plain, let them ripen a little more so that you get the maximum juice possible.
Worth the price of organic?  Probably.  Imported plums are high on the lists for pesticide use, though domestic aren’t bad.  If you don’t know where yours come from, I’d err for organic.  If you know your farmer, you could probably get away with conventional.
In season: Late Summer into Early Fall. (In L.A., all the way into early January.)
Best with: Heat.  Cook them to concentrate the flavor and bring out the juices.  Otherwise, cinnamon, nutmeg, almond, vanilla, cream (and creamy substances – yogurt, sour cream, pudding, etc.), and orange all go nicely for sweet uses.  Because of their small size and subtler sweetness, they’re also ideal for use with dark meats or game, like chicken thighs, rabbit, lamb and duck.
How to Store:  In the fridge, they’ll keep as long as 2 weeks or more.  If they start to shrivel and get prune-looking, they’re still great for baking though less tasty for eating raw.

Share this:

  • Facebook
  • Pinterest
  • Twitter
  • Tumblr
  • Reddit
  • More
  • Email
  • Pocket
  • Print

Like this:

Like Loading...

You Can’t Go Wrong with a Name Like Candy Roaster

08 Thursday Jan 2015

Posted by strangeandyummy in Fall, Orange, Squashes, Winter

≈ 2 Comments

Tags

banana, butternut, candy roaster, nutty, pink, roasted, smooth, squash, sweet

OMG. WTF. LOL. #WhateverAcronymTheKidsAreUsingTheseDays

Over a year??? Over a year since I’ve been on here?!? I’m officially fired, I suppose.  But I’m full of excuses (bought a house, construction on new house, two toddlers, brand new built-by-hand-from-scratch complete urban farming oasis of which I hope to grow many things to share with you, excuses, excuses), and I have not been completely absent from my food and camera this whole time, just absent from my blog.  But I’m here! I’m here! Yowp! And I have so much deliciousness to share.

banana ghost fairy tale blue hubbard squashFirst up: This funny-looking squash.

candy roaster squashAdmittedly, we bought it for a Halloween display.  It looked to me like a swaddled baby (perfect for that extra creepy touch to a Jack O’Lantern massacre!) but, much like everything else, time got away from us in October and the baby never came to be.  Luckily for all concerned (including the early colonists, I suppose), squashes keep! So two and a half months later, we sliced it up.

cut candy roasterIt turns out it is NOT a Swaddled Baby Squash.  It’s either a Pink Banana or a Georgia Candy Roaster, though it seems those names might just be interchangeable.  But come on. “Hey kids, would you like a banana squash salad for dinner?” sounds like a bad episode of Chopped and potentially some sort of smoothie. “Hey kids, have some nutty baked Candy Roaster!” Sold!

I don’t always like squash. Patty pans and several summer squashes are nasty and mealy, and winter squashes can sometimes smell like cucumber and taste like mush. And that quality that made them so valuable to the colonists (Feed a crowd with one giant vegetable!) can be, frankly, annoying to a modern family that does not want to eat the same punk squash for the next 43 days. Plus, you need to be an ogre to chop into the darn things. I don’t own a cleaver or an axe, and if you’ve seen my history with knives, that’s probably a good thing.

Yay for Candy Roaster! It’s small enough both that my husband could hack it for me (I am not to be trusted) and we weren’t stuck eating it until the end of time. Actually, I made the recipe below for a holiday party and there wasn’t enough left over to take any home-

The outside is a pale pinkish-orange color, and the inside is bright orange. Some sources suggest cutting it lengthwise, but I did not read those sources before beginning, of course, so I cut it in half the other way. Bonus: I could slice it into pretty circles this way. Less bonus: to scoop out the seeds I had to go elbow-deep in squash goo. Hats off to you, midwives and OBG’s…banana squash circles

The seeds are pretty easy to scoop out, and the stringy goo not as stubborn as some squashes. You’ll be able to feel the difference between orange gunk you don’t want and orange flesh you do – the strings are very slimy and mushy, where the meat part of the squash is very hard and will crunch a little when your spoon goes too deep.  Clean it completely, and you’re good for roasting!

You can peel it before or after cooking.  Before cooking has the advantage of being able to eat it hot, but the squash is pretty hard (if your slices are thick, you may have trouble cutting neatly without losing too much meat).  After cooking, you’ll have to let cool first, but the peel comes off so easily at that point it’s almost easiest to peel by hand than with a knife. I always prefer to roast it before peeling, because by the time I’m done cleaning and hacking, I want a 40 minute break…

sliced pink banana squashYou can roast it giant hunks (great if you want to make a mash, a puree, or use in pies – it’s a great alternative to pumpkin they say, if not even tastier, in baked goods) or slice it first. We sliced it into half moons in order to fit them on our baking sheets, though the circles looked prettier. Drizzle olive oil on top or toss in a little oil to prevent sticking. (I cook almost everything on aluminum foil in our house because I hate cleaning pans, but you only need to do this if you’re as lazy as I am.) Bake in the middle rack of the oven at 375 until very soft, about 50 minutes to an hour total, flipping halfway through.

carmelized banana squash moons If you can get this gorgeous carmelization on there, do. It’s delicious. If I can figure out a better way than luck to ensure it, I’ll update this post.  About half my slices came out like this, and the other half still orange but cooked through, so out of the oven the pan came.

The raw squash smells a bit like cucumber and banana, of all things, but when roasted it’s sweet and nutty, with a touch of bitterness like when you accidentally eat a walnut shell. I didn’t like that aspect of it very much, which is why I went searching for some recipes with good acidity and maybe a little sweetness to offset it. And I found a winner!

The original recipe was from Real Simple for a butternut squash, but I thought it would adapt well for the Candy Roaster.

Roasted Squash saladRoasted Squash with Mustard Vinaigrette

1 Candy Roaster squash (or, obviously, butternut, or most likely buttercup, acorn, or other sweetish squash)
2 shallots, sliced
olive oil
Mizuna, arugula, or other mesclun green (baby mustard, baby kale, or other spicy/peppery leaves should do well) – measurement depends on how much greens you want.  For a side dish, I would do about 3/4 cup.  For a salad, I might go as much as 2 cups of greens.
Optional add-ins: Dried Cranberries; pomegranate seeds; other dried fruit; toasted nuts

For the dressing:
1 cup apple cider (all we had was apple juice – pretty sure they’re the same thing?)
1 tablespoon cider vinegar
2 tbls olive oil
1 tablespoon whole-grain mustard
1/4 cup fresh flat-leaf parsley, chopped
2-3 sorrel leaves chopped fine (a lemony spinach-looking herb), or a tiny squeeze of citrus (lemon or orange) juice, or a dash of citrus zest
1 pinch fresh tarragon, chopped fine, or one shake dried
1/2 tbs roasted walnut oil

Before roasting your squash as above, toss with sliced shallots.  Roast squash and shallots for 30 minutes, turn squash slices, and roast until done (another 20-30 minutes). Immediately on removal from oven, sprinkle liberally with salt and pepper. If not done before cooking, peel before adding to salad (they will be HOT out of the oven. You’ll need to let them cool at least 5 minutes if not longer before doing this with your fingers, or you’ll need to use an oven mitt and/or a knife).

While the squash is cooking, simmer the cider in a small saucepan until reduced to ¼ cup.  The original recipe said 12 to 15 minutes, but it took me closer to 20. Let cool for 5 minutes. Whisk in the other ingredients.
mustard vinaigrette dressing

Slice the mizuna into bite-sized pieces. Toss with the peeled squash, and drizzle vinaigrette on top.  This is the version we made (and loved!) but I couldn’t help thinking as I made it, and again as I was eating it, that dried cranberries, or pomegranate seeds, would be a great addition, and then while writing this up, I thought dried raisins, cherries, or even figs might be interesting, or toasted walnuts.

The peppery sharpness of the mizuna goes so well with the sweet dressing – I thought it would be too sweet, but it was just what this squash needed to cut that funky mustiness I tasted when it was on its own. It’s a great little squash, but like many squash, I think it needs some spice or some sugar to cover up its less admirable qualities. Then again, don’t we all?

Peel? Yes, though theoretically they’re edible if you like tough, chewy hunks of blandness in your food.  Also, if they’re conventionally grown, they’ll most likely be coated in wax. So, you know, there’s that. Peel it.
Edible when raw?  No.
Worth the price of organic? Yes. Winter squash, because of its hard shell, is treated pretty liberally with insecticides, which can sink through the surface.  It also has the tendency to draw certain harmful chemicals up out of the soil. Good for renewing the soil, not so good for your insides if you’re worried about that sort of thing.
Best with:  Pretty much everything in the spice department – chili, coriander, cumin; rosemary, thyme, sage; cinnamon, nutmeg, allspice; chinese five spice, soy and sesame; parsley; nuts, especially winter nuts like walnuts and pecans; sour flavors like goat and blue cheeses, greek yogurt, sour cream; fruits, especially dried; honey; heavier flavored meats like lamb, roasted chicken (especially dark meat), steak
In Season: Summer through Fall, Winter in Warm Climates
How to Store: Winter squashes will keep as much as 6 months or more if stored, uncut, in a cool, relatively shady spot, like a garage or cupboard. Once cut, it will keep wrapped in plastic in the fridge for a few days, perhaps a week. If it starts to get slime on the surface, toss it. Once cooked, it will keep in the fridge a few days if well wrapped.

Share this:

  • Facebook
  • Pinterest
  • Twitter
  • Tumblr
  • Reddit
  • More
  • Email
  • Pocket
  • Print

Like this:

Like Loading...

Figs in a Blanket

26 Wednesday Jun 2013

Posted by strangeandyummy in Black, Brown, Fall, Fruit, Green, Miscellany, Summer

≈ 3 Comments

Tags

earthy, fig, pink, raw, rich, slimy, smooth, soft, sweet

Growing up in a humid, mid-Atlantic suburb on the East Coast, the only figs I knew of were the Newton varietal – but man oh man were they tasty!  So when I moved to California and starting expanding my fruit and vegetable repertoire (not a difficult task, when my chosen produce at the time consisted of apples, berries, and iceberg lettuce), what could be tastier, I thought, than the inside filling of a cookie fruited cake.

black figsBleh.  Raw fresh figs do NOT taste like fig newtons minus the cake part, just FYI.  Some people, lots of people in fact, love them, but I am not one of them.  So I thought I hated figs.

But as with  most things in life sliced figs(I swear to you, I promise on all that is good and holy, at some point soon I will post a whole series of posts that are kosher and/or vegetarian and/or vegan and/or don’t negate all their yummy nutrients by simply mixing with bacon and/or goat cheese…but today is not that day) they just needed to be wrapped in pork product to change my view.

Raw figs have a hint of sweetness, and a somewhat earthy, flowery flavor.  When very ripe, they’re quite syrupy and gain sweetness, but to me the flavor is like a mushroom masquerading as a pear, with a suggestion of banana.  fresh figIt’s the mushroom quality I don’t care for, along with the slightly slimy texture broken by the rows of seeds that makes me feel a little like I’m biting into a raw sea creature.  Dried figs, on the other hand, are basically candy, a concentration of sugar so sweet and yet so complex that I knew there was something in there worth exploring, even if it wasn’t eating the fruit raw out of hand.

Do something to a fresh fig, however, and you’re in entirely different territory – and when I say something, I mean almost anything.  Poach in red spiced wine for a winter dessert served over ice cream, roast with any number of meats for a restaurant-quality entree, or bake into pies, galettes, tarts, cakes, or custards for a multi-layered flavor extravaganza of a dessert.  Figs are incredibly versatile, and incredibly delicious if you pair them with anything that stands up to their complexity.

figs and prosciuttoThere are several varieties of figs, ranging in color from dark almost black, to almost lime green.  They’ll get softer and softer as they ripen, and are at their sweetest when fully ripe (edible even to the point of mush if you plan on baking or something), but they don’t travel that well once they get close to that stage, so look for a little softness without bruises.  They should feel slightly heavy for their size, and should smell slightly sweet, not sour.  Very firm figs will not ripen further, so don’t buy them.  To prepare them, I like to slice off the hard bit of stem at the top, but otherwise everything is edible, skin, seeds and all.

I love sweet and savory together.  Medieval cuisine, aka gamey meats and dried fruit? Awesome.  Mediterranean couscous salad with raisins?  Bring it.  Chicken salad with grapes? My favorite.  My husband? Not so much.  And by not so much, I mean I sneak the fancy prepared salad bar at Whole Foods when I have to buy lunch, and that is the extent of my exotic pairings.  He doesn’t even do pork chops with applesauce or lamb with jelly (which, come to think of it, neither do I, so I guess our marriage is saved).  So imagine my delight when I not only discovered this dish, but discovered that he loved it.  Sweet, salty, savory – it could be a dessert if you put a sweet balsamic glaze on it, but makes an even nicer salad on top of a bed of arugula and a simple balsamic vinaigrette; but we like them just the way they are: delicate appetizers that you can pop in your mouth, the prosciutto crisp around the edges and the juices of the meat and fig mingling into a salty sweet syrup that pools beneath each morsel.  As fancy appetizers go, they’re fast, decadent, and would be elegant if we didn’t end up licking our plates afterwards.  A true endorsement, indeed.

figs are doneFigs in a Blanket

      • Fresh figs
      • Goat cheese
      • Sliced prosciutto (2 slices per 3 whole figs)

Options: balsamic vinegar, crusty bread, arugula, blue cheese

Slice the figs in half lengthwise.  Slice each slice of prosciutto into thirds lengthwise.  Place a small portion of goat cheese in the center of the fig.

goat cheese figWrap the fig and cheese in a thin slice of prosciutto

DSCF6335fig in prosciutto

fig wrapped in prosciuttoand place in a 400 degree oven for approximately 10 minutes, or until the prosciutto begins to brown and crisp at the edges.  (We cook them on an aluminum foil-wrapped sheet in the toaster oven for easy cleanup – it gets messy.) Serve warm, but not immediately – the centers get very, very hot and we always burn ourselves when we pop them in our mouth too quickly.

Other options?  Drizzle with balsamic for a little acidity to cut the sweetness, serve with crusty bread to sop up the syrup that will form on the pan, or serve over arugula for an elegant appetizer/salad.  Some versions call for blue cheese instead of the goat, so feel free if that’s your preference, but we’ve tried it both ways and in my opinion, the goat lends a sweet tanginess that goes better with the fig.  If you use blue, I would definitely add the drizzle of balsamic.

figs in a blanket

For fresh figs:

Peel/Trim?  No.  Everything is edible, though I do like to cut off the top stem – just a centimeter or two.
Edible seed?  Yes.  Technically, it’s an inside-out flower, but whatever, you can eat the whole thing.
Edible when raw?  Yes.  Best when very ripe.
Worth the price of organic? Unclear.  Figs aren’t that common,  so they don’t show up on various “Dirty Dozen” or “Safe” lists at all, and from looking into growing them, it looks like they’re easy to grow in the right climate, and the main problems that affect fig trees can’t be controlled chemically, so it’s probably a reasonable assumption that conventional figs are not heavily doused in chemicals.  If you’re buying dried, however, I would err on organic because whatever’s there is going to be concentrated in the drying process, as well as probably have sulfites added, as most conventional dried fruit does to keep them moist.
In season: Early Summer briefly, and then Late Summer through Fall for the main crop – though in a place like Southern California where they grow well, you can usually find them all summer long.
Best with: Almonds, hazelnuts, vanilla, orange, cinnamon, black pepper, rosemary, arugula or other sharp greens, gamey or strong meats, rich/creamy cheeses or desserts (custard, ice cream, etc.), deep red, jammy wines (port especially)
How to Store:  In the coldest part of the fridge for up to 3 days, max.  Don’t wash them before storing – if they get wet, they’ll mold quickly.  If they’re already soft or squishy, use immediately as they won’t keep.

Share this:

  • Facebook
  • Pinterest
  • Twitter
  • Tumblr
  • Reddit
  • More
  • Email
  • Pocket
  • Print

Like this:

Like Loading...

Eating the Vines (aka Pea Tendrils)

27 Wednesday Mar 2013

Posted by strangeandyummy in Beans and Peas, Flowers, Green, Leafy, Miscellany, Spring, Vegetables

≈ 1 Comment

Tags

crunchy, curling, delicate, greens, nutty, pea shoots, pea tendrils, snow pea, sweet, vine

True Confessions time:pea tendrilsI despise peas.  They are the eyeballs of the vegetable world, quite literally – tiny, pasty eyeballs that show up to ruin pea plantotherwise lovely dishes, like carbonara and shrimp with lobster sauce and, worst of all, the ubiquitous fish and chips “with mushy minted peas.”  How on earth does anyone think that sounds the least bit appetizing???

But I digress.  Spring as they may hearken, it will be a long time before you see a post about English peas on this blog, which is why I felt something of a personal victory in purchasing pea tendrils at the market on Sunday.

I’m not sure if they’re the tendrils of shelling peas or pod peas (HUGE difference to pea haters, by the way – snap and sugar peas are just fine, thank you), or if they just mix them all in the bin and it doesn’t matter, but to purposefully (and rather expensively) purchase things that might have some connection to the peas I deplore is dedication to experimentation, my friends.

curling tendrilsIn short: slap my ass and call my Sally.  Or whatever the expression is.

Yup, you heard it here first: they’re delightful!  I assumed they would taste sort of like peas, so I mixed in the leftover nettle greens I had on hand as well just in case I hated them, but I needn’t have, and maybe even shouldn’t have, as the two greenspea tendrils vines have very different flavors and yes, my plate seriously resembled lawn clippings.  But the pea tendrils had a delicate nuttiness, a vegetative crunch without the grassy flavor so common in most greens, an underlying mild sweetness, and tasted just simply fresh.  It was spring on a plate.  Add to that the graceful curve of the vines’ tiny fingers flash-sauteed in hot oil and fresh garlic, the bright deep green, the shy head of a white flower poking out from a tiny swaddle of leaves and the entire thing took on something of a gentile air.  I wanted to slow sip pea flowera pale sparkling wine while discussing poetry in a cool mid-afternoon sun.  (Instead of shoveling food into my face before I pass out from exhaustion and drinking my wine like it’s shots of tequila while watching DVR’ed shows with closed captioning because the kids are asleep and my house is too small?  Yes.)

Pea tendrils are the young shoots of pea plants, which makes me so happy because snow peas are one of the few things that I have grown successfully more than once, except I forget to water them and they never produce pods.  But now I can just harvest the vines! pea vine climbing The older they get, the tougher, and some people say to ditch the thicker stems, but I used everything in the bag I bought and the thicker stems were simply slightly crispier – mine were probably young enough that nothing had gotten woody or chewy yet.

Look for young, spry-looking pea shoots without wilt or yellowing.  Many people chop them before cooking, and if you purchased long strings of them, you probably should, but my farmer sold them in roughly 3-inch long pieces, and they were perfectly manageable on a fork and retained their beautiful curls on the plate – half the fun in the first place.  The best method for cooking them seems to be exactly what I found:  very hot oil, throw them in for a quick saute and a minute later add garlic until you can smell it (the whole process goes fast – maybe even just three minutes start to finish), put on a plate with salt, and enjoy.  People that like spices add red pepper flakes, too.  I tossed mine with some pasta for a vegetarian dinner.  You might also serve them with a fried or poached egg.  You see what I’m going for here?  Keep it simple, folks.  Simple and spring-like.  And if you have time for a little poetry, let me know how that goes.  I’m jealous already.

curling tendrilsTrim? Conventional wisdom says that if you can see flowers, remove the stems nearby as they’ll be too thick to be appetizing, some even include the tendrils.  I think the tendrils are pretty and had no problem with thicker stems, but if you’re eating raw I would follow the advice.
Edible when raw?  Yes, but trim off the thicker stems.
Worth the price of organic? Hard to say.  Peas are traditionally considered a “clean” food, but I think that’s because you toss the pod.  I would definitely go organic for the tendrils – they just seem to invite pesticide residue based on how they grow.
Best with:  Simple, spring-like flavors – fresh garlic, lemon, radishes, eggs, plain grains – brown rice is as nutty as I’d go; heavy starches like bulgur or barley or beans would overpower the delicacy of the shoots, in my opinion.
In Season:   Spring
How to Store: They don’t keep well.  Use the day you buy them, the next day at the most.  Store in the fridge if you’re keeping them at all, but honestly, they wilt very fast.

Share this:

  • Facebook
  • Pinterest
  • Twitter
  • Tumblr
  • Reddit
  • More
  • Email
  • Pocket
  • Print

Like this:

Like Loading...

Parsimony and Persimmons

02 Saturday Mar 2013

Posted by strangeandyummy in Fruit, Miscellany, Orange, Winter, Yellow

≈ 1 Comment

Tags

crisp, exotic, fuyu, kaki, persimmon, raw, sharon fruit, soft, sour, sweet

Alright, I took a serious long blog break.  I have unedited photos and half-written posts galore for you all, but somehow (oh, I don’t know, running a new business while parenting a 2 year old and a newborn?) I couldn’t seem to find the time to clean up the posts enough to post them.  So an entire winter has gone by full of turnips and cabbages and various hard squashes and I have left you, the four loyal readers that are out there, bereft of deliciousness.

Fuyu persimmonAnd I’d like to say, but no longer!  But alas, I tried persimmons recently, and, well, I was unimpressed.

I’ve seen persimmons at the market for years now, though before moving to California I had only seen them in still-lifes.  They look like a yellowish to deep orange tomato, or, frankly, rather like a heart ventricle.  [Can you tell my father was a doctor?]  They’re apparently quite popular in Asian and Mediterranean dishes, and that makes some sense to me, as those cuisines tend to not have overly sweet components…but I like sugar in a fruit, and persimmons ain’t it.Persimmon

There are two main kinds you’ll find widely: Fuyu and Hachiya.  The Fuyu tend to be more tomato-y looking while the Hachiya are more oblong, but be sure to ask before you buy.  Both kinds shouldn’t be eaten until they’re ripe, as I guess ‘green’ persimmons are horribly bitter (the Hachiyas are apparently so astringent that they’ll suck all the moisture out of your mouth! sounds horrid), but Fuyus will ripen to pretty firm, something like a pear when it’s just ripe but before it gets juicy, where Hachiyas should be soft and mushy before you eat.  The Fuyus can be eaten when they’re soft, too, but my guy (yeah, that’s right, I’ve got a persimmon guy) said they’re better when they’re a little firmer.  Look for green leaves, not brown, on a Fuyu, and let it get just a wee bit soft to make sure it’s ripe.  For Hachiyas, let them get mushy – go on solidity or lack thereof, not color.

Persimmon seedI didn’t expect the seeds inside, so I’m glad I sliced it open.  I went with Fuyus since spoonable fruit seems like, well, baby food, and I deal enough with that already, thank-you-very-much.  Let me be clear, persimmon lovers, before I get hate mail: I didn’t HATE the persimmon.  I just found it…useless.  It tastes something like an apple or a pear, but without the crispness or juiciness of either.  It’s basically just an innocuous fruit that’s twice the price of more familiar specimens.  That’s it.   You can eat them raw in hand like an apple or slice so you can remove the seeds, and many people like to cook them down into puddings and tarts.  I’ve seen colanders heaped with them at people’s houses and heard exclamations of excitement when the season hits, so I guess I’m turning it over to you, dear readers: What the heck do you do with these suckers to make them worth your while?  ‘Cuz I’m cheaping out.  No more persimmon experiments for me unless it’s going to be fantastic.

persimmon slicesPeel?  No, but you do want to chop off the leaves on top, and if you plan on cooking them, they’re often peeled for texture reasons.
Edible seed? No.  There will be 6 to 8, but they’re pretty big so you can pick them out easily.
Edible when raw?  Yes, though Hachiyas are more often cooked.
Worth the price of organic?  Unclear.  They’re not common enough in the U.S. to make some of the standard Dirty Dozen lists in any capacity – since apples are #1 on the list and other soft-skinned fruits rank in the top 20, I’d err on organic if you plan on eating the skin.  But they’re notably disease and pest-resistant for gardeners, so it’s quite likely that even conventional ones don’t go too heavy on the sprays.
In season: October through February.
Best with: cinnamon, ginger, nutmeg, cardamom, black pepper (warm spices); apple, pear, orange; cream in puddings, panna cottas and cheesecakes
How to Store:  On the counter until ripe, in a paper bag to speed up ripening.  Once ripe, Fuyus can go in the fridge for up to a couple of weeks; Hachiyas can go in the fridge for a few days.

Share this:

  • Facebook
  • Pinterest
  • Twitter
  • Tumblr
  • Reddit
  • More
  • Email
  • Pocket
  • Print

Like this:

Like Loading...

Candy Cane Beets

30 Monday Jul 2012

Posted by strangeandyummy in Fall, Purple, Red, Roots and Tubers, Spring, Summer, White, Winter

≈ 4 Comments

Tags

beet, candy cane, chioggia, hairy, nutty, root, round, striped, sweet

Okay, so I know I waxed eloquent about Golden Beets only recently and complained about the earthy, bloody mess that is dark red beets, but how cute are these!

They look like something out of Willy Wonka or Candyland.  I want to skip through the Vegetable Forest, leaping between Chioggia stepping stones.

They’re called Chioggia or Candy Cane Beets, and they’re just like all the other beets except much, much prettier. Look at these stems!

I hope I can find some when Valentine’s Day comes around because I always end up serving tomato soup as the vegetable, and these are much more romantic looking. (Oooo!  I could cut them into heart shapes!  Alright, I’ve gone over the edge…  I’m not sure how a vegetable gets romantic in the first place…  I don’t think I want to know.)

Chioggias are more of a fuchsia or deep pink color on the outside than their bloody brethren, so if there are three kinds of beets lined up, golden will be orange-ish, traditional beets will be maroon colored, and these will be the paler red/hot pink kind you see in between.  (I only bought Chioggias and Golden, so no dark red beets in the picture to the left, just Golden for comparison.)

They also typically have candy cane stripes at the base of the greens where it meets the root, though they don’t have to:Once peeled, the resulting nugget can be almost all white like a potato, or deep pink stripes – the whiter ones will have paler or less pronounced pink stripes once you cut into the center; the deeper ones will make the really eye-catching slices.  The flavor isn’t as nutty as golden beets nor as earthy as red beets – frankly, they’re simply blander, but that’s not necessarily a bad thing.  They make the best chips, in my opinion, since non-beet eaters won’t be turned off by them.  As much as I love Golden Beets, they do have a distinct beet-ish flavor.  Candy Cane beets are milder and probably a better intro beet for those who really, really are afraid to try beets, though the more red they have (i.e. the more pronounced, eye-catching stripes) the more beet-like they will taste.  But, who cares?  Look how cute!

My biggest issue with Candy Cane beets is really an issue with my food processor.  I have a lovely slicing blade that should have made me beet chips in 5 seconds flat, but the beets are too round to go in properly.  The whole setup is designed for oblong things like sweet potatoes or zucchini.  Arrgh.  So in the meantime while I look on Amazon for a new lid, I had to handslice my beets to get them to look pretty, which is annoying because I have approximately Zero knife skills.  I can’t make even slices if my life depended on it.  (Which would be an odd way to threaten someone, I suppose: “Cut this beet right or I’ll kill you!”)

Regardless, toss with olive oil, salt and pepper, lay them in a single layer on a cookie sheet covered in foil, and roast at 400 or 450 until slightly crispy, about 20 minutes.  I like to flip mine halfway through so they crisp up on both sides, but if you’re not a good flipper (I am not), you don’t have to.  They’ll still taste good.  Unless you own a mandoline or some other device (like knife skills, perhaps) that will allow you to get uniform, very thin slices, they’re not going to get crisp like chips – they’ll crisp up on the edges, but the centers will remain slightly soft.  That’s okay.  Sprinkle with salt and munch away.

Note: The cuteness will fade as they cook – the colors become more muted, especially at the higher heat that also will give them brown crispy spots.  If you’re trying to impress someone, stick to the reddest slices you’ve got – the paler whiter ones will be brownish and unimpressive once roasted.

Info on peeling, seasonality, etc. is the same as Golden Beets.  Enjoy!

Share this:

  • Facebook
  • Pinterest
  • Twitter
  • Tumblr
  • Reddit
  • More
  • Email
  • Pocket
  • Print

Like this:

Like Loading...

Golden Beets

01 Sunday Jul 2012

Posted by strangeandyummy in Fall, Orange, Roots and Tubers, Spring, Summer, Winter, Yellow

≈ 15 Comments

Tags

beet, golden beets, hairy, nutty, root, round, sweet

I’ll admit it.  After years of trying, I still can’t get totally into beets.  The first time I had them was borscht, i.e., cold beet liquid mush, the second time I had them was pickled from a jar, and after getting so nauseated from the smell that I had to not just leave the kitchen but the HOUSE to get some air, I was a sworn beet hater.

Beets are, shall we say, an acquired taste.  Imagine, if you will, a clod of dirt that someone has dripped peach juice on.  Take a bite.  That’s a beet.

Now the beet lovers out there are going to protest and call them “earthy” and tell me I should roast them, and they’re right.  Roasted beets do become an entirely different thing, sliced into chips and baked at high heat they’re actually better than potato chips (I swear!), but you still have the problem of looking like Lady Macbeth after peeling them and not allowing your toddler to touch them even though they’re FANTASTIC for him because you know you’ll never get the stains out of ANYTHING.

And then I discovered golden beets.  Like massive golden jewels radiating sunshine among the stalls, golden beets solve all the problems of red beets and taste even better.  The flavor is milder, for starters – they’re slightly earthy, but they have a nuttiness to them reminiscent of walnuts, and a mild sweetness like the smell of apples or apricots.  They’re absolutely gorgeous – slice them and they look like orbs of sunlight; halve them and their whitish veins shimmer out like rivers in a golden meadow; wedge them and they look like yellow sapphires just mined from the earth.

The smaller, the sweeter, as with most root vegetables, but golden beets will stay pretty sweet even in softball size, so the rule isn’t as applicable here.  Give them a good scrub and remove all the root hairs.  If they’re quite young and the skin is quite thin, it’s not absolutely necessary to peel them, but the skin toughens up as they get older (ain’t that the truth!), and even the young ones usually have some rough stuff near the stem, so peeling is usually required to some degree.  Basically, I default to: Peel, and if they’re young and you’re feeling lazy, half-ass the job.  When you buy beets, they’ll always ask if you want the tops off.  Most people say yes.  Most people are crazy.  Before I came to like the beets themselves, I used to get free beet tops from the market all the time – hang around a stall for a few minutes and someone won’t want theirs.  Offer to split the cost and it’s a win-win for everyone!  More on beet greens in a different post, but if you do take them home, chop them off about an inch above the beet part before storing in the fridge – they’ll quickly wilt while they continue to feed the beet.

The two best ways to eat beets, in my opinion, really come down to the two ways to slice beets.  If they’re relatively spherical, slice them as thin as you dare (if you’re fancy-shmancy and own a mandoline, now is when you get your money’s worth) so they resemble potato chips.  If they’re funky-shaped or too small, cut them into wedges.  Either way, toss with a little olive oil and spices of your choice – if I’m making chips, I often add garlic powder to the standard salt and pepper; if I’m making wedges, whatever spices I’ll be using in the main dish, or nothing until I decide.  Chips get spread out on a cookie sheet so they don’t overlap, wedges usually go into the toaster oven because I hate to turn on the big guy for one meal, but either way, I line the sheet with aluminum first because I hate cleaning up.  (There’s a distinct theme running through my posts, I’m noticing…I mean, I knew I was lazy, but when you put it in writing repeatedly…yeesh.  In my defense, we don’t own a dishwasher.  Yeah, I don’t think that makes up for it completely either.)  Pop either cut into a 400 degree oven for about 20 minutes.

Bake until chips are crisp or wedges are soft and beginning to blister.  Toss the chips with salt while they’re hot, but they’ll taste great hot or cold.  The wedges can go with anything – side dish, pasta, cous cous.  Cool, they make a really nice addition to a salad.  My favorite dinner with beet wedges:

Spaghetti with Goat Cheese, Beets and Walnuts

  • Roast beet wedges in oven (how many completely depends on your size of beets and your size of family – I typically use about 3 smallish ones for 2 adults and a toddler)
  • While they’re cooking, boil pasta – any mild preferred carb will do here really.  I also like this with cous cous, either whole wheat or Israeli, or pearled barley, but nuttier things like brown rice, lentils, etc. will overpower.  I like spaghetti instead of shapes for the same reason – keep it thin and out of the way.
  • While the pasta water is boiling, slice the beet greens into strips.  Saute in a decent amount of olive oil with at least one clove garlic.  (Decent amount = maybe 1/2 to 1 tablespoon more than you need just to stop them from sticking.  This garlicky oil will become your sauce.)
  • Toss together the pasta, the beets, the sauteed greens and their oil, adding a splash of pasta water and/or a little more oil if the whole thing needs more moisture.  Add walnut pieces and goat cheese.  If your goat cheese comes in a log like mine, use a fork to break off big chunks into the pasta bowl; pre-crumbled works fine too, but it will disappear into the hot pasta.  I like chunks.  Add a little salt and pepper if necessary, though I usually don’t.  It’s sweet and salty and oily and probably isn’t the absolutely healthiest meal on the planet because of my excessive love of goat cheese and walnuts, but it’s chock full of vitamins and vegetarian and oh-so-pretty.

Want the lunchtime version?  Toss the roasted beets (cooled) with mixed greens (include something a bit sharp like arugula, endive, or even just baby spinach), goat cheese, and walnuts.  Drizzle with olive oil and balsamic.  Same thing, only without the evil carbs.

Peel?  Yes, especially the thicker skin.  The young, thin skin can stay on.  As long as they’re well-scrubbed and no root hairs are left, the skin is edible; it’s just not very tasty.
Edible when raw? Technically…Some raw food types grate them into obscurity or juice them in order to eat them, but I don’t recommend it.  I’ve seen them sampled at the market raw with oil and salt, but if you’re a beet newbie, I’d cook them.
Worth the price of organic?  Not sure.  If you’re eating the greens, it seems to be a good idea to keep it clean, and lettuce, spinach, kale and collards – other similar greens – are all on the “Dirty Dozen” of pesticide-absorbing foods.  But most root vegetables hide beneath the soil pretty well, especially if you’re going to peel them.  If you’re keeping the greens, I’d make the splurge.  If money is tight and/or you’re buying your beets from the grocery store so you don’t even get the option of keeping the greens, I’d probably save my cash and risk conventional.
In season: All year, though most sources say June-October.  I don’t think I’ve ever NOT seen them at the market, though I know from trying to grow them that they like a cold snap.
Best with: soft, mild cheeses to counteract their natural sweetness; nuts (especially walnuts, sunflower seeds or similar) to increase their nutty flavors; sharp or slightly bitter greens – arugula, beet greens, radish tops; almost any herb – garlic, rosemary, thyme, sage quickly come to mind, but others swear by curry, dill or any number of other favorites.  Golden beets in particular, because they’re so mild, really go nicely with almost everything.
How to Store: With greens removed, store in the crisper – leave a bit of stem on top and don’t peel until ready to use, though you can scrub before storing.  We’ve kept them as long as 2 weeks or more, but a week or less is probably a better idea.

Share this:

  • Facebook
  • Pinterest
  • Twitter
  • Tumblr
  • Reddit
  • More
  • Email
  • Pocket
  • Print

Like this:

Like Loading...

Pluots

10 Sunday Jun 2012

Posted by strangeandyummy in Fruit, Purple, Stone Fruit, Summer

≈ 5 Comments

Tags

juicy, plum, pluot, smooth, sour, sweet

Finally!  Fruit!

I’m a fruit fiend, frankly.  Peaches, nectarines, plums, cherries…and don’t even let me near a basket of strawberries.  Not if you want any, anyway.

But when you’re trying out new stuff, fruit is pretty old hat.  There may be 5000 varieties of peaches in existence, but when all is said and done, you eat it like a peach, amiright?

Still, the number of varieties can be daunting.  Take pluots, as I did at the market today.  Pluots are a hybrid of plums and apricots that go a little heavier on the plum than the apricot, but within that description, there are a whole range of varieties, and each one tastes a little different.  I very much like the ones that are often called Dinosaur Eggs or the other speckled varieties, but I haven’t seen those around just yet.  Maybe they’re later bloomers.

Pluot skin, of any variety, is a bit more speckled than plain old plums, but otherwise they really can look almost identical if you get the dark ones like I picked up today.  Pluot skin is smooth like plums, not fuzzy like apricots, and until you get your favorites memorized – and even then, unless you know your farmer or something – pluots are one fruit that you absolutely HAVE to sample.  Pluots will always have a touch of sour, but they can also be very sour.  Some of that depends on the ripeness of the fruit, of course, but I’ve found that a lot of it is varietal.  These were listed as Santa Rosa Pluots, which I’ve not heard of before, but am assuming they’re hybridized off Santa Rosa Plums.  They have a complex sweetness when ripe, with a tiny hint of sour, sort of the equivalent of really good plain yogurt.

Let them get as ripe as you dare, almost too ripe, to get them as sweet and juicy as possible. A ripe pluot will have a small bit of give rather than be hard, but they don’t smell very floral the way peaches or apricots do, and they only get quite soft when they’re almost overdone, so ask if you’re not quite sure how ripe yours are.  Since a lot of pluots have greenish skin, hints of green near the stem aren’t a good indicator.  Pluot meat can be anywhere from yellowish to almost purple, sometimes even greenish-purple, though if it’s greenish on the inside that usually means it’s not ripe.  Otherwise, the variety is as endless as, well, the varieties of pluots.

Because of their complexity of flavor, I prefer to eat pluots straight up (unlike every other stone fruit, which I prefer to bake into innumerable delicious items that all go great with ice cream…).  If they do get too ripe, or if they are far too sour, saute with a little cinnamon and eat as a saucy dessert.  If they’re too sour, add a little sugar to the mix, and you can always add a little butter, but when they’re simply overly ripe they really don’t need it.  If you have any recipes in which pluots really shine, post below!

Peel?  Nope.  The skin is delicious – a little sharp around the edges, a little bit of chew like apple peels, but perfectly lovely.
Edible seed? No.  It’s a stone fruit.  This variety at least, is not a freestone, which means a lot of peach meat will hang on to the pit – another reason to just eat it straight up.
Edible when raw?  Definitely.  Wait until ripe.
Worth the price of organic?  The consensus is yes.  Stone fruits are notoriously hard to grow, which means if someone’s growing them conventionally, they’re likely loading up on all sorts of chemicals to keep all the enemies at bay.  While pluots aren’t specifically listed on most “Must Buy Organic” lists, plums are high on the list, and since you’re eating the skin usually, I’d err on organic all the way.
In season: Summer.
Best with: A sunny day and a napkin.
How to Store:  Ripen on the counter, in a paper bag to speed the process.  Store on the counter if you plan on eating soon; put them in the fridge if you want them to keep a few days longer.  Once ripe, they’ll keep on the counter about 2 days, in the fridge maybe as many as 4, but that’s pushing it.

Share this:

  • Facebook
  • Pinterest
  • Twitter
  • Tumblr
  • Reddit
  • More
  • Email
  • Pocket
  • Print

Like this:

Like Loading...

Welcome!

  • About
  • Contact
  • Sites I Like

Recent Posts

  • With Every Beet of My Heart
  • Teeny Tiny Prune Plums
  • You Can’t Go Wrong with a Name Like Candy Roaster
  • Figs in a Blanket
  • Fava Beans, and the Spring-iest Salad that Ever Was Sprung

Categories

Browse By Color or Season

  • Spring
  • Summer
  • Fall
  • Winter
  • Red
  • Orange
  • Yellow
  • Green
  • Blue
  • Purple
  • White
  • Brown
  • Black

What Is That and How Do I Eat It?

What Is That and How Do I Eat It?

Archives

  • February 2016
  • January 2015
  • June 2013
  • May 2013
  • March 2013
  • October 2012
  • September 2012
  • July 2012
  • June 2012
  • May 2012
  • January 2012

Meta

  • Register
  • Log in
  • Entries feed
  • Comments feed
  • WordPress.com

Blog at WordPress.com.

Privacy & Cookies: This site uses cookies. By continuing to use this website, you agree to their use.
To find out more, including how to control cookies, see here: Cookie Policy
  • Follow Following
    • What is That and How Do I Eat It?
    • Join 31 other followers
    • Already have a WordPress.com account? Log in now.
    • What is That and How Do I Eat It?
    • Customize
    • Follow Following
    • Sign up
    • Log in
    • Report this content
    • View site in Reader
    • Manage subscriptions
    • Collapse this bar
 

Loading Comments...
 

    %d bloggers like this: