• Spring
  • Summer
  • Fall
  • Winter
  • Red
  • Orange
  • Yellow
  • Green
  • Blue
  • Purple
  • White
  • Brown
  • Black

What is That and How Do I Eat It?

~ strangeandyummy farmer's market finds

Category Archives: Yellow

Parsimony and Persimmons

02 Saturday Mar 2013

Posted by strangeandyummy in Fruit, Miscellany, Orange, Winter, Yellow

≈ 1 Comment

Tags

crisp, exotic, fuyu, kaki, persimmon, raw, sharon fruit, soft, sour, sweet

Alright, I took a serious long blog break.  I have unedited photos and half-written posts galore for you all, but somehow (oh, I don’t know, running a new business while parenting a 2 year old and a newborn?) I couldn’t seem to find the time to clean up the posts enough to post them.  So an entire winter has gone by full of turnips and cabbages and various hard squashes and I have left you, the four loyal readers that are out there, bereft of deliciousness.

Fuyu persimmon
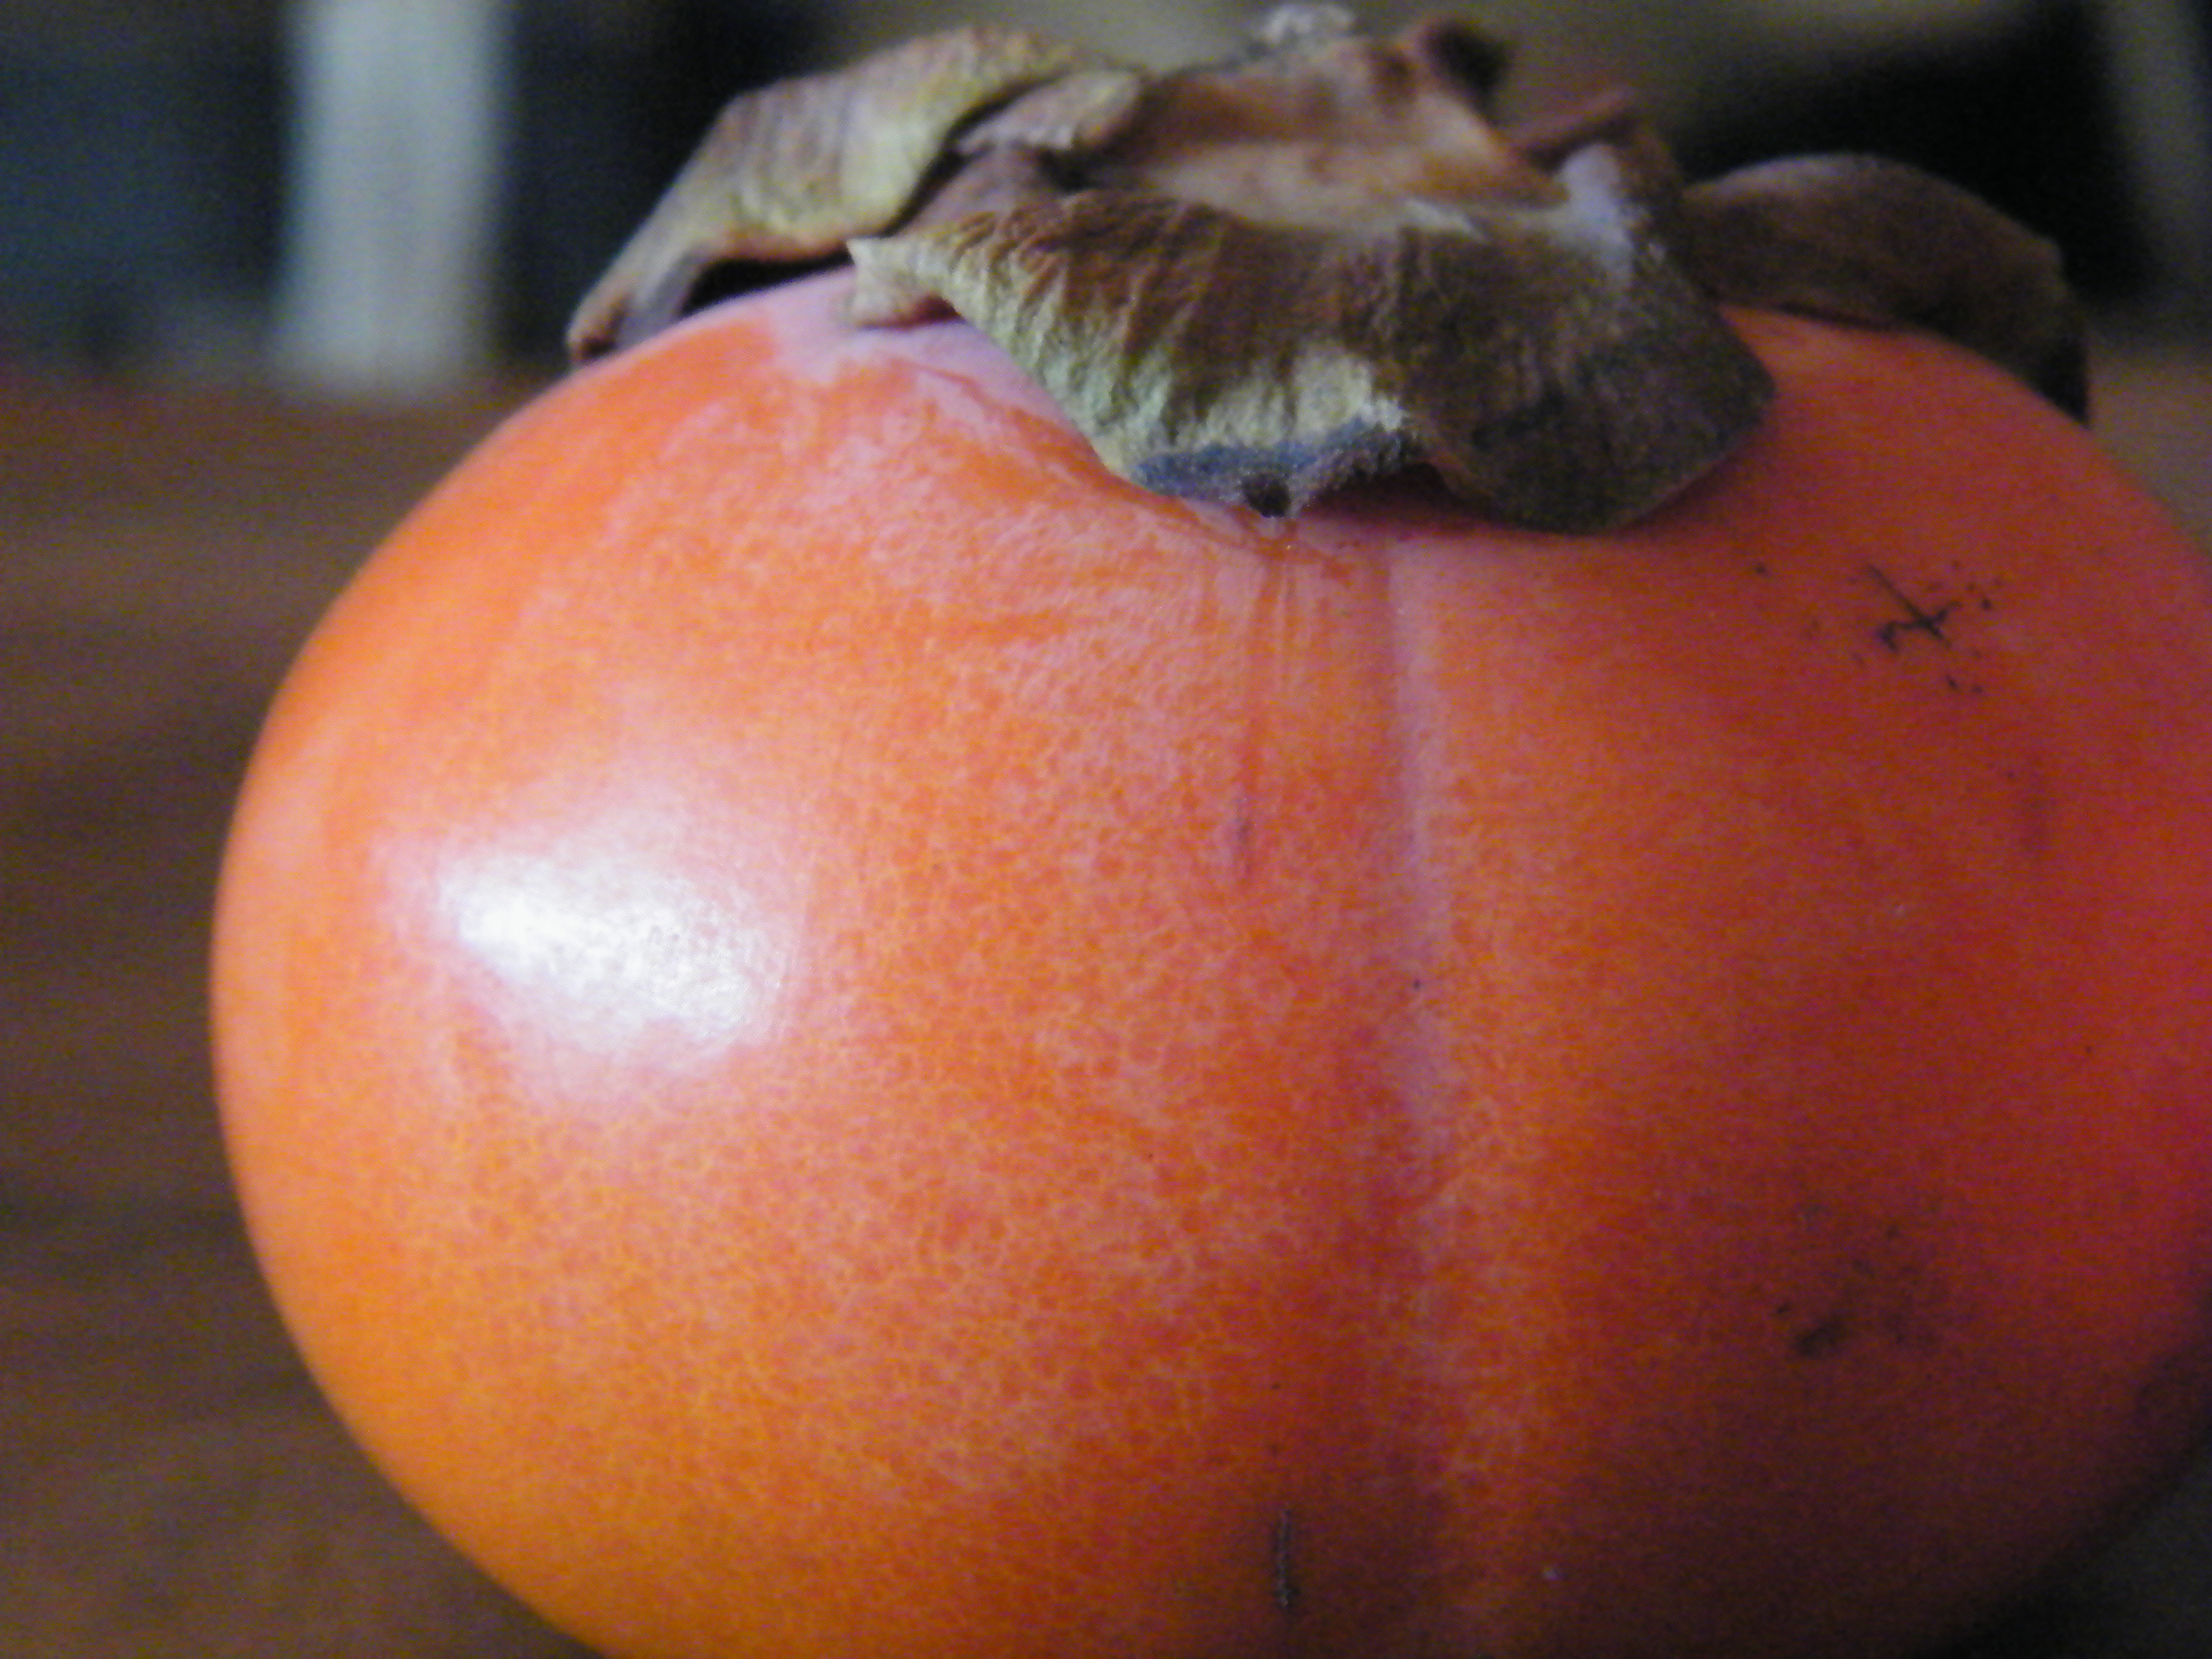
And I’d like to say, but no longer!  But alas, I tried persimmons recently, and, well, I was unimpressed.

I’ve seen persimmons at the market for years now, though before moving to California I had only seen them in still-lifes.  They look like a yellowish to deep orange tomato, or, frankly, rather like a heart ventricle.  [Can you tell my father was a doctor?]  They’re apparently quite popular in Asian and Mediterranean dishes, and that makes some sense to me, as those cuisines tend to not have overly sweet components…but I like sugar in a fruit, and persimmons ain’t it.Persimmon

There are two main kinds you’ll find widely: Fuyu and Hachiya.  The Fuyu tend to be more tomato-y looking while the Hachiya are more oblong, but be sure to ask before you buy.  Both kinds shouldn’t be eaten until they’re ripe, as I guess ‘green’ persimmons are horribly bitter (the Hachiyas are apparently so astringent that they’ll suck all the moisture out of your mouth! sounds horrid), but Fuyus will ripen to pretty firm, something like a pear when it’s just ripe but before it gets juicy, where Hachiyas should be soft and mushy before you eat.  The Fuyus can be eaten when they’re soft, too, but my guy (yeah, that’s right, I’ve got a persimmon guy) said they’re better when they’re a little firmer.  Look for green leaves, not brown, on a Fuyu, and let it get just a wee bit soft to make sure it’s ripe.  For Hachiyas, let them get mushy – go on solidity or lack thereof, not color.

Persimmon seed
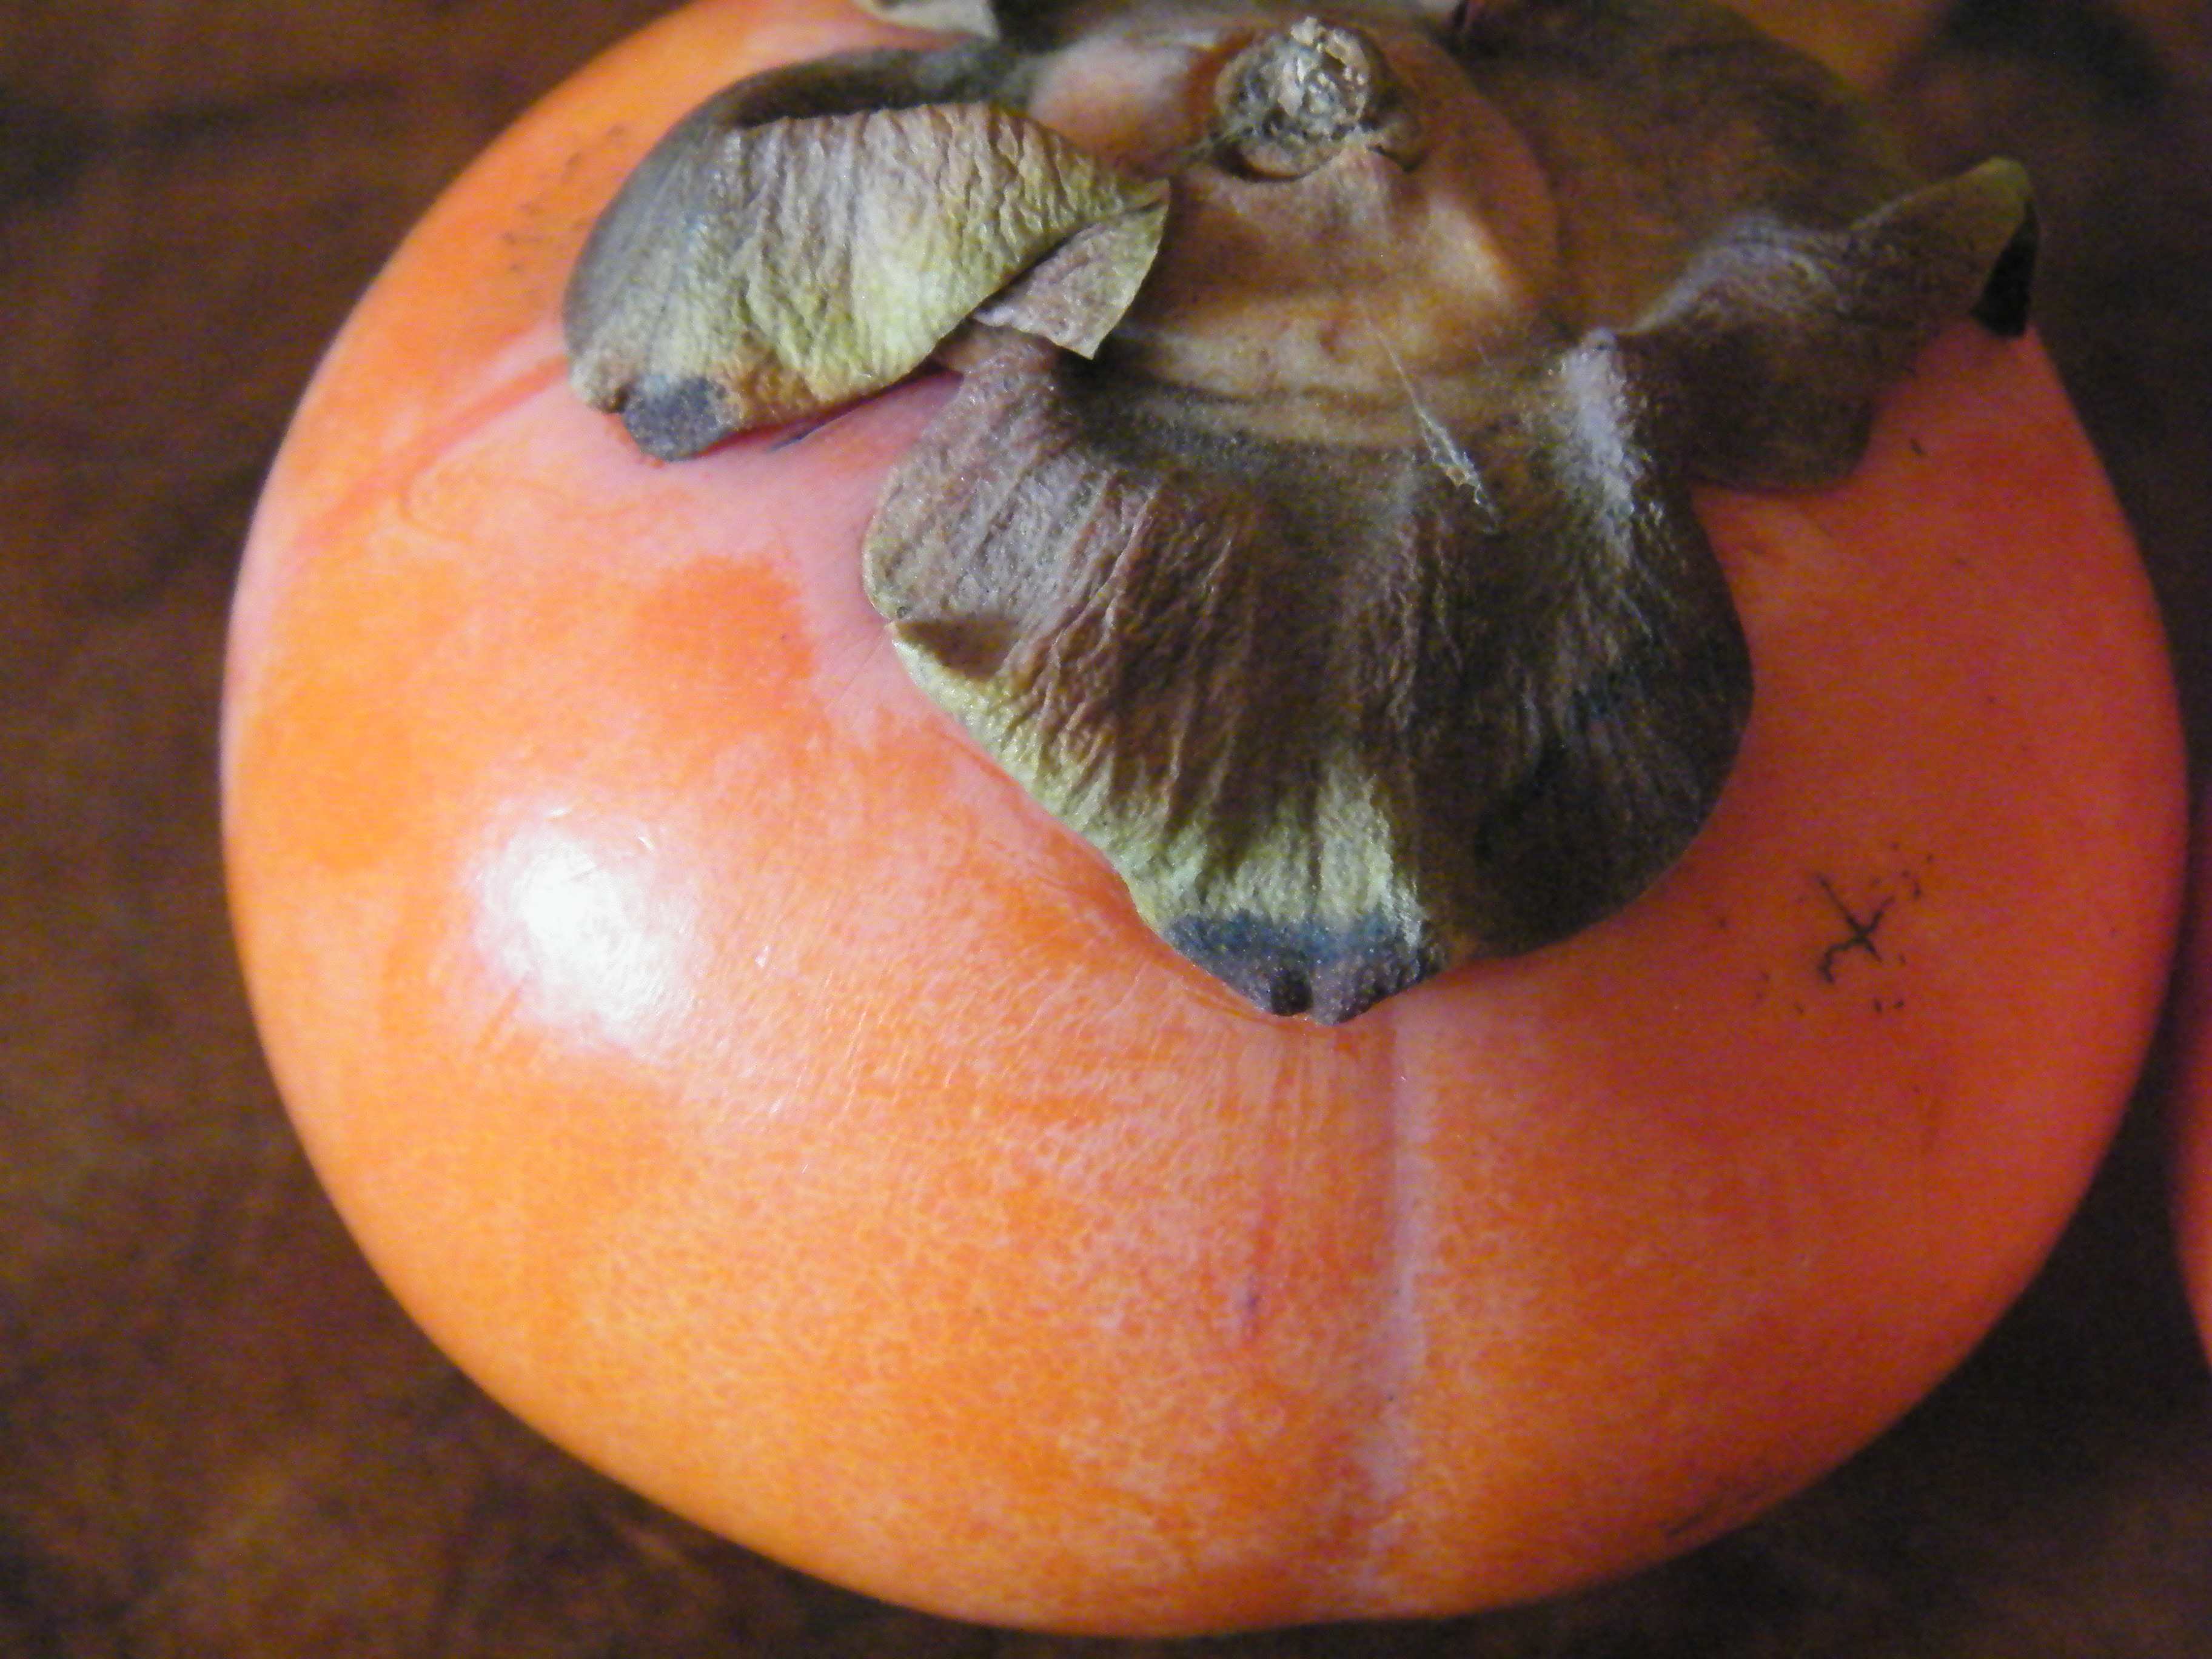
I didn’t expect the seeds inside, so I’m glad I sliced it open.  I went with Fuyus since spoonable fruit seems like, well, baby food, and I deal enough with that already, thank-you-very-much.  Let me be clear, persimmon lovers, before I get hate mail: I didn’t HATE the persimmon.  I just found it…useless.  It tastes something like an apple or a pear, but without the crispness or juiciness of either.  It’s basically just an innocuous fruit that’s twice the price of more familiar specimens.  That’s it.   You can eat them raw in hand like an apple or slice so you can remove the seeds, and many people like to cook them down into puddings and tarts.  I’ve seen colanders heaped with them at people’s houses and heard exclamations of excitement when the season hits, so I guess I’m turning it over to you, dear readers: What the heck do you do with these suckers to make them worth your while?  ‘Cuz I’m cheaping out.  No more persimmon experiments for me unless it’s going to be fantastic.

persimmon slices
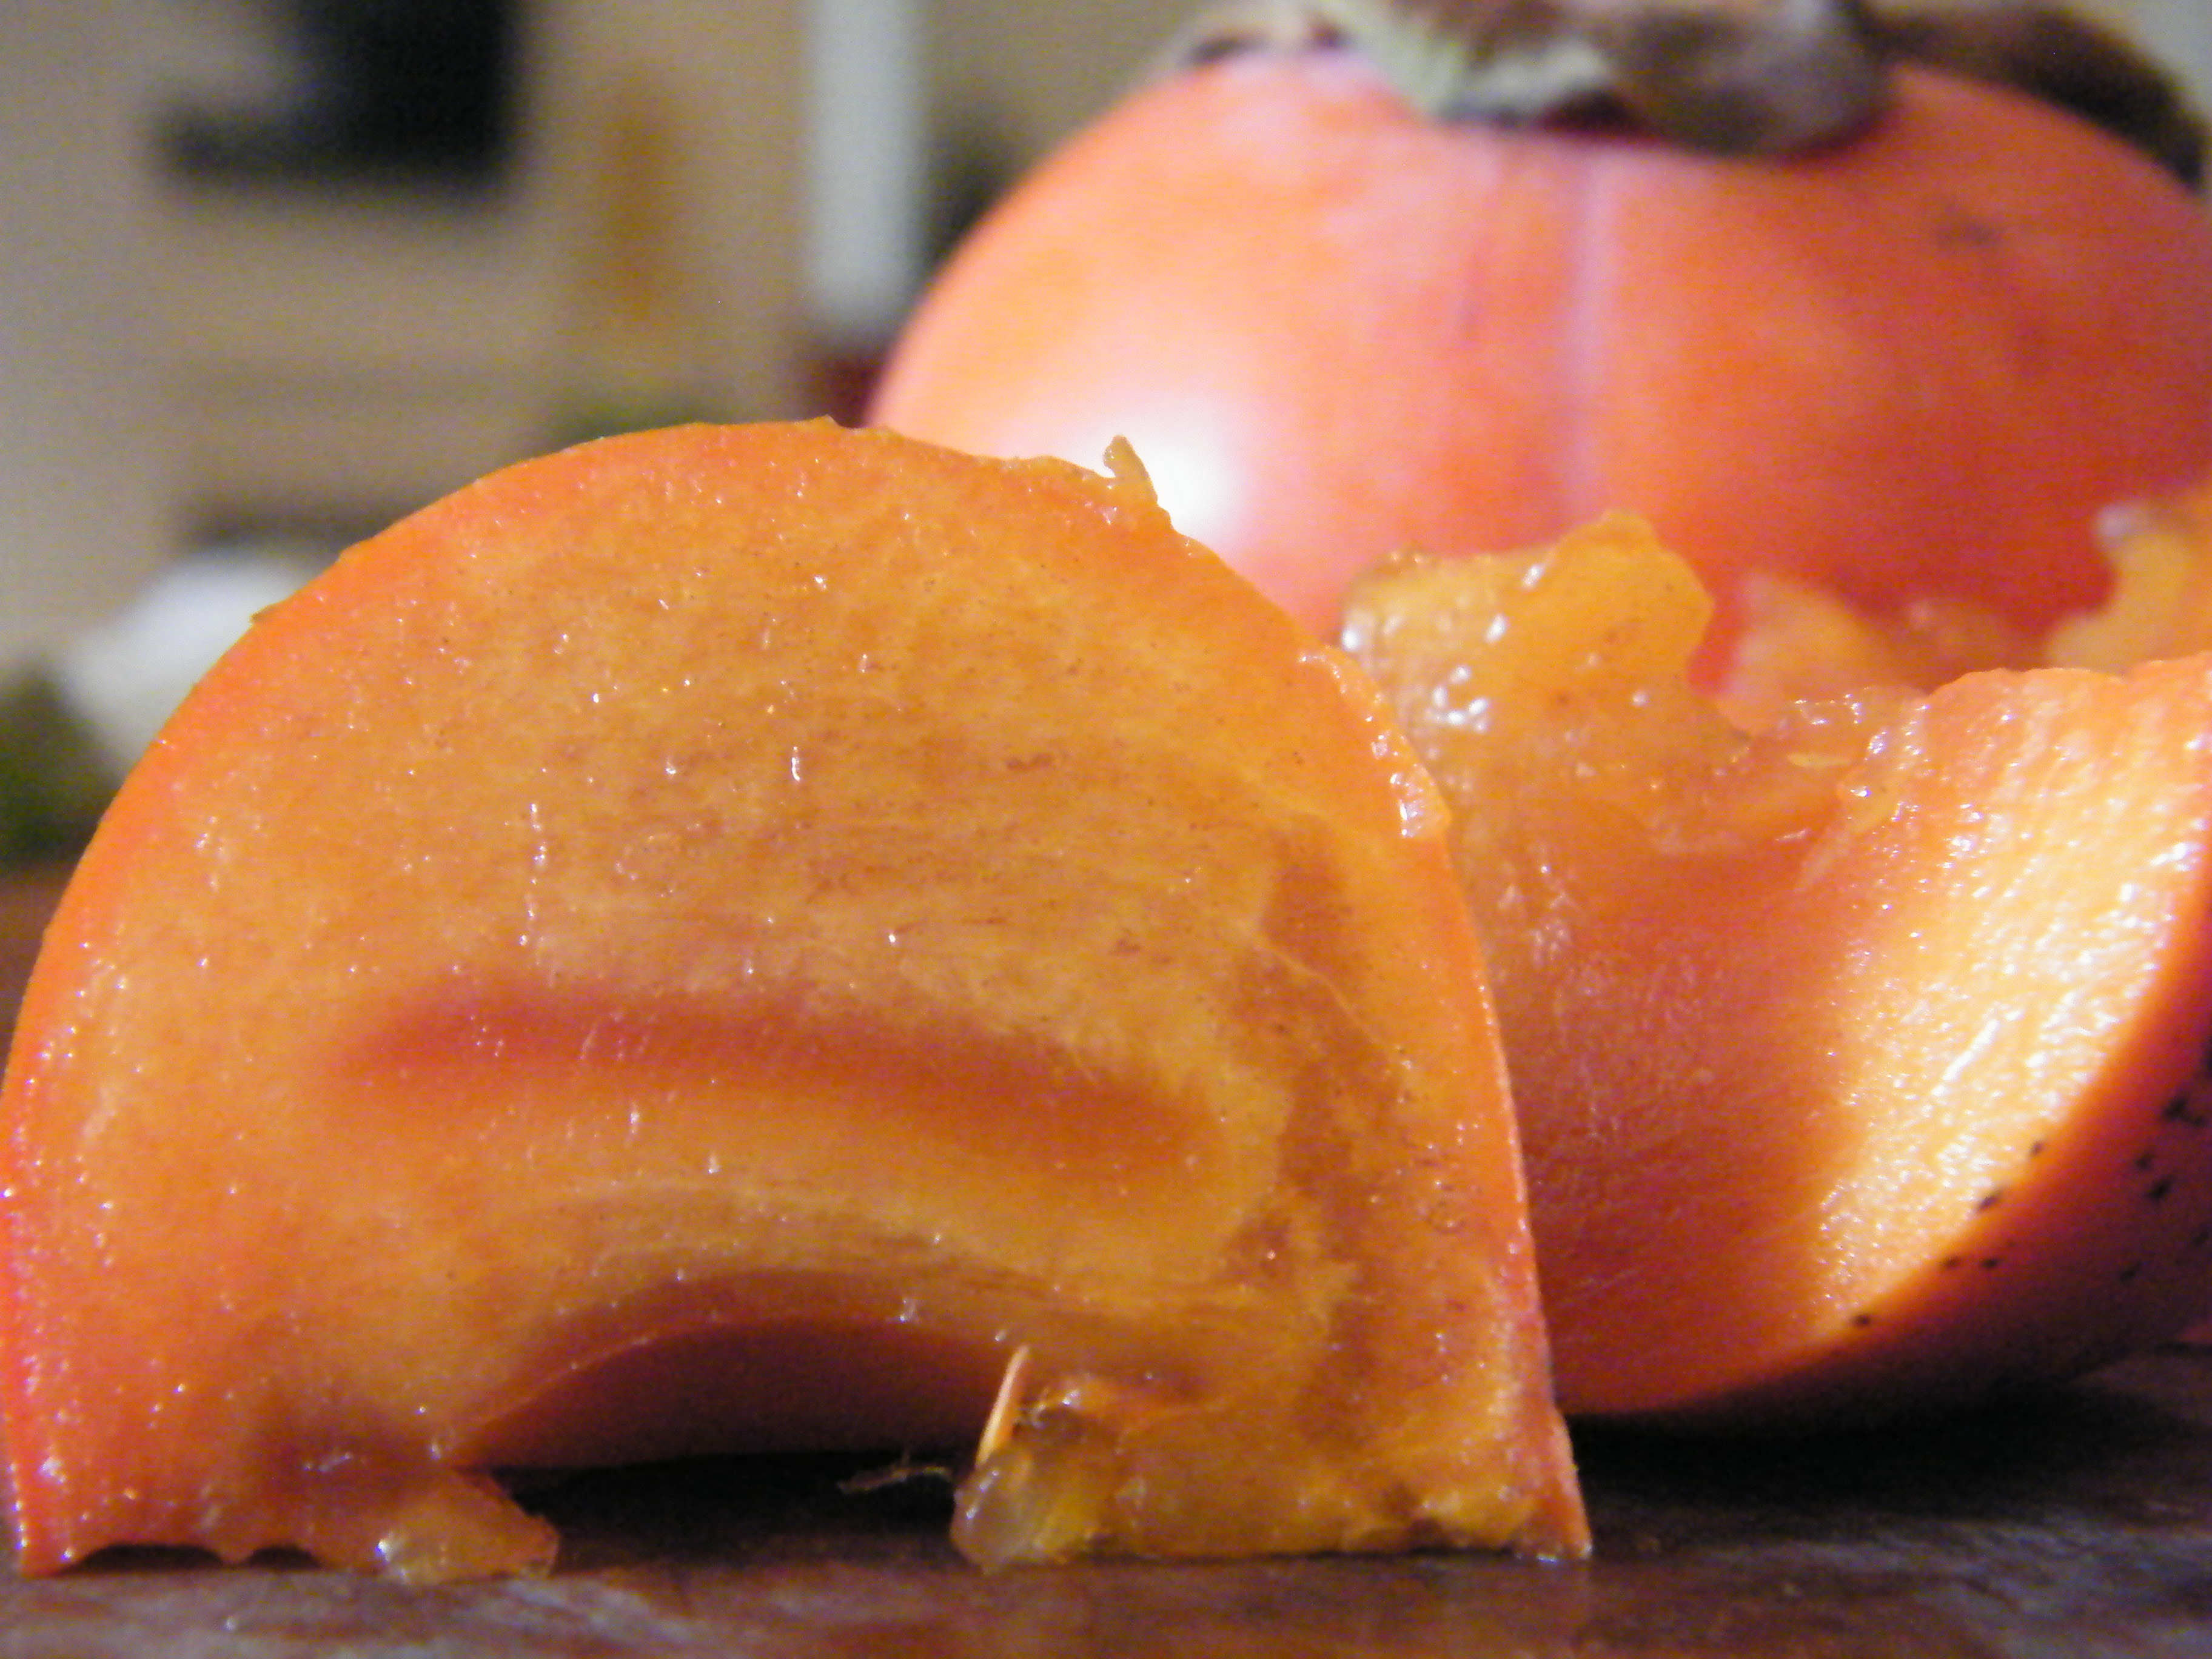
Peel?  No, but you do want to chop off the leaves on top, and if you plan on cooking them, they’re often peeled for texture reasons.
Edible seed? No.  There will be 6 to 8, but they’re pretty big so you can pick them out easily.
Edible when raw?  Yes, though Hachiyas are more often cooked.
Worth the price of organic?  Unclear.  They’re not common enough in the U.S. to make some of the standard Dirty Dozen lists in any capacity – since apples are #1 on the list and other soft-skinned fruits rank in the top 20, I’d err on organic if you plan on eating the skin.  But they’re notably disease and pest-resistant for gardeners, so it’s quite likely that even conventional ones don’t go too heavy on the sprays.
In season: October through February.
Best with: cinnamon, ginger, nutmeg, cardamom, black pepper (warm spices); apple, pear, orange; cream in puddings, panna cottas and cheesecakes
How to Store:  On the counter until ripe, in a paper bag to speed up ripening.  Once ripe, Fuyus can go in the fridge for up to a couple of weeks; Hachiyas can go in the fridge for a few days.

Share this:

  • Facebook
  • Pinterest
  • Twitter
  • Tumblr
  • Reddit
  • More
  • Email
  • Pocket
  • Print

Like this:

Like Loading...

Haricots Verts, Golden Wax and Other Sorta Green Beans

21 Sunday Oct 2012

Posted by strangeandyummy in Beans and Peas, Fall, Green, Miscellany, Purple, Summer, Yellow

≈ 3 Comments

Tags

beans, earthy, green, haricots verts, long, purple, raw, snap, string, thin, wax beans, yellow

I used to hate green beans as a kid.  Frankly, in most cases, I still do.  I don’t blame my mom for this – she bought high-quality frozen green beans as I recall – but to be honest?  They taste like vegetables.  Like the vegetables of kids’ tear-induced tantrums – a little sharp, a little bitter, and very, very green.  And they squeak.  Seriously.  Some people actually know them as squeaky beans.  And God forbid, in my opinion, you buy them canned.  Add to the squeaky bitterness a metallic aftertaste, and it’s like eating medical equipment.

I discovered 2 problems with my green bean past.  1) I was eating the wrong kinds, and 2) I was cooking them wrong.  Most of the time, if you buy something labeled green beans, it’s probably Kentucky Wonder or Blue Lake – a relatively fat, fleshy bean with a succulent pod surrounding thin, tiny seeds.  I’m sure plenty of people like the somewhat meaty, earthy flavor, especially when smothered in cream of mushroom soup and fried onions, but I am not one of those people.  I am, however, something of a Francophile, so I’m pretty sure many of those same green bean loving people think I’m merely being pretentious by saying that I hate green beans but I love Haricots Verts.  Which, yes, translates to “green beans,” I know.

But Haricots Verts are a different breed entirely from the fleshy cut variety that taints many a side dish.  For one thing, they don’t have to be green.  They come in purple and yellow and speckled and all sorts of beautiful colors.  Haricots Verts and their slender brethren are thin, dainty, unimposing in their somewhat parched state.  They crisp easily or soften and blend in with the crowd when necessary while still maintaining a wee bit of vegatative flavor.  They’re milder than their heartier cousins.  They still squeak, but I like to imagine more of a dainty accident than the bold mouse-like squeak of their friends.

As for eating them wrong, every blog and recipe I can recall commands steaming, blanching, boiling or microwaving.  And to that I respond: bleh!  It’s a good way to release some vitamins, sure, and to soften them up, of course, because they can get a bit stringy or a bit of a chewy-wood thing going on when they’re not cooked enough.  Sure.  But…bleh.  What a way to make them taste like earthy, mineral-y mush.  Nope, the trick I discovered?  Burn them.  Burn them all.  (And if you’re not picturing a creepy Donald Sutherland in Backdraft right now, you don’t watch nearly as many movies as I do, and also, I envy your uncluttered brain.)

I don’t like burnt food.  I scrape burnt toast, pick around burned roasts, hell, I throw out burned cookies and if you know me that’s practically a hangin’ crime for all the rules it violates, but green beans, as far as I can recall, are my one exception.  Get a little burn on them and all that metallic minerality takes on hints of something akin to a savory caramel, the last wee traces of succulence get dessicated into crispness, and you’re left with something sharp and sweet and so tasty we always end up eating all the green beans before we even touch the main.

When buying haricots verts and their friends, look for fleshy, bright beans that snap easily.  They shrivel and get tough and bendy as they dry out and get older, and as much as I like them drier, you want to do the drying, in the pan, not nature on the vine.  Any variety that’s young and slim will do (have I lived in Hollywood too long?) but I like ones labeled Haricot Verts,  Haricots Jaune (the thin yellow ones at the top), Golden Wax for something a bit fleshier (the ones in the red bowl), or these Purple Queens for Halloween – they look almost black.  All of them, really, are varieties of filet beans, so you can look for those, too.  Snip off the ends with the stem still attached, and burn away.

Burnt Green Beans

Any color Green beans
olive oil
Herbes de Provence (or at least Rosemary)
garlic cloves
sherry (optional)
goat cheese (optional)
sea salt

Heat enough olive oil in to lightly cover the bottom of a pan, preferably cast iron (you want a pan that will get nice and hot, and that’s not a brand new non-stick – the non-stick doesn’t give a great burn, though it’s serviceable if that’s all you’ve got).  Toss the green beans into the pan, and let them sit.  This is the hard part.  DON’T TURN THEM, toss them, or otherwise touch them.  Make something else, do the dishes, whatever, until they start to get a little burn on the bottoms.  (If your beans are on the fleshier side, you may want to add a healthy dose of sherry here to steam them open a little, then let them burn afterwards.)  Toss/flip and let them start to get a little burn on the other side – you don’t want them burnt beyond recognition, but you want some blistering/black color going on.  Chop the garlic (I like 2 cloves, but one will do.)  Sprinkle liberally with herbes de provence and stir.  Add the garlic and cook very briefly, until you can smell it, maybe 1 minute tops.   Put on a plate and sprinkle well with sea salt.  If you like goat cheese, mix some in just before you remove from heat – they’re AMAZING with goat cheese, but just as nice on their own if you’re not the dairy type.  Added bonus?   They don’t work well if you fuss over them, so screaming babies, rambunctious toddlers, and a big, balloon glass of wine can all be addressed while your green beans get nice and crispy.  THAT’S the kind of side dish I like.

Trim? Yes.  Snip off the stem end.  If they’re larger or fleshier, you may want to peel the string down the side as well, but younger specimens don’t need it.
Edible when raw?  Yes.
Worth the price of organic? Yes.  Green beans don’t make the Dirty Dozen, but they make the Dirty Twenty, and that’s enough chemicals for me, thanks.
Best with:  Stronger flavors – goat cheese, lemon/citrus, garlic, ginger, vinegars.  Woodsy flavors  like rosemary, sage, thyme and mushrooms complement nicely.  They hold up well as a side dish from everything to the lightest sole to the meatiest steak, so there are really no holds barred.
In Season:  Summer, though in warm-season climes like here in L.A, that actually means Late Spring and Early Fall, since the hot months are too hot for the vines to flower.
How to Store: In the fridge, in a produce box or loosely sealed plastic bag, they should keep for a few days.  If they start to get bendy or a little shriveled, they’ll still taste fine if you crisp-cook them as above; if you can see bean seeds outline through the tight, shriveled skin, they’ve crossed the hump and are no longer very tasty.

Share this:

  • Facebook
  • Pinterest
  • Twitter
  • Tumblr
  • Reddit
  • More
  • Email
  • Pocket
  • Print

Like this:

Like Loading...

Swiss Chard (now with Sweet Potato! and of course bacon…)

16 Tuesday Oct 2012

Posted by strangeandyummy in Fall, Green, Leafy, Miscellany, Red, White, Winter, Yellow

≈ 3 Comments

Tags

bright, broad leaf, chard, dark, green, leafy, nutty, rainbow, stalk, swiss, veined, wide

There’s a lot of repetition in my recipes and posts, if you haven’t noticed already.  Greens are greens, and they all go nicely with bacon.  That’s not my fault.

Swiss chard is no exception.  Of all the bitter greens you’ll find at the market, swiss chard is the mildest and the prettiest.  Rainbow chard is the most common variety, simply because it’s so pretty.  Red, white and yellow stalks wink at you as they snake up the center of the phenomenonally large, deep green leaves.  Look for fresh looking leaves with slightly firm stalks – ignore a few rips, tears, or bug holes.  Chard leaves aren’t as hearty as something tougher like kale, so they do rip easily.  The stalks do bend a little, but they shouldn’t be bending on their own or wilting.  The leaves can range from almost purple in the red varieties to kelly green in the yellow or white, so look for those signature brightly colored veins, rhubarb-like stalks, and wide, soft leaves.

Wash well – I recommend at least 2 rinses – scrubbing the stalk with your thumb under the faucet.  They trap a lot of dirt.  

Chard is slightly sweet as greens go and a little nutty.  (I feel like I should make some sort of vaudevillian pun here.  I’ll resist the urge.)  Because it’s a little milder, it can sneak its way in to almost any recipe, though it really shines with other fall vegetables – winter squashes and pumpkins, walnuts, root vegetables.  I had planned to use this chard in a sneaky green way by slicing it up very fine, mixing with ricotta, stuffing it into giant pasta shells, covering with sauce and cheese, and baking.  But we had our very first fall day in Los Angeles last week – cold and rainy and absolutely delightful – and I wanted something far more Autumnal.  (I don’t think that word means what I think it means…  Autumn-y?  Sure.)  So instead, I made a Chard and Sweet Potato Gratin.  I made enough for the husband and I to have some for dinner, to save some for the toddler for tomorrow’s lunch, and maybe even a little leftover for my lunch.  No dice.  We ate the whole pan.  Oops.

Sweet Potato and Chard Gratin

This is not a real gratin because there’s no bechamel.  I like to think of it as lazy (wo)man’s gratin – mix ricotta with another soft cheese or a splash of whole milk and you have something not at all as rich and delicious as bechamel, but serviceable and super fast for a work night supper.

  • Sweet potatoes – I used 3 smallish/medium-sized for a 2 1/2 qt oval casserole dish, but if I’d used the giant ones in the bag I might have only used one.  You’ll have to eyeball.  And yes, botanically I think these orange ones are yams, but I call ’em like they’re labeled.
  • Swiss chard (I used 4 or 5 giant leaves)
  • Ricotta (I used about 1 cup)
  • Goat cheese (I used about 3 inches from a goat cheese log) – as above, if you don’t like goat cheese, you can sub in something else like farmer’s cheese – very mild – or just a splash of whole milk to thin it out
  • Cheddar or other melting cheese (I used about 2 oz)
  • 1-2 slices bacon (If you’re lucky enough to have a Trader Joe’s, get the bag of Ends and Pieces – a steal at something like $2.99 a pound and perfect for recipes in which you’re cutting up the bacon anyway.)
  • olive oil

Chop the bacon into bite-sized pieces and fry until almost crispy.  Preheat oven to 400.Slice the sweet potatoes into long, thin slices.  Drizzle a little olive oil on the bottom of your dish to coat.  Layer one layer of sweet potato into the dish.

Slice the chard into thin strips, discarding the bottom stalks. Layer half the chard on top of the sweet potatoes.

Place the goat cheese in a bowl in the microwave for 20-30 seconds to soften (not melt).  Mix thoroughly with ricotta.  Using about half the mixture, dollop spoonfuls on top of the chard and use the back of the spoon to spread them over the layer.

Sprinkle half the bacon on top.

Place the rest of the chard on top.  Layer another layer of sweet potatoes to cover.  Spread the remainder of the ricotta mixture on the sweet potatoes.  Sprinkle with the remaining bacon.  Grate the cheese or break into chunks and disperse over top to cover up any “holes.”  Bake at 400 until sweet potatoes are soft when stabbed with a fork and cheese is melted, about 20 minutes.

ugly but delicious!

For Chard:
Trim? Yes, at the bottom of the stalk where it gets tough and splintered, though some people lose the whole portion below the leaves as well.
Edible when raw?  Yes, when young.  It’s very chewy, however, so if you get large/older leaves, definitely cook the stalks, and probably the leaves as well.
Worth the price of organic? Yes.  Greens are generally considered high on the Organic Preferred list.
In season: Fall, Winter.
Best with: Fall foods – winter squashes, pumpkin, squash, sweet potato, even apples and dried fruit like raisins.  Walnuts, pecans, bacon or sausage for protein – earthy, smokier flavors do well.  Garlic, carmelized onions, goat cheese – sweeter flavors complement the greens’ slight sweetness.
How to Store: Like other greens, wash in warm water, give them a cold bath, and store in the fridge for a few days or possibly as long as a week, though that’s pushing it.

Share this:

  • Facebook
  • Pinterest
  • Twitter
  • Tumblr
  • Reddit
  • More
  • Email
  • Pocket
  • Print

Like this:

Like Loading...

Tromboncino Rampicante

11 Tuesday Sep 2012

Posted by strangeandyummy in Green, Squashes, Summer, Vegetables, White, Yellow

≈ 9 Comments

Tags

green, mealy, mild, nutty, rampicante, smooth, striped, summer squash, tromboncino, yellow, zucchini

Sorry it’s taken me so long to post; I was busy giving birth to this:

Which leaves little time for farmer’s marketing and even less time for cooking and blogging.  But how do you NOT buy this when you see it at the market?

Especially if you like zucchini, which I do.  I’m a little annoyed at the Summer Squash selection this year, frankly – everyone’s got a blog post about what to do with all that zucchini that is so clearly taking over your garden that you need to make it into breads, fritters, cakes, casseroles, and other creative, delicious-sounding recipes, and here I am, zucchini-less.  My garden won’t grow (probably because I forget to water it), and none of the sellers at the market seem so flush with zucchini that they’re marking down the prices into the ridiculously-cheap category, which means if I buy zucchini, I’m buying it to use for its sweet, squashy self, not to use it up.

Which I guess is a gigantic tangent to: How I Found a New Yummy Zucchini.  Usually called Tromboncino Zucchini or Zucchetta Rampicante, it’s also sometimes just called Squash with some horribly misspelled version of one of those names in parentheses on the farmer’s handwritten sign.

Summer squashes have far more variety in flavor than one might expect, given that they’re always lumped into that same massive category.  There’s crookneck and zucchini and patty pan and little stripey ones that the husband and I like to refer to as hand grenades…  Rampicante is slightly sweet and slightly nutty.  It’s most similar to zucchini in flavor, but a little nuttier.  I don’t think it’s as mealy as crookneck, but sources differ on how to avoid the mealies with this guy: some say that the young ones start out quite mealy, others say that the younger/smaller fruits will always be the sweeter and more flavorful, so if you’re worried about mealiness, go with one of those.  How to tell?  They turn into a trombone as they grow, so shorter, straighter squash are what you would look for, though it’s possible to grow them straighter by trellising them, so again, look for short if you’re looking for young.  This sucker is pretty full-grown, maybe 2 or 3 feet long if you stretched him out.  Personally, I think the problem is steaming at any size.  People are constantly telling me to steam squash because it’s so healthful that way, but to me, it tastes like mealy baby food.  Not a fan of any kind of steamed squash, frankly.

They have a very pale green skin, sometimes almost pale yellow or tan, sometimes so light they look almost white.  They tend to have varied faint white stripes like some zucchini varieties as well.  The really nice thing about this variety is that all the seeds form in the bulbous part at the end, the way seeds all collect in the center of hard squash.  That means you’ve got this whole long length of stem with no seeds.  It’s drier and firmer than zucchini, though the pores near the skin do weep when you cut it, but I imagine if you wanted to make something akin to Rampicante Parmesan or Fried Zucchini (dredging in flour and deep frying) it would probably be excellent for that since it is drier than its cousin who can sometimes get mushy.  The skin is edible as well – a bit tougher than zucchini skin, but nowhere near winter squash toughness or even delicata squash or something in which people tell you the skin is edible but the texture’s tough and awful…   All this means that Rampicante are really, really easy to work with, so you get a lot of bang for your buck.  Which is nice, because I’ve only seen one or two sellers with them ever, which means they’re twice the price of other summer squash per pound.  C’est la vie for the experimental veggie eater.

Actually, that’s the weird part about Tromboncino – pluck it early, and you have got a summer squash that’s basically edible from end to end minus the seeds.   Let it grow big and keep it around, and the skin will grow tough like winter squash, so it stores well.  If you’re worried about your personal fruit having too tough a skin, go ahead and peel it.  I’ve only bought it as a summer squash; the online consensus seems to be that as it matures into a winter squash, the texture gets stringier, more watery, and less flavorful, much like the interior of a carving pumpkin, so I think I’ll stick with the summer harvest for now.

Like I said with the zucchini this year, I’m not wasting this puppy on “use it up” recipes, but you don’t need to.  Zucchini is often easy to julienne or similar because of its straight shape; rampicante is easier to slice into rounds.  If you have a food processor, chop the neck into straighter sections before putting through the slicing blade and you’ll have a gagillion Rampicante rounds in no time.  If you put the bent part in, you’ll have long slices instead.

I like to saute in olive oil and garlic and toss into practically any dish – it does take a bit to cook through to the center if you slice too thick, so try to keep them just a cm or 2 in width if you’re slicing by hand.  Half-inch rounds are just too big.  They’re also nice tossed with olive oil and salt and roasted on 400 or 450 like beet chips until crisp, or crisp-ish really.  They’re a great alternative to potato chips or some other horrible for you snack.

As for the bulb, scoop out the seeds, and chop the rest up any way you like.  Again, I always prefer sauteed in a little olive oil or roasted over steamed, but if you feel like trying it steamed, steam the bulb end since your pieces won’t be uniform in shape.  Hmm…maybe a mashed Rampicante?  Like mashed potatoes, but more summery?  I may learn to like steamed squash after all…

Rampicante with Sausage, Beet Greens and Goat Cheese

  • Rampicante Zucchini
  • Beet greens, stalks removed and greens sliced or torn into bite-sized pieces
  • Sausage, chopped into bite-size pieces (I prefer sweet Italian Chicken Sausage from Trader Joe’s)
  • Pasta (I like spaghetti in this recipe)
  • olive oil
  • goat cheese

Notes: There are no measurements because it really is to taste and depends on the number of people being served.  Half a trombone zucchini served 2 hungry adults and a toddler; likewise half a bunch of beet greens, but we’re veggie-happy and everything depends on how big a bunch you get.  For the sausage, my lazy strategy is to simply hold the sausage over the pan and use kitchen shears to lop of pieces – no cutting board to disinfect afterwards!  Same thing with the goat cheese:  I buy it in a log and just use a fork to hack off chunks right onto the plate.

Slice your rampicante however you like and remove the lower stalks from your beet greens, chopping them into 1/2 to 1-inch size pieces.  Saute in olive oil until everything starts to soften, then add sausage.  Cook until sausage is brown and slightly crispy – don’t stir too often or the sausage and rampicante won’t crisp up.  This is very much a “leave it alone, I have dishes to do and a toddler to wrangle while dinner cooks” kind of meal.

While these are cooking, boil water and start the pasta cooking – this goes nicely with any carb accompaniment, frankly, so cous cous, brown rice, barley, polenta, or anything else you fancy makes a fine substitute for noodles.

When the sausage is almost done, throw in the green parts of the beet greens – they cook fast, so now is the time to start stirring, adding a bit more olive oil if everything’s looking too dry.  When the greens wilt, toss the pasta in the pan and stir everything together (added benefit: if you mis-timed your carb cooking or are using up leftovers, here is where everything gets to be the same temperature, so feel free to use last night’s leftover Chinese food takeout rice straight from the fridge.)  If you’re watching your calories or using up leftovers, add a splash of water instead of the extra oil above – the hot pasta water is great for adding a little thickener.

Pour into serving bowl and add chunks/crumbled goat cheese on top – feel free to toss to distribute, but it will lessen the final appearance as the melted goat cheese deliciously though unattractively slimes every strand of pasta. 

Peel?  If it’s young or small or you buy it mid-summer, no.  If you’re buying in fall and it’s a big, old fruit, or if you just think it’s going to be too tough for your tastes, yes.  This squash serves both seasons of squash descriptors.
Edible seed? No.  Scoop them out and toss them.
Edible when raw? Yes, if it’s young, though I would probably only eat the neck of the squash raw since the bulb gets more winter squash-like, and I would shred, grate, or julienne – I’m not a huge fan of raw summer squash in the first place, and this variety is a bit tougher than some of his friends, so I don’t know that giant raw hunks of it would be the way to go.
Worth the price of organic? Questionable, but probably not.  Summer squash in general isn’t a horrible pesticide keeper, and winter squash is one of the least offensive conventional vegetables you can buy.  Rampicante is known among squash gardeners as being surprisingly resistant to many bugs that plague other squashes, so it means it probably isn’t getting sprayed down even as heavily as other squashes.  Since it’s so rare at the markets at this point anyway, I probably wouldn’t sweat it and would just buy whatever they have, especially if you plan on peeling.  If you’re going to eat it skin and all, you may want to take the monetary plunge, but I don’t bother with this guy, and I’m pretty picky about organic when I have the chance.
In season: Mid-late summer through Fall – Earlier in the season, treat like a summer squash; later in the season, peel and treat like a winter squash.
Best with: Garlic, basil, oregano; Italian cheeses (parmesan, ricotta, mozarella…); cinnamon and sage for savory soups; lemon or orange for splash of citrus; tomatoes and other complimentary summer vegetables like eggplant
How to Store: In the fridge when fresh, it should last a good week or longer.  Once cut, the pores begin to weep and it begins to dry out, so use it up within a couple of days at most.  You can wrap it in plastic or foil if you like; just don’t shove it into the fridge with the cut part exposed because it will leak sappy moisture onto your shelves or other food…Not that I’ve done that.  As winter squash, it can keep uncut in a cool place for as long as a couple of months, but it should be hard-skinned first.  If it’s still too young, it will just rot.

Share this:

  • Facebook
  • Pinterest
  • Twitter
  • Tumblr
  • Reddit
  • More
  • Email
  • Pocket
  • Print

Like this:

Like Loading...

Heirloom Tomatoes

03 Tuesday Jul 2012

Posted by strangeandyummy in Fruit, Green, Orange, Purple, Red, Summer, Vegetables, Yellow

≈ 3 Comments

Tags

heirloom, juicy, lobed, raw, round, soft, striped, tomato

Okay, I overbought on the tomatoes.

But you can’t blame me.  It all started last summer…we overslept one Sunday and raced to the market to try and get there before everyone packed up, which I highly recommend, by the way, if you’re looking for deals.  No one wants to cart crates of perishables back to the farm, so everyone slashes their prices.  Pickings can be slim, but they’ll also be cheap.

Which is how we found ourselves with a GIANT box of heirloom tomatoes for $10.  It probably weighed 20 lbs, maybe more.  It was awesome.  We couldn’t figure out what to do with them – we ate caprese salads and avocado salads and made fresh tomato sauces and fresh tomato soup and ate them raw and sliced for breakfast.  We were so worried they’d go bad that we stuffed them into every meal and somehow managed to finish them off by Saturday.

So the next Sunday we went back for more.  Imagine our shock and chagrin when we casually asked, “Hey, could we get one of those boxes like last week?” and the guy said, “Sure, that’ll be $40.”  Um, what?  Um, no.

Except we couldn’t stop thinking about them.  It’s been almost a year and I can still taste the sweet juice that dribbled all over my hands when I transferred the wedges to a plate, the sharp tang of balsamic and the creamy counterbalance of fresh buffalo mozarella, the aroma of garlic and lemon bubbling in the sauce.  See, once you’ve had fresh tomatoes, and I mean really fresh, I mean ripened by the summer sun and then hours later popped into your mouth, you become very, very spoiled.  I can’t eat grocery store tomatoes anymore.  I can barely eat homegrown Romas or Beefsteaks or any of the other standard-variety-bred-for-toughness-and-shipping varieties.  They taste mealy and bland and chemical-y.  They taste like what I always thought tomatoes tasted like, which is why I swore I must be allergic to them and literally THREW UP when my mom made me eat one as a child.  (Did I mention I was an actress in an earlier life?  Majored in Theater?  A bit melodramatic?  Oh, I didn’t?  Ah.)

So we’ve been tomato-free in our home since last fall.  Oh, we’ve probably cheated once or twice, picked one up for a certain something and been so horribly disappointed we don’t even remember it, but our salads are just greens and dressing these days, twiddling our tomato thumbs and waiting impatiently for the heat that will bring the heirlooms back to market.

So when we went to the market 3 weeks ago and a handful of farmers had them for sale, it was Veggie Christmas [Except when you taste these, you realize why they’re botanically a fruit.  They’re so sweet, they’re practically dessert.  Seriously.  I drizzled fig balsamic vinegar on one and it was too sweet to eat with the meal.  We had to save it for after dinner and have it with tea.]  Determined not to make last year’s Giant Box mistake and overspend, we bought a modest 3 happy fellows and took them home – where we promptly devoured them in about 12 hours.

So this week, when we were a little later to market and one seller slashed their prices by only 50 cents, we dove in.  They’re WAY too expensive, they really are.  Typical prices are $4/lb, and I’m not even sure that’s for organic.  $3/lb is considered a bargain.  But they’re so delicious and unusual and beautiful and you can just put them on anything – you can slice firmer ones or dice ripe ones for bruschetta or mush soft ones into sauce.  They can go in cold things like sandwiches or accidentally get warm like when you dice one on top of an omelette, or get really purposefully hot in ratatouille or soup, and there they’ll still be, sweet and bright and just a wee bit sour.  The really good ones, the heirlooms, the weird varieties, don’t hold up well.  They barely travel well from market to house, much less farm to store, so even heirlooms at the grocery aren’t the same as the ones you can get from the farmer, or grow yourself.  Look for firm but not hard.  A little give is okay; anything soft will turn within a day so eat it immediately.  They do get mealy as they over-ripen, but toss it into a sauce with half a good one to save the flavor and you’ll never notice.  Heirlooms come in every color and size imaginable – from teeny tiny to the size of a shrunken head, round and oblong and lobed and flattish,  in orange and yellow and  red (of course) and striped and purple to almost black and even ones that are still pretty green when ripe, so experiment and see which kinds you like the best – though I did ask a farmer this week and was informed that even green tomatoes should get a yellowish tinge as they ripen.  If it’s still completely green, even with green stripes, it’s not ready.  I like the orangey-yellows, the purples, and the deep reds myself.  Not sure what their names are, but since I’ve only got a few months to eat them, I’m not wasting any more time trying to figure it out.

The best way to eat heirlooms?  Simply.  A drizzle of olive oil, a shake of sea salt, and dive in.  But if you need stuff to go with them, keep everything nice and raw to really let the sweetness shine:

Caprese Salad: alternate slices of tomato, fresh mozarella (the kind that comes in a tub with water – preferably buffalo if you want to splurge, but cow’s milk tastes just dandy, too), and fresh basil leaves.  Drizzle with good quality olive oil, balsamic vinegar, and sprinkle lightly with salt.

Avocado-Tomato Salad: Chop avocado and tomato wedges into similar-sized chunks.  Toss with garlic powder and a dash of salt.  If the tomato is slightly underripe, you may want to add a teeny amount of olive oil or lime juice to get a little juiciness going, but I usually don’t.

Bruschetta:  Dice tomato and as many cloves of garlic as you can stand and mix with olive oil, salt and pepper.  Use more oil than you think you need – it shouldn’t be swimming in it, but all the oil shouldn’t get soaked up by the tomato either.  Let sit for up to a few hours – the longer it sits, the more the garlic will infuse the oil and mellow out, but we often don’t let it sit more than the two minutes it takes to toast the bread.  Lightly toast really nice sliced bread – go artisan here; skip the sandwich bread.  Top the bread with the tomato mixture, spooning the remaining oil in the bowl on to the bare parts of the bread.

Slightly-healthier alternative to above bruschetta: skip the olive oil mix.  Spread good bread with ricotta and top with diced tomatoes, garlic powder, and a dash of salt.  Add sliced olives if you want a little kick.

I could seriously go on and on.  Feel free to post your favorites below!  I’m sure this topic is going to come up again.  A lot.

Peel?  No.  I don’t even peel if I’m making them into a sauce – the skin is thinner than grocery store tomatoes bred for shipping, and I don’t mind it.
Edible seed? Yes.  I don’t like a ton of seeds or my concoctions to be too acidic, so if some of the insides leak out on to the cutting board, I don’t mind; some people strain the seeds, especially in a sauce, for texture purposes, so feel free to strain if you like.
Edible when raw?  Heirlooms are best raw, in my opinion, unless you have a ton you need to use up – then go for a same day sauce, not one you’re going to jar and freeze.
Worth the price of organic?  Questionable.  Tomato leaves are poisonous to a lot of animals (humans included) so tomatoes can survive pretty well on their own, and are pretty low on the list for foods that absorb pesticides like the dickens – they used to be high, but recent efforts have lowered their residue.  On the other hand, you’re eating the whole thing, skin and all, so it might be a good idea.  The good news?  Heirlooms are still considered something of a specialty item, so most sellers are organic anyway.  Hence the high price.
In season: Summer.
Best with: Garlic, balsamic, lemon, any kind of cheese but soft cheeses really let the complex flavor of the heirloom shine, almost any savory herb (basil, rosemary, oregano are all classics), zucchini, eggplant
How to Store:  On the counter.  Do NOT refrigerate!  Tomatoes leach out their vitamins in the refrigerator and lose their flavor.  Don’t cut into a huge tomato if you’re only going to use half, if you can help it – find something to put it in or have a few extra slices than you intended.  Ripe tomatoes that aren’t yet soft will keep up to a week; if they’ve got a soft spot, you’ve only got about 2 days max, so use it or lose it.

Share this:

  • Facebook
  • Pinterest
  • Twitter
  • Tumblr
  • Reddit
  • More
  • Email
  • Pocket
  • Print

Like this:

Like Loading...

Golden Beets

01 Sunday Jul 2012

Posted by strangeandyummy in Fall, Orange, Roots and Tubers, Spring, Summer, Winter, Yellow

≈ 15 Comments

Tags

beet, golden beets, hairy, nutty, root, round, sweet

I’ll admit it.  After years of trying, I still can’t get totally into beets.  The first time I had them was borscht, i.e., cold beet liquid mush, the second time I had them was pickled from a jar, and after getting so nauseated from the smell that I had to not just leave the kitchen but the HOUSE to get some air, I was a sworn beet hater.

Beets are, shall we say, an acquired taste.  Imagine, if you will, a clod of dirt that someone has dripped peach juice on.  Take a bite.  That’s a beet.

Now the beet lovers out there are going to protest and call them “earthy” and tell me I should roast them, and they’re right.  Roasted beets do become an entirely different thing, sliced into chips and baked at high heat they’re actually better than potato chips (I swear!), but you still have the problem of looking like Lady Macbeth after peeling them and not allowing your toddler to touch them even though they’re FANTASTIC for him because you know you’ll never get the stains out of ANYTHING.

And then I discovered golden beets.  Like massive golden jewels radiating sunshine among the stalls, golden beets solve all the problems of red beets and taste even better.  The flavor is milder, for starters – they’re slightly earthy, but they have a nuttiness to them reminiscent of walnuts, and a mild sweetness like the smell of apples or apricots.  They’re absolutely gorgeous – slice them and they look like orbs of sunlight; halve them and their whitish veins shimmer out like rivers in a golden meadow; wedge them and they look like yellow sapphires just mined from the earth.

The smaller, the sweeter, as with most root vegetables, but golden beets will stay pretty sweet even in softball size, so the rule isn’t as applicable here.  Give them a good scrub and remove all the root hairs.  If they’re quite young and the skin is quite thin, it’s not absolutely necessary to peel them, but the skin toughens up as they get older (ain’t that the truth!), and even the young ones usually have some rough stuff near the stem, so peeling is usually required to some degree.  Basically, I default to: Peel, and if they’re young and you’re feeling lazy, half-ass the job.  When you buy beets, they’ll always ask if you want the tops off.  Most people say yes.  Most people are crazy.  Before I came to like the beets themselves, I used to get free beet tops from the market all the time – hang around a stall for a few minutes and someone won’t want theirs.  Offer to split the cost and it’s a win-win for everyone!  More on beet greens in a different post, but if you do take them home, chop them off about an inch above the beet part before storing in the fridge – they’ll quickly wilt while they continue to feed the beet.

The two best ways to eat beets, in my opinion, really come down to the two ways to slice beets.  If they’re relatively spherical, slice them as thin as you dare (if you’re fancy-shmancy and own a mandoline, now is when you get your money’s worth) so they resemble potato chips.  If they’re funky-shaped or too small, cut them into wedges.  Either way, toss with a little olive oil and spices of your choice – if I’m making chips, I often add garlic powder to the standard salt and pepper; if I’m making wedges, whatever spices I’ll be using in the main dish, or nothing until I decide.  Chips get spread out on a cookie sheet so they don’t overlap, wedges usually go into the toaster oven because I hate to turn on the big guy for one meal, but either way, I line the sheet with aluminum first because I hate cleaning up.  (There’s a distinct theme running through my posts, I’m noticing…I mean, I knew I was lazy, but when you put it in writing repeatedly…yeesh.  In my defense, we don’t own a dishwasher.  Yeah, I don’t think that makes up for it completely either.)  Pop either cut into a 400 degree oven for about 20 minutes.

Bake until chips are crisp or wedges are soft and beginning to blister.  Toss the chips with salt while they’re hot, but they’ll taste great hot or cold.  The wedges can go with anything – side dish, pasta, cous cous.  Cool, they make a really nice addition to a salad.  My favorite dinner with beet wedges:

Spaghetti with Goat Cheese, Beets and Walnuts

  • Roast beet wedges in oven (how many completely depends on your size of beets and your size of family – I typically use about 3 smallish ones for 2 adults and a toddler)
  • While they’re cooking, boil pasta – any mild preferred carb will do here really.  I also like this with cous cous, either whole wheat or Israeli, or pearled barley, but nuttier things like brown rice, lentils, etc. will overpower.  I like spaghetti instead of shapes for the same reason – keep it thin and out of the way.
  • While the pasta water is boiling, slice the beet greens into strips.  Saute in a decent amount of olive oil with at least one clove garlic.  (Decent amount = maybe 1/2 to 1 tablespoon more than you need just to stop them from sticking.  This garlicky oil will become your sauce.)
  • Toss together the pasta, the beets, the sauteed greens and their oil, adding a splash of pasta water and/or a little more oil if the whole thing needs more moisture.  Add walnut pieces and goat cheese.  If your goat cheese comes in a log like mine, use a fork to break off big chunks into the pasta bowl; pre-crumbled works fine too, but it will disappear into the hot pasta.  I like chunks.  Add a little salt and pepper if necessary, though I usually don’t.  It’s sweet and salty and oily and probably isn’t the absolutely healthiest meal on the planet because of my excessive love of goat cheese and walnuts, but it’s chock full of vitamins and vegetarian and oh-so-pretty.

Want the lunchtime version?  Toss the roasted beets (cooled) with mixed greens (include something a bit sharp like arugula, endive, or even just baby spinach), goat cheese, and walnuts.  Drizzle with olive oil and balsamic.  Same thing, only without the evil carbs.

Peel?  Yes, especially the thicker skin.  The young, thin skin can stay on.  As long as they’re well-scrubbed and no root hairs are left, the skin is edible; it’s just not very tasty.
Edible when raw? Technically…Some raw food types grate them into obscurity or juice them in order to eat them, but I don’t recommend it.  I’ve seen them sampled at the market raw with oil and salt, but if you’re a beet newbie, I’d cook them.
Worth the price of organic?  Not sure.  If you’re eating the greens, it seems to be a good idea to keep it clean, and lettuce, spinach, kale and collards – other similar greens – are all on the “Dirty Dozen” of pesticide-absorbing foods.  But most root vegetables hide beneath the soil pretty well, especially if you’re going to peel them.  If you’re keeping the greens, I’d make the splurge.  If money is tight and/or you’re buying your beets from the grocery store so you don’t even get the option of keeping the greens, I’d probably save my cash and risk conventional.
In season: All year, though most sources say June-October.  I don’t think I’ve ever NOT seen them at the market, though I know from trying to grow them that they like a cold snap.
Best with: soft, mild cheeses to counteract their natural sweetness; nuts (especially walnuts, sunflower seeds or similar) to increase their nutty flavors; sharp or slightly bitter greens – arugula, beet greens, radish tops; almost any herb – garlic, rosemary, thyme, sage quickly come to mind, but others swear by curry, dill or any number of other favorites.  Golden beets in particular, because they’re so mild, really go nicely with almost everything.
How to Store: With greens removed, store in the crisper – leave a bit of stem on top and don’t peel until ready to use, though you can scrub before storing.  We’ve kept them as long as 2 weeks or more, but a week or less is probably a better idea.

Share this:

  • Facebook
  • Pinterest
  • Twitter
  • Tumblr
  • Reddit
  • More
  • Email
  • Pocket
  • Print

Like this:

Like Loading...

Squash Blossoms!

30 Wednesday May 2012

Posted by strangeandyummy in Fall, Flowers, Orange, Spring, Yellow

≈ 6 Comments

Tags

blossoms, delicate, flores de calabaza, flower, petals, stuffed

Squash blossoms are back!  And somewhat less importantly, so am I…

So you might not care at all what happened to me after only 4 posts, but I’ll tell you anyway because I have control of the keyboard.  It’s a tragic story for an experimental veggie-lover, filled with heartache and loss and gross things growing in the fridge…  Basically, I got knocked up. Woo-hoo!  Baby #2 on the way!  But in early January, when I had just found out that I would not be allowed to have alcohol for ALL OF SPRING AND SUMMER (the tragic part), I also got violently ill for a week.  I had just purchased the most glorious abundance of strangeness to try simply for your reading pleasure: kabocha squash and purslane and frilly mustard greens that I forget the name of and tatsoi, and the one I was most excited about, nettles – crazy stinging nettles that you need gloves to cook with and that the Irish survived the famine with and oh, it just sounded so bizarre and exciting.  I even took a picture of some of it the morning before The Sickness:

And yes, that’s my son in the corner, judging me for photographing vegetables, or possibly pre-judging me for considering serving them to him.  Cut to 1 week later when I could finally crawl out of bed, morning sickness kicking in so the only thing I wanted to eat was toast and jelly beans, and a plastic bag filled with green slime where beautiful greens used to be, and I didn’t want to touch anything new for months.  Seriously.  My veggie consumption consisted of very plain green salads, the occasional stalk of broccoli, and my beloved illustrious avocado.  I don’t think I blanched or sauteed or even chopped until the 2nd trimester.

But to come back to the blog with squash blossoms!  What a resurrection!  See, squash blossoms are pretty much the epitome of farmer’s market glory.  They’re extremely perishable and extremely fragile and have a relatively short-lived season and are hugely popular and yet no one grows them for sale, so they’re just, frankly, the elitist little goody two-shoes of the market.  You have to get to the market within an hour of opening times to even GET squash blossoms, because all the chefs buy up garbage bags worth and there’s nothing left by 10 am (did I say 10?  I meant 11:30) when we’ve finally rolled out of bed.  Don’t even try the grocery store.  They won’t have them.

Squash blossoms are just meant to be stuffed.  They have long beautiful petals that you can fold over each other and tuck under the base like a ballerina’s limbs.  They have a very delicate flavor – mildly squash-like, but not mealy or bitter.  They don’t taste of perfume like other edible flowers, either.  They just taste like pockets of Fresh.  Most recipes for squash blossoms call for stuffing with some kind of filling (soft cheese and/or shellfish-based, generally), then dipping in batter and deep frying, and to that I say, ARE YOU NUTS??  I’m not a huge fan of batter fried veggies in general, I’ll admit, but with something so delicate, the entire thing just melts in the oil and you’re basically left with deep fried filling…which now that I type it doesn’t sound so bad.  So the other reason I’m against it is, meh.  Deep frying?  What a chore!  I’m not a fan of really messy time-consuming preparations that waste a lot of an ingredient (oil in this case), so we’ve only bothered deep frying once, and it wasn’t worth the effort.  Here’s my tips and shortcuts:

You’ve got to start when they’re fresh.  And I mean REALLY fresh.  If you can’t get them at the market, grow your own.  Zucchini start by putting forth male flowers, followed by female flowers – the females will grow a zucchini from the base of the flower, so if you want zucchini, don’t pluck all the blossoms in the first flush of growth, or all the blossoms on your plant.  Apparently, the ancient Romans loved squash blossoms so much they barely even knew it grew a fruit – they only grew fruit for the seeds and didn’t eat it.  They only ate the blossoms, or so says some semi-reputable source.  Probably wikipedia.

If they’ve sat around in the heat of the morning, they’ll start to wilt – this is what happened with ours, and why there are so few pictures on this post.  When they wilt, they get thin, and even more delicate, and they rip ridiculously easily when you try to stuff them.  Save the slightly wilted and ripped for non-stuffing uses – they’re still yummy.  If they’ve sat around on the counter for a day, they’ll turn slimy.  Throw them out.  You really have 2-3 days tops from plucking if you put them in the fridge or better yet put their stems in water; otherwise, wait until next market day.

So How to Stuff:  There’s no other way to say it.  You’re going to need a suppository.  Take a half tsp of your mixture (we like goat cheese, fresh herbs- especially rosemary- and garlic, but shrimp or crab with ricotta is also extremely rich and delicious) and roll it in your palms until it’s suppository-shaped: mostly oblong and thinner at one end.  Open the blossom as carefully as you can, stuff the thin end into the base, and then squish in the fatter end.  Twist up the petal tails to close it off, or tuck them under if cheese is oozing out the sides.  Most recipes, again, will tell you to remove the pollen stamens first, but we’ve never bothered.  Most also say to destem, but I like the stems – they’re the most vegetable-tasting part of the whole thing, a very tiny, very mild zucchini flavor, and if you’re deep frying, they’re helpful to leave on for plucking the blossom out of the hot oil.

But we don’t deep fry.  We put them on a piece of aluminum foil on a toaster oven sheet and bake or broil at 400 or 425 until brown on top.  If you spray or drizzle with oil first, you can get a little crisp on them, which is divine.  And that’s it!  They’re basically attractive, labor-intensive, goat cheese receptacles at this point, but they’re oh so good.

For the wilted and ripped, put a 1/4-inch of oil in a skillet and flash fry.  Toss into a salad for a crouton-y crunch – salads meant for warm dressings, like spinach or arugula, fare the best with the addition of hot veggies, and you can use some of the leftover oil in the skillet to make a hot dressing – or, better yet, toss with pasta and whatever you would have used to stuff them with if you hadn’t been too busy to get to them the day you bought them.  You can douse them in a bit of egg before you fry to help them hold their shape.  Blossom Day 2 dinner was pasta with chopped bacon, shredded chard, goat cheese, and flash-fried squash blossoms, tossed only with rosemary-infused olive oil.  It was so good we actually fought over who got the last squash blossom.  IN A MEAL WITH BACON.  That’s pretty impressive.

Trim? Most people recommend trimming off the stem and pulling out the stamens, especially if they’re already at the pollen stage.  I don’t.  I think they taste delicious, and I’m lazy.
Edible when raw?  Yes, though pretty bland and VERY green-tasting, especially in the more succulent base.  If you’ve ever chewed on sweet grass, it’s a little like that.  Cooking preferred.
Worth the price of organic?  Yes, if you can find them.  Squash blossoms appear for harvest before the more popular fruit, which means they appear at the stage in which even farmers who try to reduce pesticide use are probably doing one last pre-fruit spray.  As a result, though, only really die-hard organic farmers are going to have organic squash blossoms, and they’ll cost you – they’re often used as bait to trap/lure bugs away from the zucchini themselves, so the blossoms get eaten to shreds by nature.
In season: Early summer, and sometimes mid or late fall, a very brief window.  If you see them, nab them.
Best with: Soft cheeses (especially goat), shellfish, fresh herbs (rosemary, garlic, cilantro in particular), avocado.
How to Store: They don’t store well.  A note: don’t wash them.  They’ll rot quite quickly.  Brush out bugs with your fingers or a paper towel, and if they stems are long enough, place in a glass of water like you would any cut flower.  Store in the fridge until they start to wilt, maximum 2-3 days.  If the stems are short for water, a paper bag is best, but it makes little difference.  You should eat them before the packaging has a chance to matter.

Share this:

  • Facebook
  • Pinterest
  • Twitter
  • Tumblr
  • Reddit
  • More
  • Email
  • Pocket
  • Print

Like this:

Like Loading...

Welcome!

  • About
  • Contact
  • Sites I Like

Recent Posts

  • With Every Beet of My Heart
  • Teeny Tiny Prune Plums
  • You Can’t Go Wrong with a Name Like Candy Roaster
  • Figs in a Blanket
  • Fava Beans, and the Spring-iest Salad that Ever Was Sprung

Categories

Browse By Color or Season

  • Spring
  • Summer
  • Fall
  • Winter
  • Red
  • Orange
  • Yellow
  • Green
  • Blue
  • Purple
  • White
  • Brown
  • Black

What Is That and How Do I Eat It?

What Is That and How Do I Eat It?

Archives

  • February 2016
  • January 2015
  • June 2013
  • May 2013
  • March 2013
  • October 2012
  • September 2012
  • July 2012
  • June 2012
  • May 2012
  • January 2012

Meta

  • Register
  • Log in
  • Entries feed
  • Comments feed
  • WordPress.com

Blog at WordPress.com.

Privacy & Cookies: This site uses cookies. By continuing to use this website, you agree to their use.
To find out more, including how to control cookies, see here: Cookie Policy
  • Follow Following
    • What is That and How Do I Eat It?
    • Join 31 other followers
    • Already have a WordPress.com account? Log in now.
    • What is That and How Do I Eat It?
    • Customize
    • Follow Following
    • Sign up
    • Log in
    • Report this content
    • View site in Reader
    • Manage subscriptions
    • Collapse this bar
 

Loading Comments...
 

    %d bloggers like this: