• Spring
  • Summer
  • Fall
  • Winter
  • Red
  • Orange
  • Yellow
  • Green
  • Blue
  • Purple
  • White
  • Brown
  • Black

What is That and How Do I Eat It?

~ strangeandyummy farmer's market finds

Tag Archives: mild

Fava Beans, and the Spring-iest Salad that Ever Was Sprung

11 Saturday May 2013

Posted by strangeandyummy in Beans and Peas, Green, Spring, Vegetables

≈ 4 Comments

Tags

broad beans, buttery, earthy, fava beans, fave, green, legume, mild, nutty, pod, raw

Poor fava beans.  Besmirched by Hannibal Lecter, neglected by most Americans, their fat, lumpy pods looking like just a whole lot of bother.

fava bean podsDon’t get me wrong, favas are a bit of pain in the heinie. (Fun Fact: also spelled hiney!  But not heiny, as I originally thought.  Thanks, dictionary.com!)  As anyone who has read, oh, even one of my posts can attest to, I’m a lazy cook.  I don’t like peeling, trimming, turning, shelling, or barely even washing.  I eat the parts most people toss and if it can all quickly go into one pan, preferably with bacon, and just get stirred around until it looks done, I’m happy.

Not so with favas.

broad beansFava beans (also known as faba beans, fave, broad beans, English beans, horse beans, pigeon beans, field beans – I’m getting the sense that these suckers have been around a while, yes?) take a comparatively whole lotta work.  They’re protected from the elements by not just one but TWO casings – the outer pod and an inner soft shell – and you have to shuck both before you can eat them.  Don’t, ahem, assume other bloggers and cookbooks are being fancy pants and take a bite of the de-podded but still white-shelled bean.  It’s nasty.  Not that I did that.

But the good news is that the whole double-shucking process isn’t nearly as time-consuming as it reads.  The beans pop out of the pods pretty easily, and with a good blanching the worst part of the de-shelling is a bit of vegetation under your nails – which might not even be true if you blanch properly.  fave in shellsI never have ice on hand, so my ice water is cold tap water, which if you’ve ever taken basic science class, you’ll realize means that as soon as you add hot favas to the water, the whole thing heats up instantaneously and does a horrible job of blanching.  But good news continues!  Because even with sub-par blanching, the beans are still pretty easy to peel.  It just takes time to go bean by bean.

And then!  You get these squat, nutty, oh so green nuggets of delight.  They don’t taste like beans at all, in my opinion, because they’re not little explosions of mealy mush.  (I’m not a big fan of beans, as you might guess.)  The closest approximation is garbanzo beans, but really only in terms of texture, since fava beans have nothing of garbanzos’ astringency.  Fava beans taste like a nut that doesn’t stick in your teeth, a little sweet, a little buttery, and a wee bit ‘green.’  But what they really taste like is Spring.

English bean in podI don’t know how, I don’t know why – maybe it’s their intense green color, their cute little shape, their inherent freshness since you’re eating them essentially raw – but when you taste a fava, it tastes like a sunshine-y day and a cool breeze.  They were so spring-like that we actually laid out a blanket in the back yard and made a picnic out of our meal rather than eat at the table.  I’m not kidding.

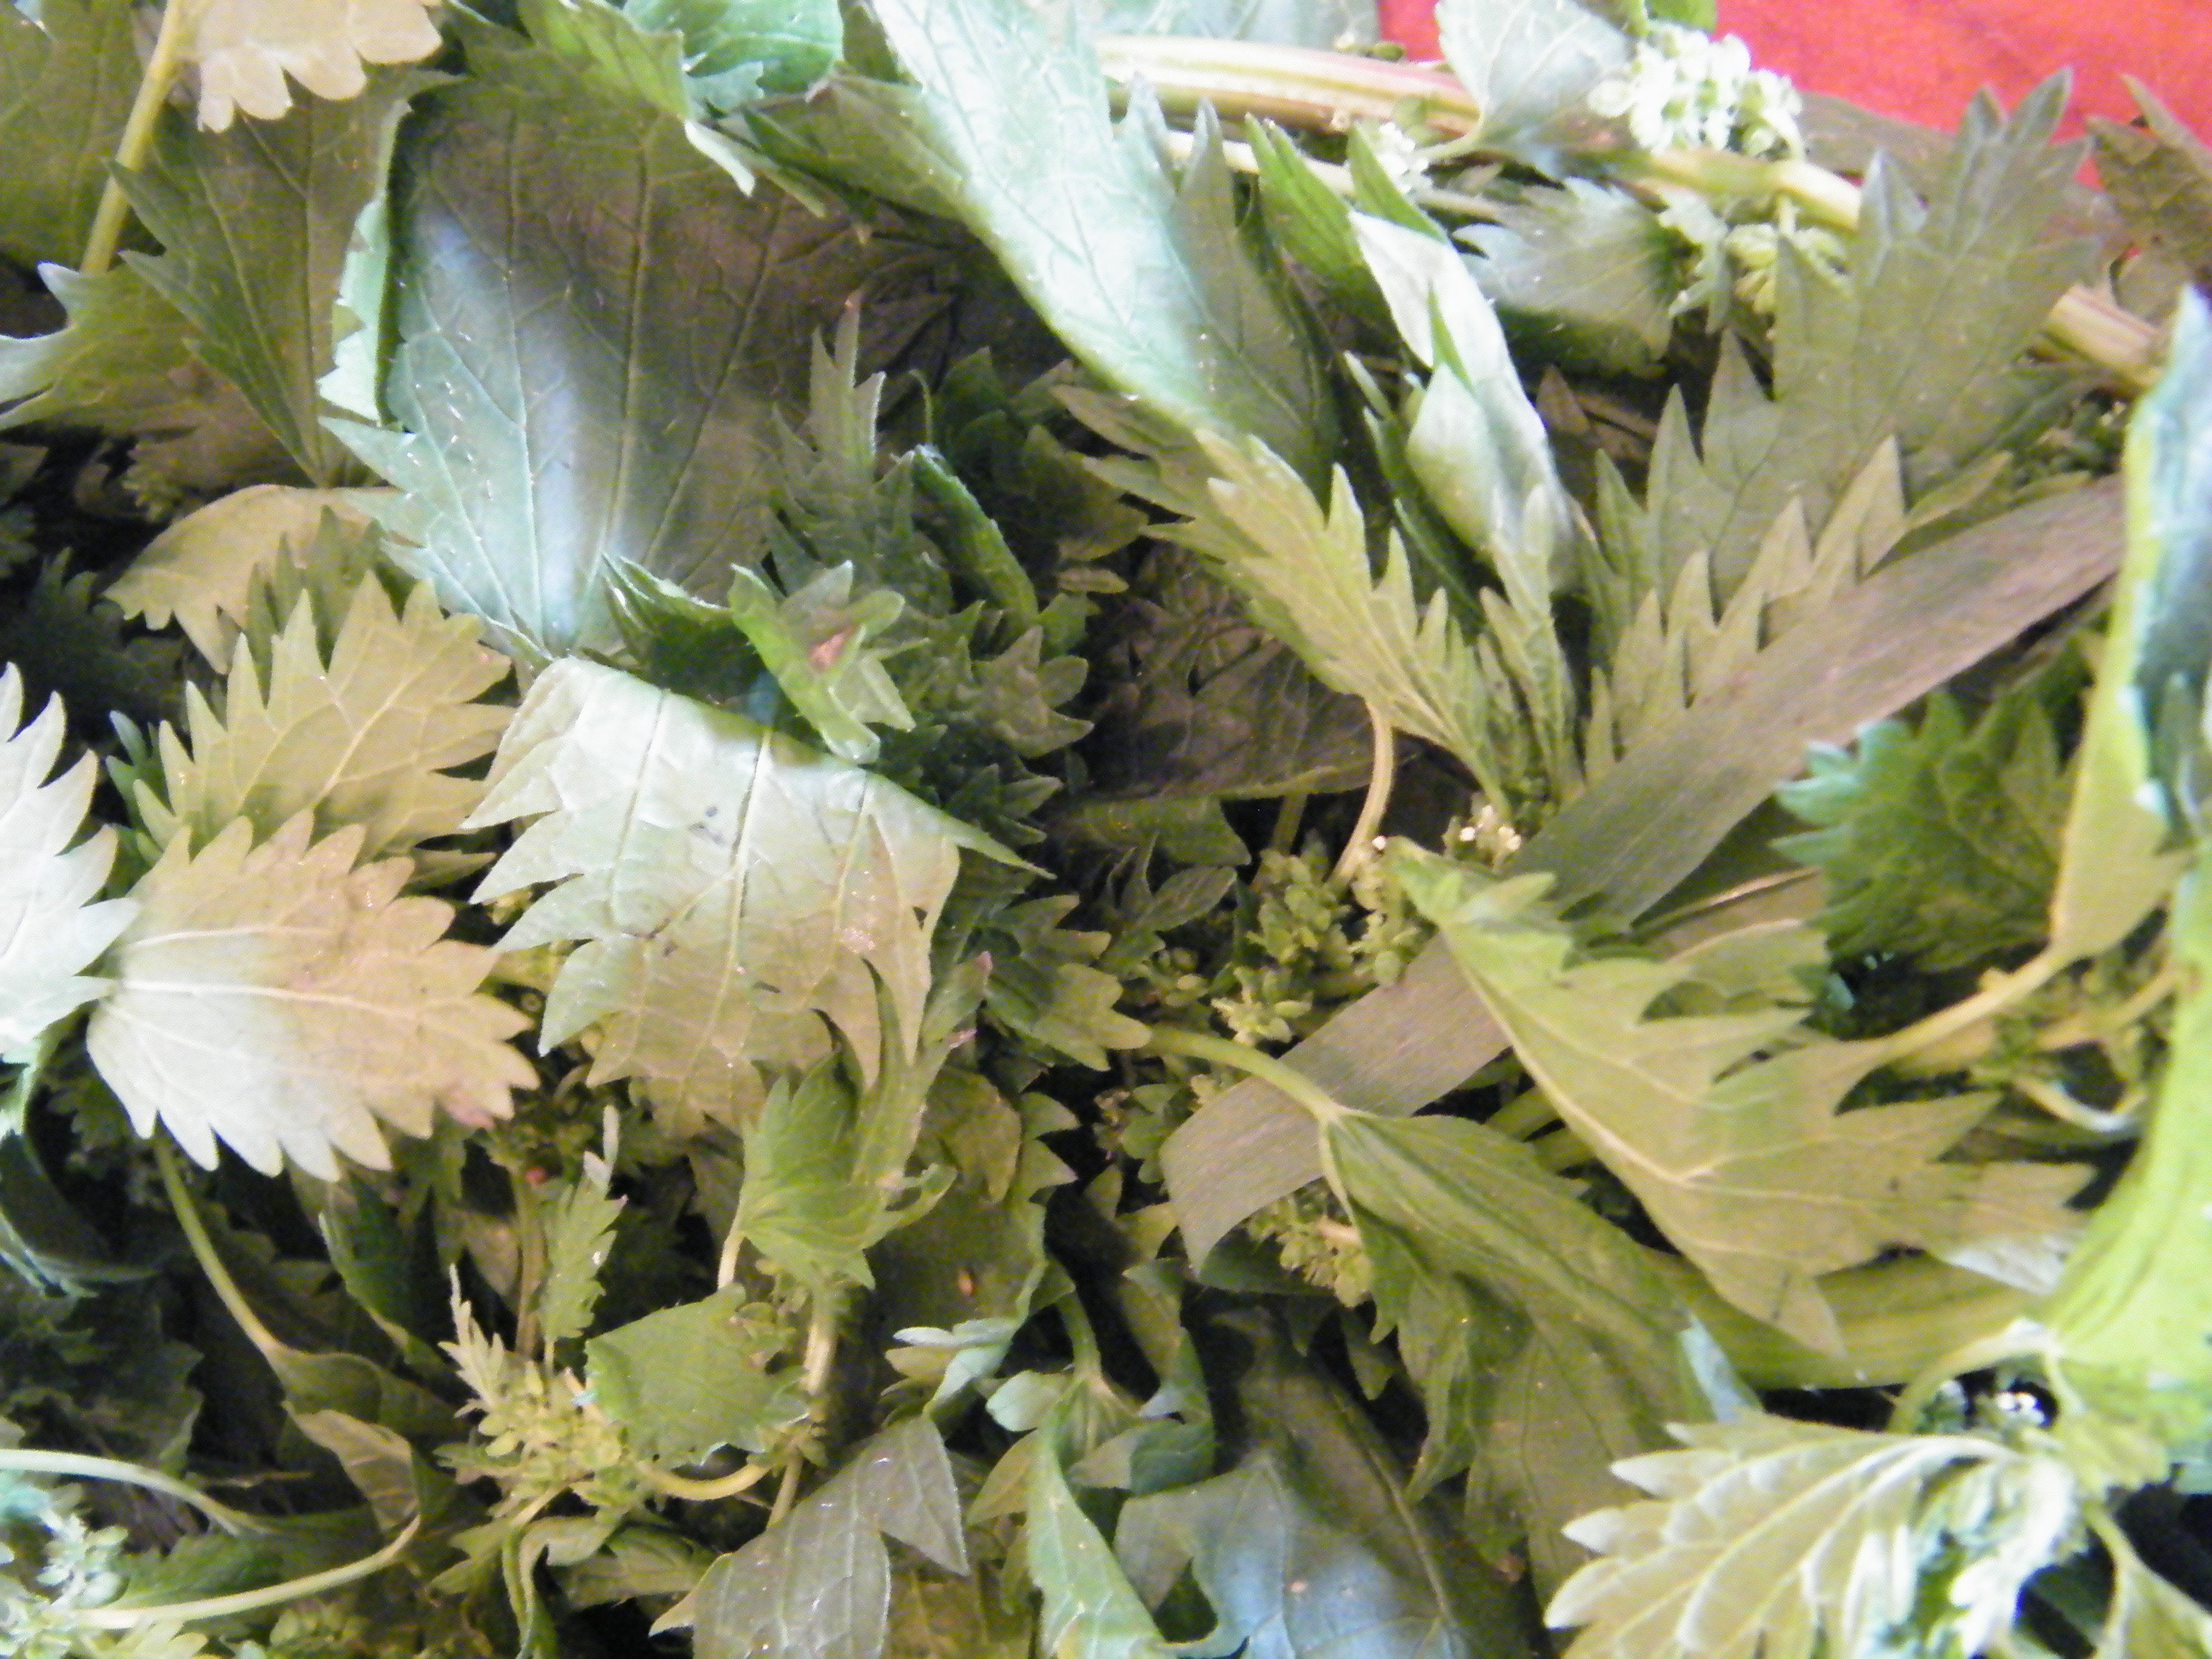
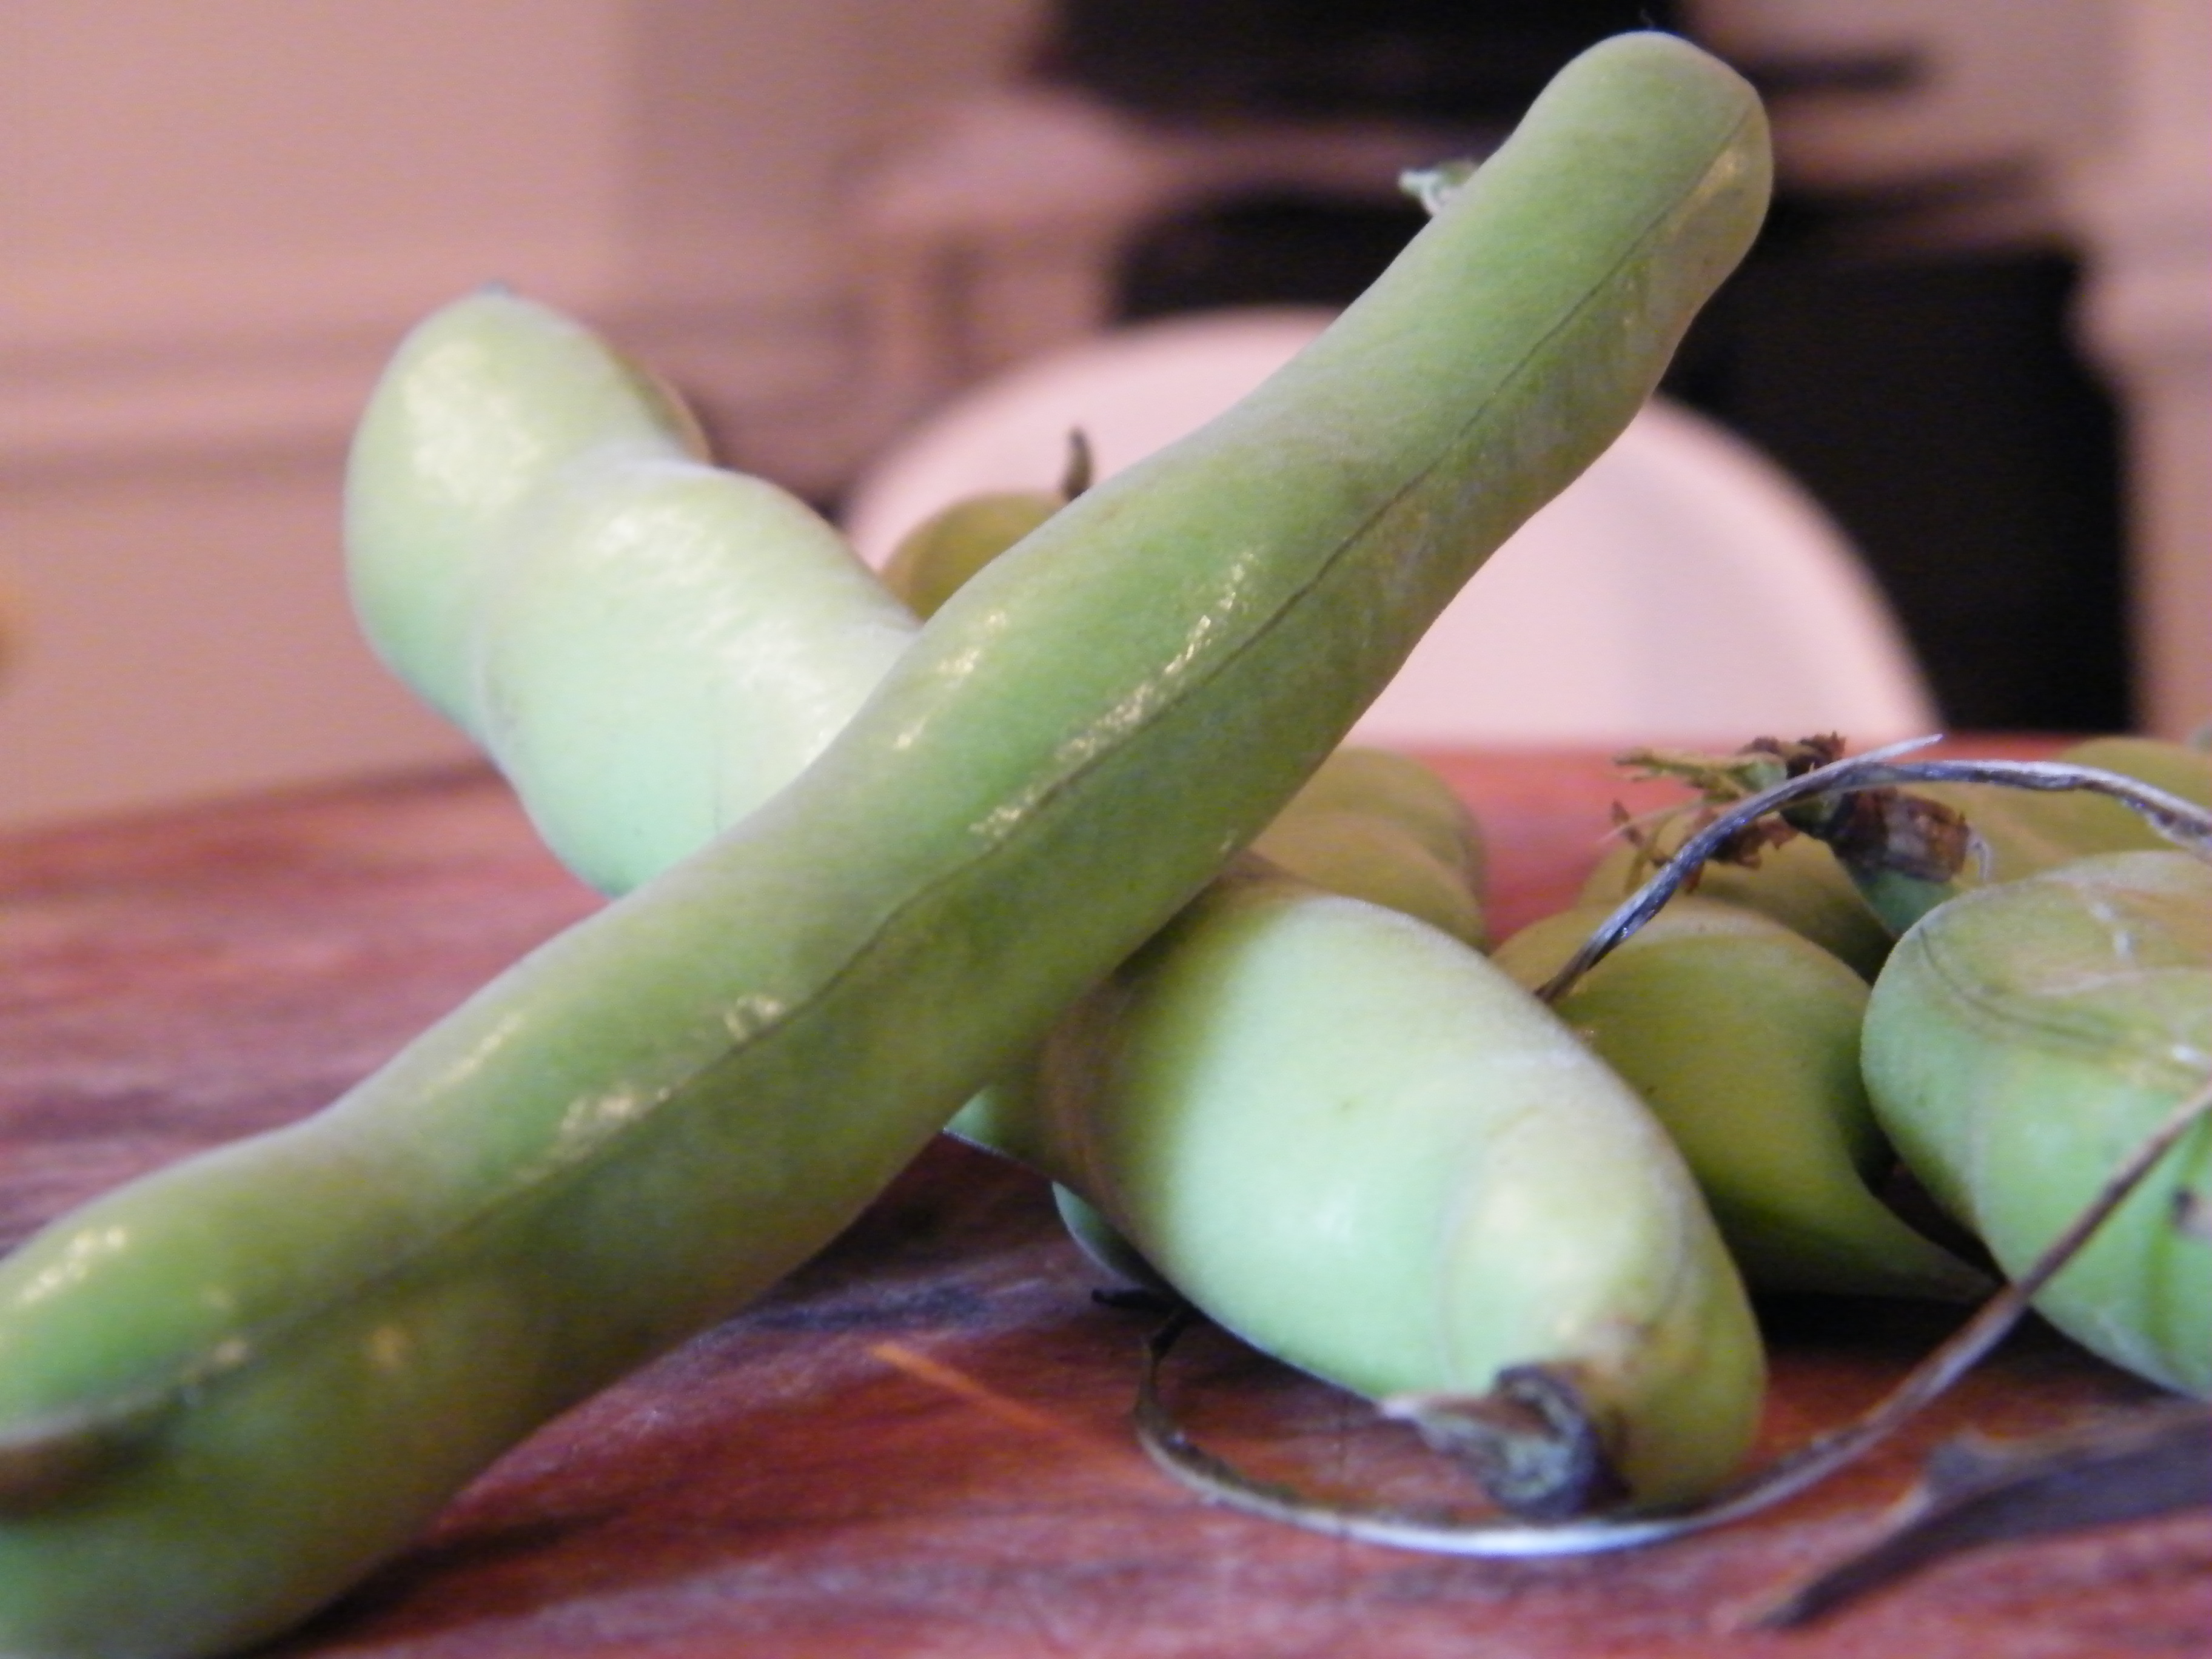
Look for healthy, springy, pale to medium green pods without a lot of brown spots (a few are okay), and in which the beans aren’t bulging out of the pod.  Bulging beans means they’re a bit old and overgrown. (I feel like there’s a pot belly joke in here, but having been pregnant twice in the past 3 years, I have stopped commenting on bulging bellies.)  And then, to the work:

First, de-pod your beans.  There’s technically a string that runs along the back:

fava beanAnd if you can catch it it will peel right open, but if not, just tear it open.  You’ll find 3-6 beans nestled snug in their beds.  The cushioning looks like a pillow:broad bean cushion

While you’re de-podding, boil some water.  When you have your little pile of whitish-looking beans and the water is rolling, toss them in for just 1 minute:

fava beans blanchWhile they’re boiling, fill a bowl with ice water (not just cold tap water).  When the timer goes, toss them in and let them sit 1 minute.  The outer waxy covering should shrivel and pull away from the green legume a little.  Then, bean by bean, remove that outer coating.  On the left, a boiled bean; on the right, the coating removed:

fava with and without membraneSee how green they are?  That’s it.  Now they’re edible.  Some people puree them, some people saute with garlic and lemon (though I find cooking further isn’t necessary), but we chose to make

The Spring-iest Salad that Ever Was Sprung

Prepared fava beans
Breakfast Radishes
Fennel
Cooked Breakfast or Sweet Chicken Sausage (optional)
1 lemon
Olive oil
Sea or kosher salt (you want it chunky, not finely ground)

Slice the radishes into small pieces and shave the fennel as finely as you can.  Mix with favas and and the sausage if you’re using it.   Our fennel was particularly licorice-tasting this time, so we combined in a ratio of about 2:2:1 for radishes, fava beans, and fennel so it didn’t overpower.  Squeeze the lemon juice on top, drizzle with olive oil, and toss to coat.  Sprinkle with salt.

Spring Salad
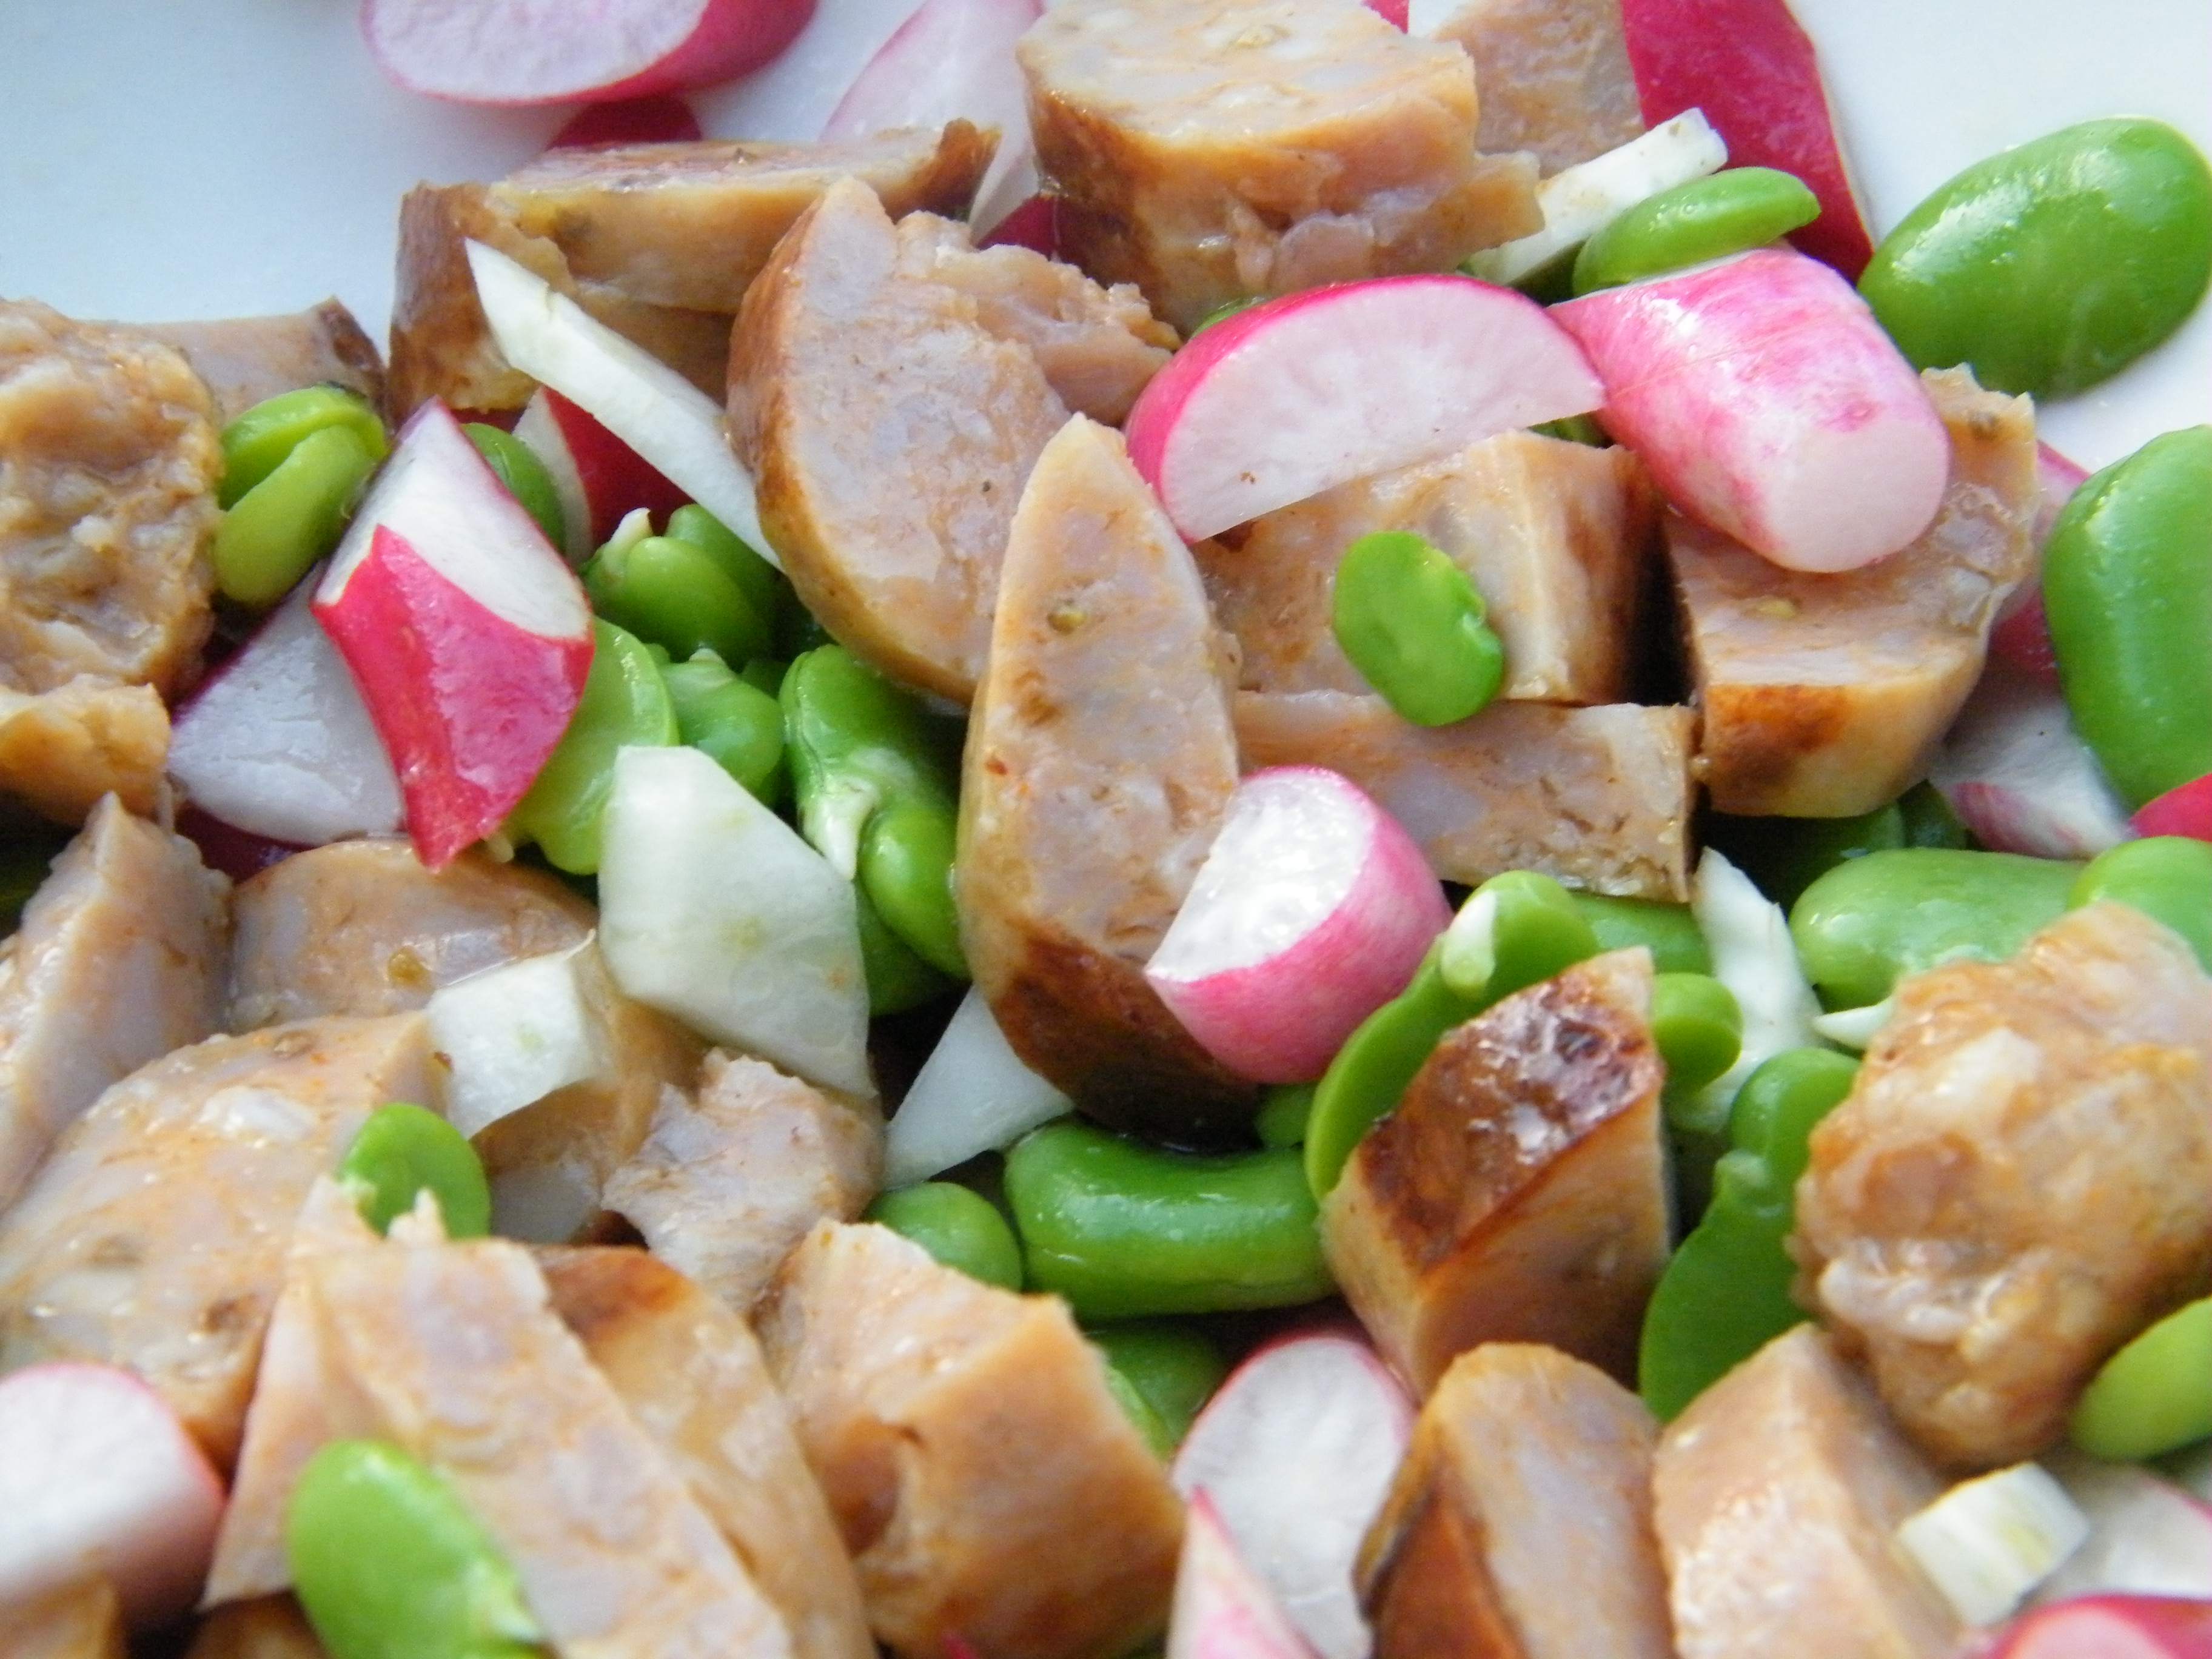
That’s it.  It was awesome.  The fava beans are mellow and nutty and add an unexpected bit of richness of flavor, the radishes and fennel added a little bite and complexity, the lemon dressing and chunky salt added a brightness that enhanced the freshness of all the ingredients.  It was spring in a bowl and was the inspiration for our impromptu picnic – good crusty bread, a few slices of quality cheese, and very cold wine and you had a happy little family, though the toddler just ate the favas and sausage and ignored the sharp little radishes and fennel slices.  I honestly think I’ll leave out the sausage next time, as we really only added it because we wanted to use it up, and though it added a nice savory sweetness, I think the salad would be even springier without it.  Other additions?  Next time I’m adding thinly sliced asparagus, even garlic scapes if I can find them, but in my estimation, the best Spring Salad is one just like this: find the freshest Spring ingredients you can, toss them together, and put down a blanket in the back yard.  And just this once, leave out the bacon.

Peel/Trim? Definitely.  A few sources say you can eat without the second shelling if the beans are absolute babies, but the casing is pretty bitter in anything bigger.
Edible when raw? Sort of.  Blanch to remove the casing, and then they’re edible.  It’s possible to buy them dried like other beans, and then you have to cook them just as you would black, pinto, kidney, etc.
Worth the price of organic? One of the few foods to which I’m going to say Probably Not.  There’s so much peeling and shelling going on here that any pesticides sprayed on won’t make it to your plate.  It’s true that what you’re eating is the seed, so anything in the soil is going to be concentrated in here, so if you’re that concerned, feel free, but if you’re that concerned, you’re probably buying everything organic already.
Best with:  Do I have to say liver and a nice chianti?  Yes, yes I do.  Otherwise, spring vegetables that taste clean, green, and fresh are the way to go: radishes, young garlic, young onion, mint, dill, lemon.  Ricotta would be lovely, even a mild goat cheese, but anything stronger will overpower the subtle, mild flavor of the fresh nutty beans.
In Season: Spring.  In some areas they grow into the summer, but in Southern California, they’re usually gone by late May.
How to Store: In the fridge.  They should keep about a week in their pods.  After blanching and preparing, the shelled favas keep a few days, but rinse in water before using if you prepared them in advance.
Note: There is a potentially fatal disease called favism, that is an allergic reaction to fava beans.  While very rare, it can affect some people of African, Mediterranean, or Southeast Asian descent.

Share this:

  • Facebook
  • Pinterest
  • Twitter
  • Tumblr
  • Reddit
  • More
  • Email
  • Pocket
  • Print

Like this:

Like Loading...

Stinging Nettles

29 Friday Mar 2013

Posted by strangeandyummy in Green, Herbs, Leafy, Miscellany, Spring, Vegetables

≈ 2 Comments

Tags

citrus, flower buds, green, hairy, leaf, leafy, mild, sharp, stinging nettles, toothy

I don’t know that I’ve ever been more excited to eat something that I’m afraid to touch.NettlesI first heard of nettles as edibles (whee! That’s fun to say!) years ago when I was reading a book on the Irish famine.  I’m Irish-obsessed, in case you didn’t know (my daughter’s name is full-blown Irish Gaelic), and at the time I found it tragic that they ate weeds to survive when the potato crop failed.  But in a different Irish famine book (yes, obsessed), there was some mention of nettles as actually a staple food before the famine (if you don’t know Irish history, it’s tragic.  TRAGIC tragic.  The English were right bloody arseholes.) because they’re one of the richest sources of iron, vitamins A and C, and a full 10 to even 40 percent protein (and to that I say, what the what??  Vegetarians, get in here!).  They’ve also long been a staple in herbal medicine, since they supposedly are one of the best treatments for hay fever, and also for arthritis.  I was intrigued.  Nettles seemed pretty awesome.

Silica StingersExcept that they will sting you.  The taxonomy derives from the Latin for “I burn” and they’re chock full of little stingers especially on the new growth.  Standard rule of thumb for harvesting is to wear gloves, but I don’t own rubber gloves for cooking, and I was frightened.  The farmer at the market made fun of me dismissed my fears and said they weren’t that bad, but I wasn’t taken chances.  So here was my oh-so-graceful and professional method for dealing with nettles:
1. Let farmer with callused hands and scoffing bravado put them into bag.  Don’t put other veggies in same bag in case the prickers brush up against things and stick to my innocent chard or beets.
2. Remove from bag by grabbing only the bottom two inches of stem and awkwardly hold the whole bunch under the faucet to wash.  Rinse by shaking vigorously, thereby blessing the whole kitchen with nettle holy water.
3. To prepare for cooking, just as awkwardly hold giant nettle stalks over the largest frying pan I have, hot with oil, and chop off hunks with kitchen shears, trying not to get burnt by the spitting oil because the nettles weren’t really dry from the vigorous shaking and in case you haven’t heard, oil and water don’t like each other and in a hot pan they take it out on me.

Miraculously, this method worked out really, really well.

Nettle StalksThe nettles lose their stingers within about 30 seconds of cooking, so you could probably cook them, then slice them more neatly if you liked, but I’m not fussy about presentation so much, and I don’t like getting burned by hot, thornless nettles any more than I like getting stung with raw nettle thorns…  Most sources DON’T recommend my version of preparing them (I can’t imagine why) but recommend blanching instead:

  • Plunge nettles into already boiling water for about 30 seconds to 1 minute to get rid of the stingers)
  • Plunge into an ice bath to stop the cooking
  • Roll in towels or paper towels to dry them off

At this point, they can then be sauteed, sliced, frozen for later, whatever, and they’ll be a brilliant green to boot.  I 1) am lazy 2) never have ice on hand and 3) broke my favorite and largest mixing bowl last week, so plunging and bathing and creating more dishes [4) don’t have a dishwasher] is not part of my repertoire.  But if you are the opposite of me in any of those criteria, you can blanch like a normal person.

Nettle branchNettles taste a bit like the lovechild of spinach and an artichoke.  They don’t have the chalky feel of spinach and are milder in flavor, but they do have a little of the mineral/metallic/plastic tang that artichokes always seem to have.  There’s a hint of lemon in there as well, and though they’re a little grassy, they don’t in any way taste like grass or weeds – though if you buy nettles instead of picking them, make sure you pick out the long strands of actual grass that seemed to show up in all the bunches.  Nettles are toothy-leaved and roundish-stalked, not long, flat blades. (Did I, I know you’re thinking, shrug and assume those long blades were perhaps a rogue type of weird nettle stalk among my branches?  Yes, yes I did.)  Look for healthy-looking plants that have not yet begun to flower (flowering makes the leaves turn bitter), the younger the better for sweetness and mildness of flavor.  You can just use the young leaves, not the full stalk and tiny flower buds the way I did, if you want to keep the flavor as mild as possible and still reap all the nutrient benefits.  Nettle soup is a classic way to use them, or nettle pesto once they’ve been blanched, but I liked them sauteed:

Lemon-Parmesan Pasta with Stinging Nettles
Nettles
Olive Oil
Freshly grated parmesan (not the green tub)
Lemon
Garlic cloves
Spaghetti

  • Boil water and start the pasta.  Once you’ve added the noodles to the water, start your nettles:
  • In a very large pan, saute chopped nettles in roughly a tablespoon of olive oil (Use as many nettles as you like – like any leafy green, they cook down quite a bit).
  • When the nettles are wilted, squeeze the juice of one to 1 1/2 lemons into the hot pan.
  • Add a little more olive oil, along with chopped garlic (we used 2-3 cloves for just 2 1/2 people, but we love garlic).  Cook until the garlic smell hits you, just a minute or so.Lemon-Parmesan Pasta with Nettles
  • Drain the pasta, reserving about 1 tablespoon of the pasta water (you can save yourself the trouble of “reserving” boiling hot water by just draining the pasta lazily so a little of the water stays in the pot).  Add the pasta and reserved water to the frying pan, and mix.
  • Spread the pasta dish out in the frying pan to get the most surface area, and grate fresh parmesan on top.  Fold the pasta dish into the serving bowl as if it were an omelette – slide half in, then fold the other half on top – then toss immediately.  This gets the parmesan integrated into the food so you don’t just have hunks of parmesan in certain bites and none elsewhere.
  • Top with salt, pepper, and a little more parmesan if you like.

Next time, I’m making Dungeness Crab and Wild Nettle Frittata or Stinging Nettle and Asparagus Risotto.  They both sounded awesome, but I didn’t find the recipes until I’d already eaten my bunch.  But I’ll buy more.  They’re too tasty not to try again, and besides, I refuse to be intimidated by a vegetable.  I’ll brave you yet, nettle thorns!  Just not, you know, this season.

Stinging Nettle LeafTrim? You can trim a bit of the tough base and eat the rest, or trim off everything but the leaves – your choice.  But watch out for the stingers!  They’re most prevalent towards the tips, so you can grasp the bottoms without getting stung.  Use gloves, or my wimpy method as above.
Edible when raw?  No.  You will get stung, and possibly get burning welts in your mouth and throat, even if you puree them – it’s an acid that causes the burning, and it needs to be cooked to be deactivated.  Unless, of course, you’re part of a contest.
Worth the price of organic? Probably.  Though they’re basically a weed, so there’s no real reason someone should be using a bunch of sprays on them anyway, I’d still go for organic since you’re eating the leaves where the residue will sit.  If you can’t find them organic, I would definitely do the blanching technique and probably toss that water rather than using it for tea (as some people do).
Best with:  Frankly, kind of everything.  They’re such an ancient food and grow in so many places that recipes abound, from Italian pestos to Scottish soups to Indian curries.  I like to eat as seasonally as possible, so I like them with other spring flavors like young garlic ramps, lemon, fresh fennel, asparagus, peas (if you don’t hate them)…  Nettles are a bit more delicate than some other leafy greens, so I personally avoid stronger flavors like anchovies or my beloved bacon as well, but that’s only because nettles don’t need it the way bitter greens do.  It certainly would taste fine if you decided to go that route.
In Season:  In cooler climes, you can probably find them Spring into early Summer, maybe even again in fall, but here in Southern California, you’re looking at a window of just a few weeks in early Spring, so jump on them while you can.
How to Store: In the fridge, in a produce box or plastic bag,  they should keep for a week or more uncooked.  Once they’ve been blanched, use or freeze pretty quickly.
Note: If you get stung, dock leaves are the miracle cure, but since most people don’t have those lying around – make a paste of baking soda and water and apply to the area, and once the inflammation goes down, make sure there are no stingers stuck in your skin.  If so, remove with scotch tape.  There’s no danger in getting stung other than the pain, so it should go away with no ill effects in a couple of days regardless.

Share this:

  • Facebook
  • Pinterest
  • Twitter
  • Tumblr
  • Reddit
  • More
  • Email
  • Pocket
  • Print

Like this:

Like Loading...

Tromboncino Rampicante

11 Tuesday Sep 2012

Posted by strangeandyummy in Green, Squashes, Summer, Vegetables, White, Yellow

≈ 9 Comments

Tags

green, mealy, mild, nutty, rampicante, smooth, striped, summer squash, tromboncino, yellow, zucchini

Sorry it’s taken me so long to post; I was busy giving birth to this:

Which leaves little time for farmer’s marketing and even less time for cooking and blogging.  But how do you NOT buy this when you see it at the market?

Especially if you like zucchini, which I do.  I’m a little annoyed at the Summer Squash selection this year, frankly – everyone’s got a blog post about what to do with all that zucchini that is so clearly taking over your garden that you need to make it into breads, fritters, cakes, casseroles, and other creative, delicious-sounding recipes, and here I am, zucchini-less.  My garden won’t grow (probably because I forget to water it), and none of the sellers at the market seem so flush with zucchini that they’re marking down the prices into the ridiculously-cheap category, which means if I buy zucchini, I’m buying it to use for its sweet, squashy self, not to use it up.

Which I guess is a gigantic tangent to: How I Found a New Yummy Zucchini.  Usually called Tromboncino Zucchini or Zucchetta Rampicante, it’s also sometimes just called Squash with some horribly misspelled version of one of those names in parentheses on the farmer’s handwritten sign.

Summer squashes have far more variety in flavor than one might expect, given that they’re always lumped into that same massive category.  There’s crookneck and zucchini and patty pan and little stripey ones that the husband and I like to refer to as hand grenades…  Rampicante is slightly sweet and slightly nutty.  It’s most similar to zucchini in flavor, but a little nuttier.  I don’t think it’s as mealy as crookneck, but sources differ on how to avoid the mealies with this guy: some say that the young ones start out quite mealy, others say that the younger/smaller fruits will always be the sweeter and more flavorful, so if you’re worried about mealiness, go with one of those.  How to tell?  They turn into a trombone as they grow, so shorter, straighter squash are what you would look for, though it’s possible to grow them straighter by trellising them, so again, look for short if you’re looking for young.  This sucker is pretty full-grown, maybe 2 or 3 feet long if you stretched him out.  Personally, I think the problem is steaming at any size.  People are constantly telling me to steam squash because it’s so healthful that way, but to me, it tastes like mealy baby food.  Not a fan of any kind of steamed squash, frankly.

They have a very pale green skin, sometimes almost pale yellow or tan, sometimes so light they look almost white.  They tend to have varied faint white stripes like some zucchini varieties as well.  The really nice thing about this variety is that all the seeds form in the bulbous part at the end, the way seeds all collect in the center of hard squash.  That means you’ve got this whole long length of stem with no seeds.  It’s drier and firmer than zucchini, though the pores near the skin do weep when you cut it, but I imagine if you wanted to make something akin to Rampicante Parmesan or Fried Zucchini (dredging in flour and deep frying) it would probably be excellent for that since it is drier than its cousin who can sometimes get mushy.  The skin is edible as well – a bit tougher than zucchini skin, but nowhere near winter squash toughness or even delicata squash or something in which people tell you the skin is edible but the texture’s tough and awful…   All this means that Rampicante are really, really easy to work with, so you get a lot of bang for your buck.  Which is nice, because I’ve only seen one or two sellers with them ever, which means they’re twice the price of other summer squash per pound.  C’est la vie for the experimental veggie eater.

Actually, that’s the weird part about Tromboncino – pluck it early, and you have got a summer squash that’s basically edible from end to end minus the seeds.   Let it grow big and keep it around, and the skin will grow tough like winter squash, so it stores well.  If you’re worried about your personal fruit having too tough a skin, go ahead and peel it.  I’ve only bought it as a summer squash; the online consensus seems to be that as it matures into a winter squash, the texture gets stringier, more watery, and less flavorful, much like the interior of a carving pumpkin, so I think I’ll stick with the summer harvest for now.

Like I said with the zucchini this year, I’m not wasting this puppy on “use it up” recipes, but you don’t need to.  Zucchini is often easy to julienne or similar because of its straight shape; rampicante is easier to slice into rounds.  If you have a food processor, chop the neck into straighter sections before putting through the slicing blade and you’ll have a gagillion Rampicante rounds in no time.  If you put the bent part in, you’ll have long slices instead.

I like to saute in olive oil and garlic and toss into practically any dish – it does take a bit to cook through to the center if you slice too thick, so try to keep them just a cm or 2 in width if you’re slicing by hand.  Half-inch rounds are just too big.  They’re also nice tossed with olive oil and salt and roasted on 400 or 450 like beet chips until crisp, or crisp-ish really.  They’re a great alternative to potato chips or some other horrible for you snack.

As for the bulb, scoop out the seeds, and chop the rest up any way you like.  Again, I always prefer sauteed in a little olive oil or roasted over steamed, but if you feel like trying it steamed, steam the bulb end since your pieces won’t be uniform in shape.  Hmm…maybe a mashed Rampicante?  Like mashed potatoes, but more summery?  I may learn to like steamed squash after all…

Rampicante with Sausage, Beet Greens and Goat Cheese

  • Rampicante Zucchini
  • Beet greens, stalks removed and greens sliced or torn into bite-sized pieces
  • Sausage, chopped into bite-size pieces (I prefer sweet Italian Chicken Sausage from Trader Joe’s)
  • Pasta (I like spaghetti in this recipe)
  • olive oil
  • goat cheese

Notes: There are no measurements because it really is to taste and depends on the number of people being served.  Half a trombone zucchini served 2 hungry adults and a toddler; likewise half a bunch of beet greens, but we’re veggie-happy and everything depends on how big a bunch you get.  For the sausage, my lazy strategy is to simply hold the sausage over the pan and use kitchen shears to lop of pieces – no cutting board to disinfect afterwards!  Same thing with the goat cheese:  I buy it in a log and just use a fork to hack off chunks right onto the plate.

Slice your rampicante however you like and remove the lower stalks from your beet greens, chopping them into 1/2 to 1-inch size pieces.  Saute in olive oil until everything starts to soften, then add sausage.  Cook until sausage is brown and slightly crispy – don’t stir too often or the sausage and rampicante won’t crisp up.  This is very much a “leave it alone, I have dishes to do and a toddler to wrangle while dinner cooks” kind of meal.

While these are cooking, boil water and start the pasta cooking – this goes nicely with any carb accompaniment, frankly, so cous cous, brown rice, barley, polenta, or anything else you fancy makes a fine substitute for noodles.

When the sausage is almost done, throw in the green parts of the beet greens – they cook fast, so now is the time to start stirring, adding a bit more olive oil if everything’s looking too dry.  When the greens wilt, toss the pasta in the pan and stir everything together (added benefit: if you mis-timed your carb cooking or are using up leftovers, here is where everything gets to be the same temperature, so feel free to use last night’s leftover Chinese food takeout rice straight from the fridge.)  If you’re watching your calories or using up leftovers, add a splash of water instead of the extra oil above – the hot pasta water is great for adding a little thickener.

Pour into serving bowl and add chunks/crumbled goat cheese on top – feel free to toss to distribute, but it will lessen the final appearance as the melted goat cheese deliciously though unattractively slimes every strand of pasta. 

Peel?  If it’s young or small or you buy it mid-summer, no.  If you’re buying in fall and it’s a big, old fruit, or if you just think it’s going to be too tough for your tastes, yes.  This squash serves both seasons of squash descriptors.
Edible seed? No.  Scoop them out and toss them.
Edible when raw? Yes, if it’s young, though I would probably only eat the neck of the squash raw since the bulb gets more winter squash-like, and I would shred, grate, or julienne – I’m not a huge fan of raw summer squash in the first place, and this variety is a bit tougher than some of his friends, so I don’t know that giant raw hunks of it would be the way to go.
Worth the price of organic? Questionable, but probably not.  Summer squash in general isn’t a horrible pesticide keeper, and winter squash is one of the least offensive conventional vegetables you can buy.  Rampicante is known among squash gardeners as being surprisingly resistant to many bugs that plague other squashes, so it means it probably isn’t getting sprayed down even as heavily as other squashes.  Since it’s so rare at the markets at this point anyway, I probably wouldn’t sweat it and would just buy whatever they have, especially if you plan on peeling.  If you’re going to eat it skin and all, you may want to take the monetary plunge, but I don’t bother with this guy, and I’m pretty picky about organic when I have the chance.
In season: Mid-late summer through Fall – Earlier in the season, treat like a summer squash; later in the season, peel and treat like a winter squash.
Best with: Garlic, basil, oregano; Italian cheeses (parmesan, ricotta, mozarella…); cinnamon and sage for savory soups; lemon or orange for splash of citrus; tomatoes and other complimentary summer vegetables like eggplant
How to Store: In the fridge when fresh, it should last a good week or longer.  Once cut, the pores begin to weep and it begins to dry out, so use it up within a couple of days at most.  You can wrap it in plastic or foil if you like; just don’t shove it into the fridge with the cut part exposed because it will leak sappy moisture onto your shelves or other food…Not that I’ve done that.  As winter squash, it can keep uncut in a cool place for as long as a couple of months, but it should be hard-skinned first.  If it’s still too young, it will just rot.

Share this:

  • Facebook
  • Pinterest
  • Twitter
  • Tumblr
  • Reddit
  • More
  • Email
  • Pocket
  • Print

Like this:

Like Loading...

Welcome!

  • About
  • Contact
  • Sites I Like

Recent Posts

  • With Every Beet of My Heart
  • Teeny Tiny Prune Plums
  • You Can’t Go Wrong with a Name Like Candy Roaster
  • Figs in a Blanket
  • Fava Beans, and the Spring-iest Salad that Ever Was Sprung

Categories

Browse By Color or Season

  • Spring
  • Summer
  • Fall
  • Winter
  • Red
  • Orange
  • Yellow
  • Green
  • Blue
  • Purple
  • White
  • Brown
  • Black

What Is That and How Do I Eat It?

What Is That and How Do I Eat It?

Archives

  • February 2016
  • January 2015
  • June 2013
  • May 2013
  • March 2013
  • October 2012
  • September 2012
  • July 2012
  • June 2012
  • May 2012
  • January 2012

Meta

  • Register
  • Log in
  • Entries feed
  • Comments feed
  • WordPress.com

Create a free website or blog at WordPress.com.

Privacy & Cookies: This site uses cookies. By continuing to use this website, you agree to their use.
To find out more, including how to control cookies, see here: Cookie Policy
  • Follow Following
    • What is That and How Do I Eat It?
    • Join 31 other followers
    • Already have a WordPress.com account? Log in now.
    • What is That and How Do I Eat It?
    • Customize
    • Follow Following
    • Sign up
    • Log in
    • Report this content
    • View site in Reader
    • Manage subscriptions
    • Collapse this bar
 

Loading Comments...
 

    %d bloggers like this: