• Spring
  • Summer
  • Fall
  • Winter
  • Red
  • Orange
  • Yellow
  • Green
  • Blue
  • Purple
  • White
  • Brown
  • Black

What is That and How Do I Eat It?

~ strangeandyummy farmer's market finds

Category Archives: Leafy

Stinging Nettles

29 Friday Mar 2013

Posted by strangeandyummy in Green, Herbs, Leafy, Miscellany, Spring, Vegetables

≈ 2 Comments

Tags

citrus, flower buds, green, hairy, leaf, leafy, mild, sharp, stinging nettles, toothy

I don’t know that I’ve ever been more excited to eat something that I’m afraid to touch.Nettles
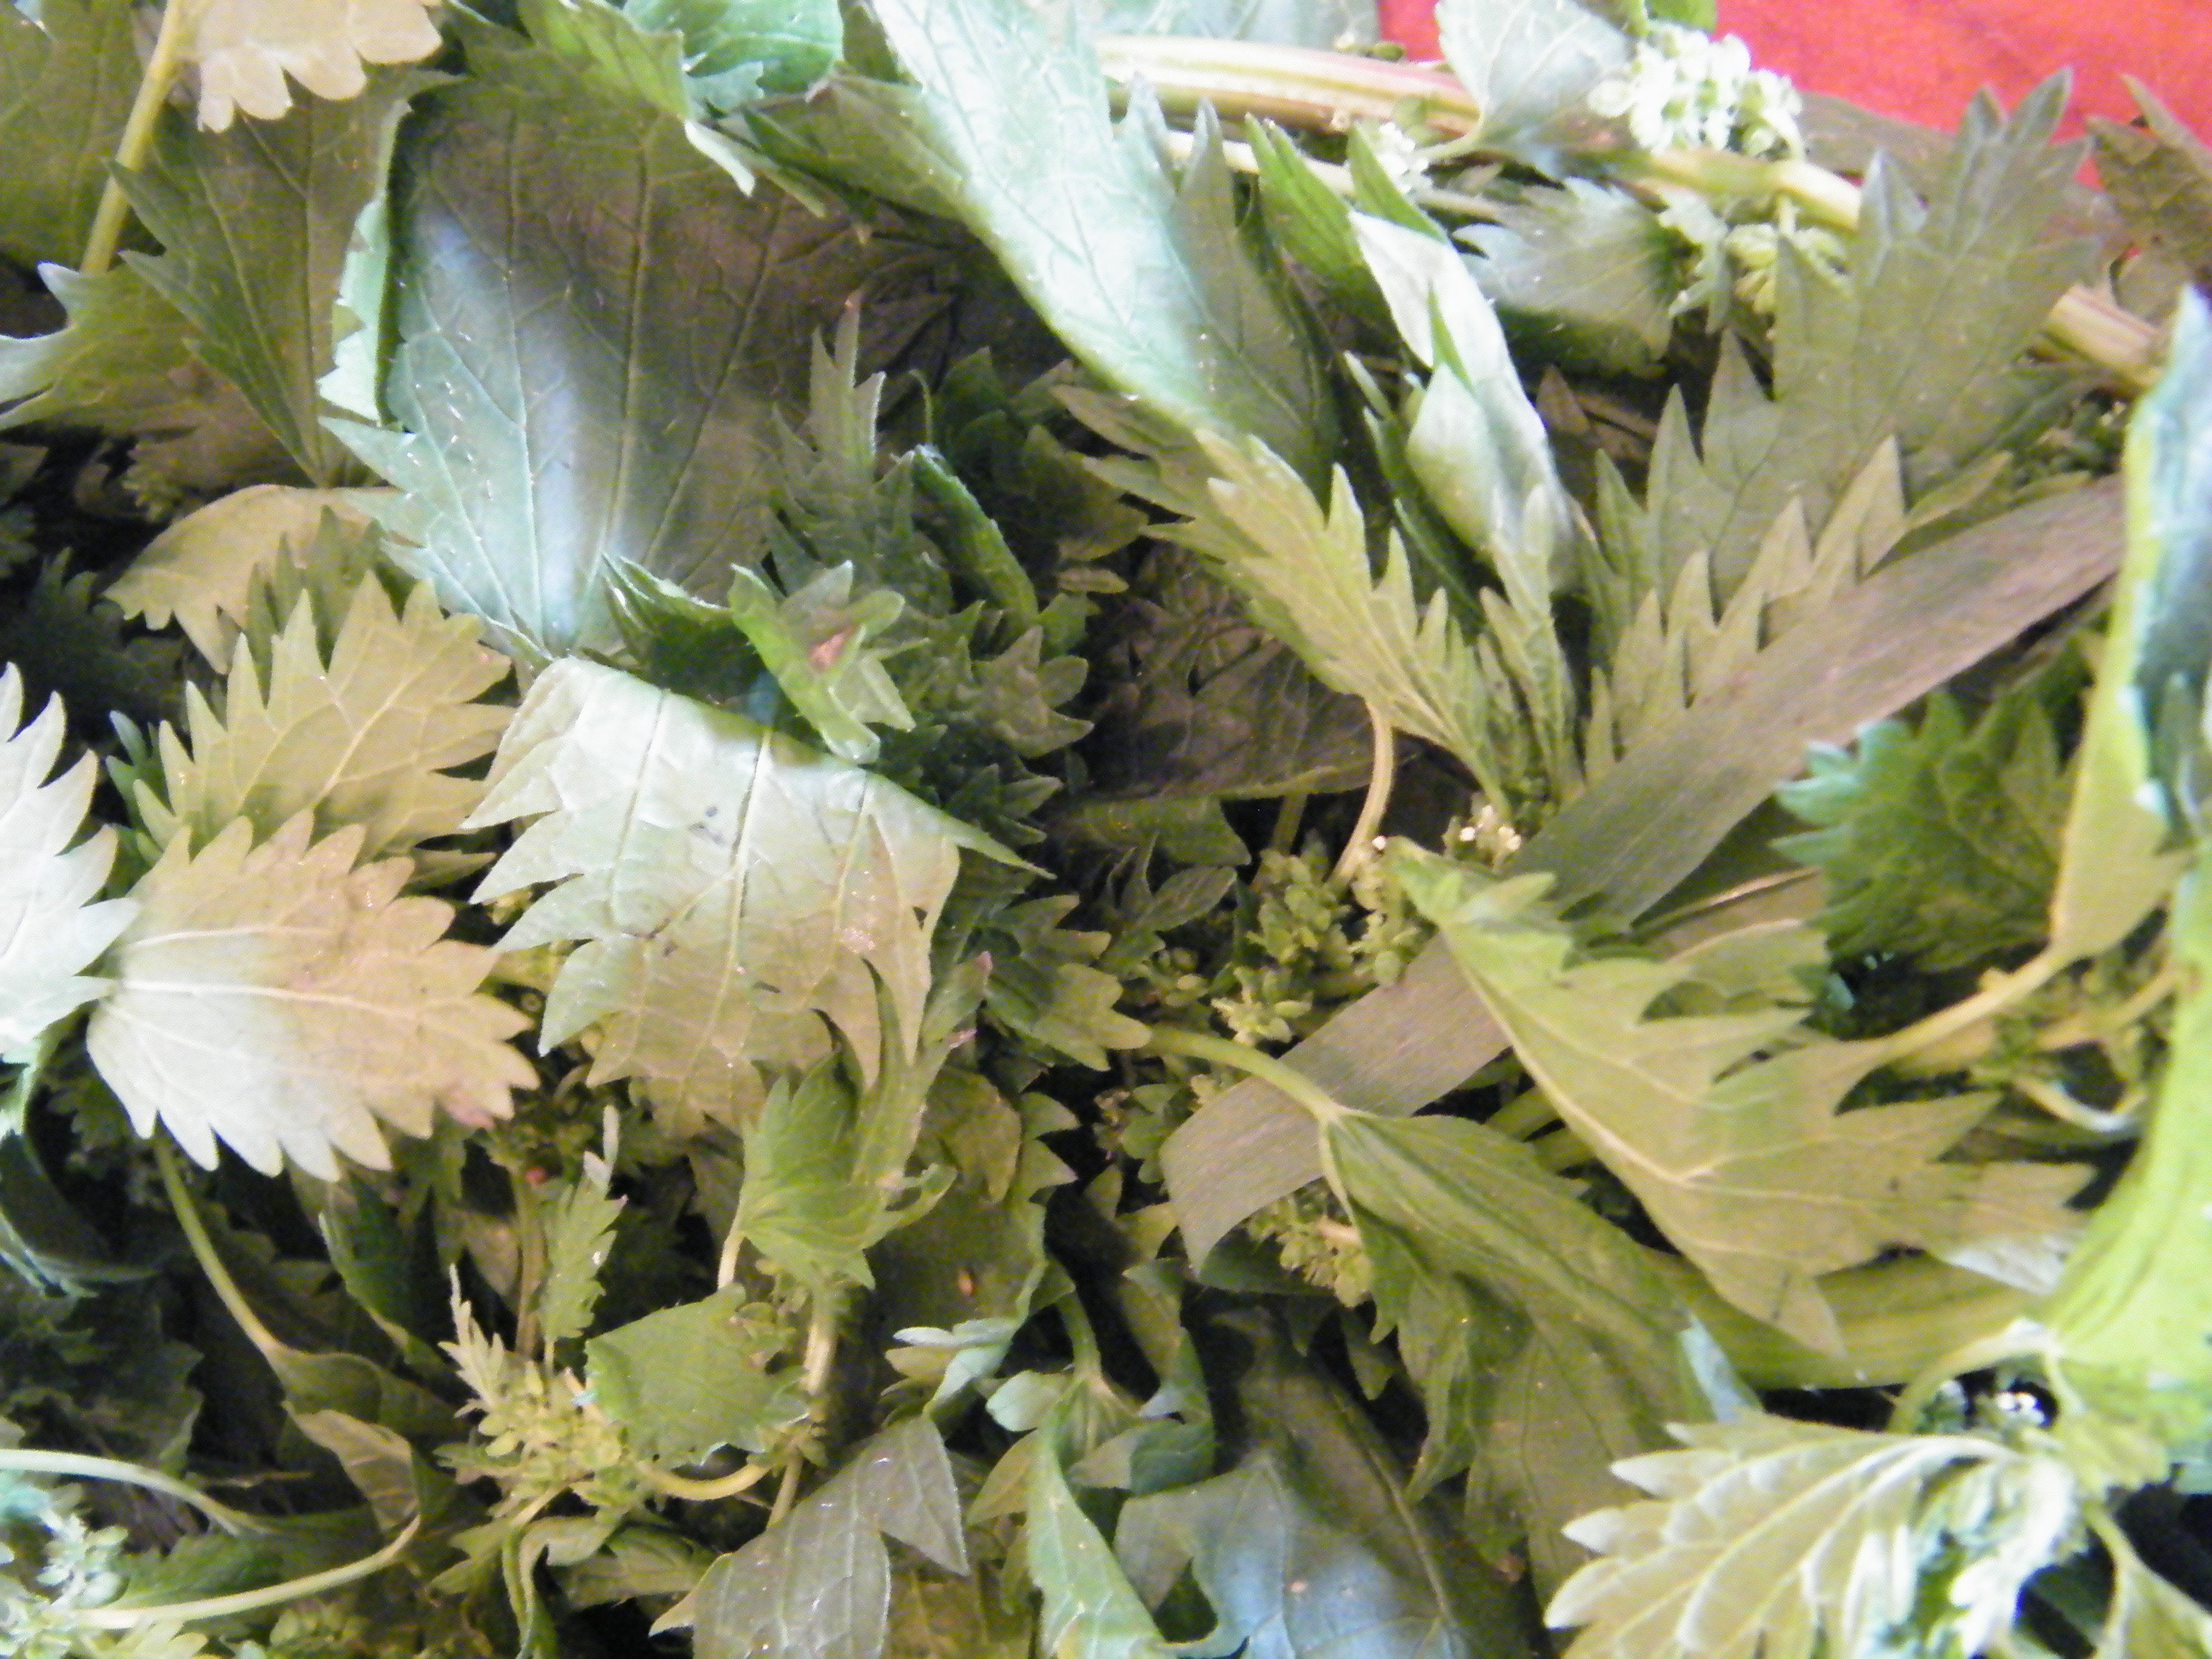
I first heard of nettles as edibles (whee! That’s fun to say!) years ago when I was reading a book on the Irish famine.  I’m Irish-obsessed, in case you didn’t know (my daughter’s name is full-blown Irish Gaelic), and at the time I found it tragic that they ate weeds to survive when the potato crop failed.  But in a different Irish famine book (yes, obsessed), there was some mention of nettles as actually a staple food before the famine (if you don’t know Irish history, it’s tragic.  TRAGIC tragic.  The English were right bloody arseholes.) because they’re one of the richest sources of iron, vitamins A and C, and a full 10 to even 40 percent protein (and to that I say, what the what??  Vegetarians, get in here!).  They’ve also long been a staple in herbal medicine, since they supposedly are one of the best treatments for hay fever, and also for arthritis.  I was intrigued.  Nettles seemed pretty awesome.

Silica StingersExcept that they will sting you.  The taxonomy derives from the Latin for “I burn” and they’re chock full of little stingers especially on the new growth.  Standard rule of thumb for harvesting is to wear gloves, but I don’t own rubber gloves for cooking, and I was frightened.  The farmer at the market made fun of me dismissed my fears and said they weren’t that bad, but I wasn’t taken chances.  So here was my oh-so-graceful and professional method for dealing with nettles:
1. Let farmer with callused hands and scoffing bravado put them into bag.  Don’t put other veggies in same bag in case the prickers brush up against things and stick to my innocent chard or beets.
2. Remove from bag by grabbing only the bottom two inches of stem and awkwardly hold the whole bunch under the faucet to wash.  Rinse by shaking vigorously, thereby blessing the whole kitchen with nettle holy water.
3. To prepare for cooking, just as awkwardly hold giant nettle stalks over the largest frying pan I have, hot with oil, and chop off hunks with kitchen shears, trying not to get burnt by the spitting oil because the nettles weren’t really dry from the vigorous shaking and in case you haven’t heard, oil and water don’t like each other and in a hot pan they take it out on me.

Miraculously, this method worked out really, really well.

Nettle StalksThe nettles lose their stingers within about 30 seconds of cooking, so you could probably cook them, then slice them more neatly if you liked, but I’m not fussy about presentation so much, and I don’t like getting burned by hot, thornless nettles any more than I like getting stung with raw nettle thorns…  Most sources DON’T recommend my version of preparing them (I can’t imagine why) but recommend blanching instead:

  • Plunge nettles into already boiling water for about 30 seconds to 1 minute to get rid of the stingers)
  • Plunge into an ice bath to stop the cooking
  • Roll in towels or paper towels to dry them off

At this point, they can then be sauteed, sliced, frozen for later, whatever, and they’ll be a brilliant green to boot.  I 1) am lazy 2) never have ice on hand and 3) broke my favorite and largest mixing bowl last week, so plunging and bathing and creating more dishes [4) don’t have a dishwasher] is not part of my repertoire.  But if you are the opposite of me in any of those criteria, you can blanch like a normal person.

Nettle branch
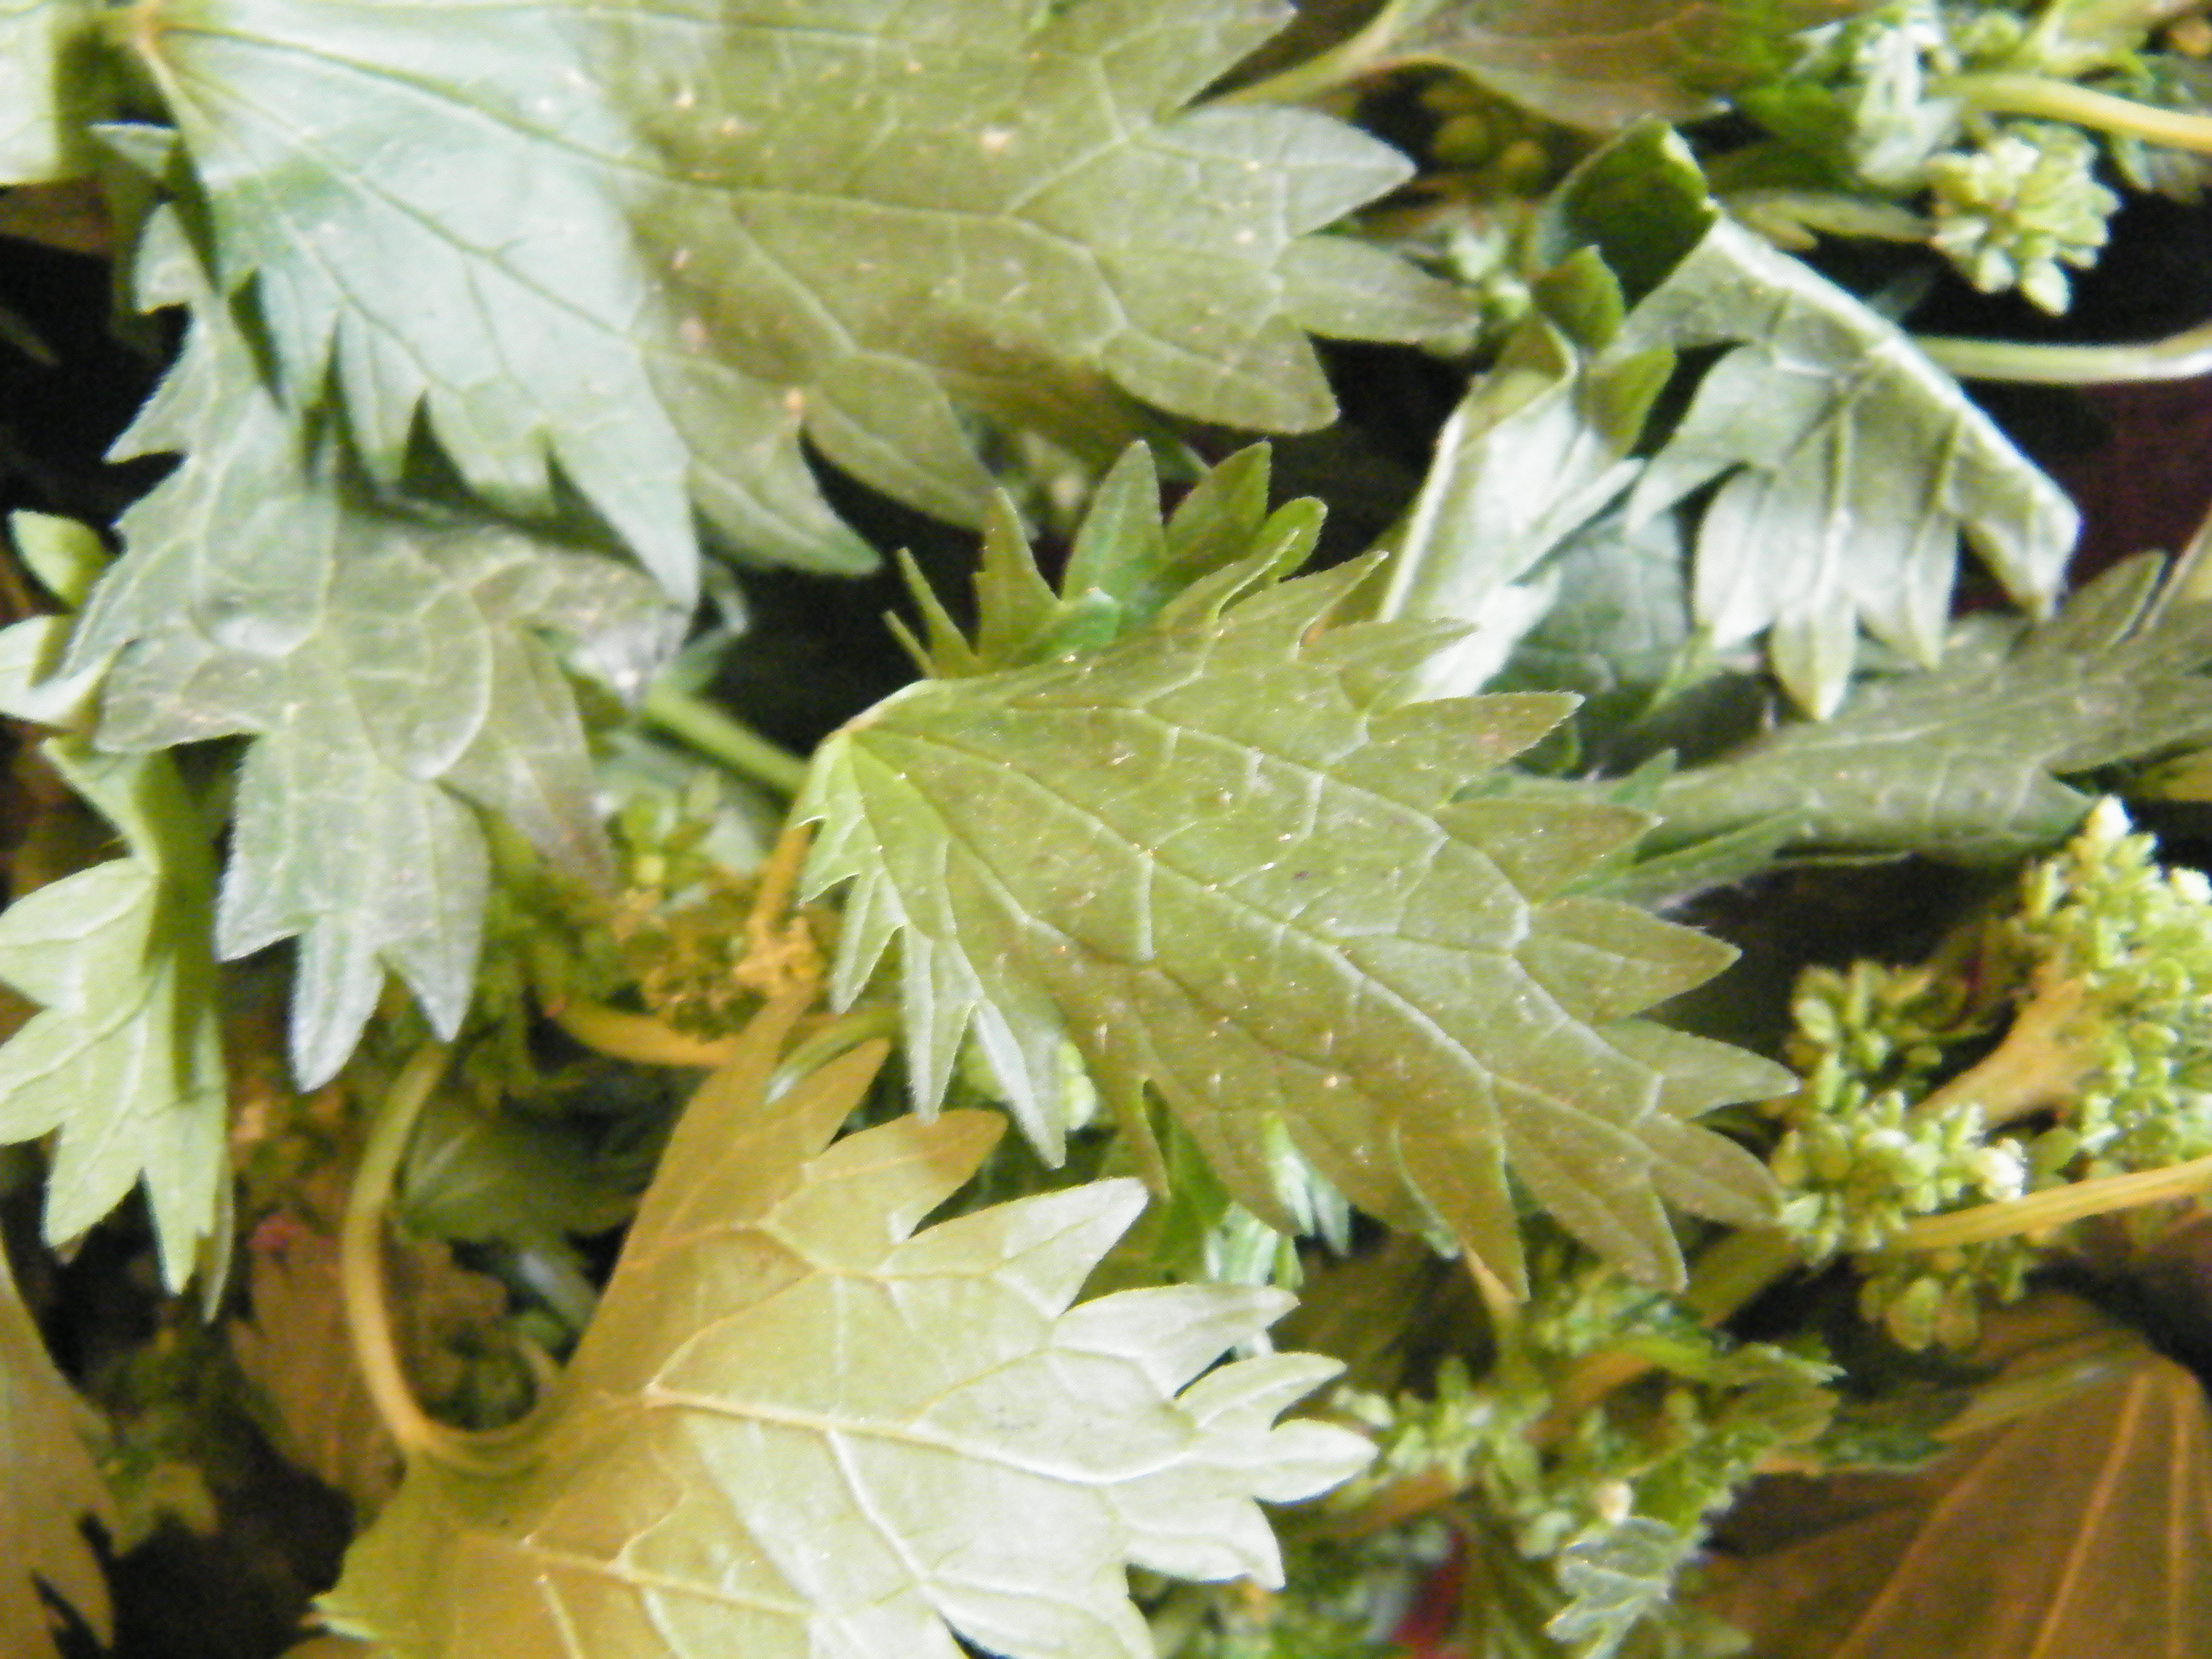
Nettles taste a bit like the lovechild of spinach and an artichoke.  They don’t have the chalky feel of spinach and are milder in flavor, but they do have a little of the mineral/metallic/plastic tang that artichokes always seem to have.  There’s a hint of lemon in there as well, and though they’re a little grassy, they don’t in any way taste like grass or weeds – though if you buy nettles instead of picking them, make sure you pick out the long strands of actual grass that seemed to show up in all the bunches.  Nettles are toothy-leaved and roundish-stalked, not long, flat blades. (Did I, I know you’re thinking, shrug and assume those long blades were perhaps a rogue type of weird nettle stalk among my branches?  Yes, yes I did.)  Look for healthy-looking plants that have not yet begun to flower (flowering makes the leaves turn bitter), the younger the better for sweetness and mildness of flavor.  You can just use the young leaves, not the full stalk and tiny flower buds the way I did, if you want to keep the flavor as mild as possible and still reap all the nutrient benefits.  Nettle soup is a classic way to use them, or nettle pesto once they’ve been blanched, but I liked them sauteed:

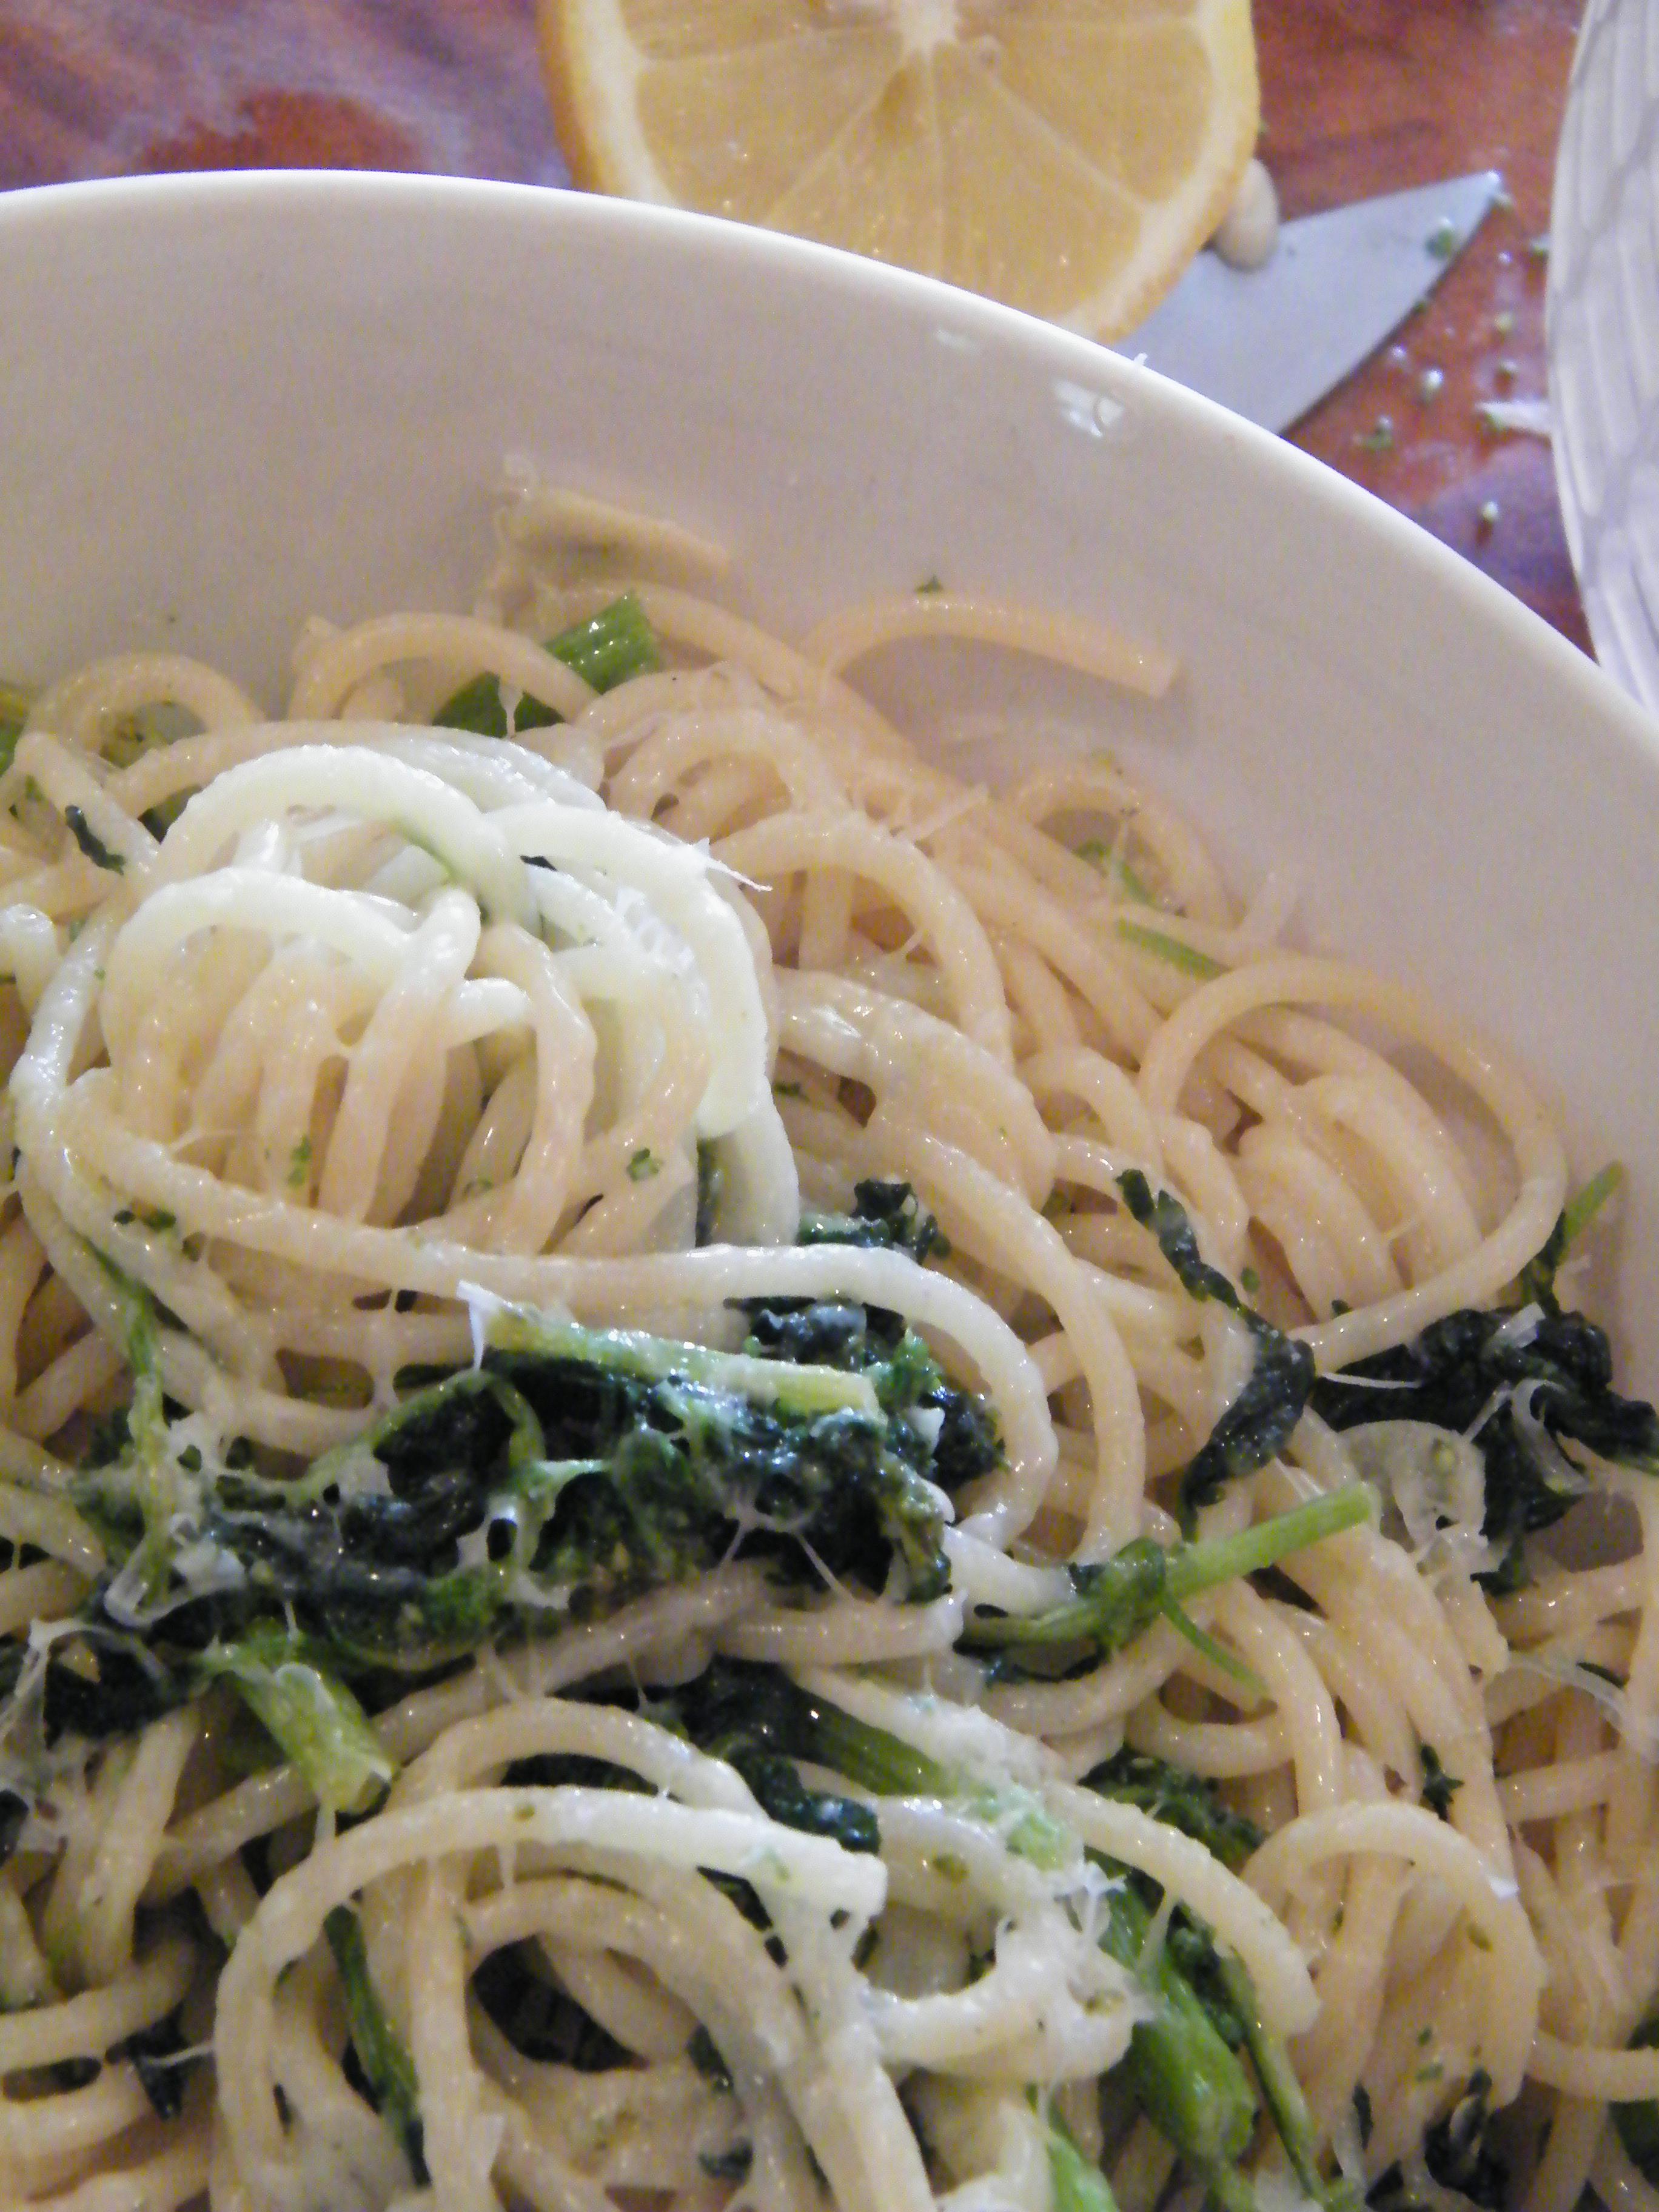
Lemon-Parmesan Pasta with Stinging Nettles
Nettles
Olive Oil
Freshly grated parmesan (not the green tub)
Lemon
Garlic cloves
Spaghetti

  • Boil water and start the pasta.  Once you’ve added the noodles to the water, start your nettles:
  • In a very large pan, saute chopped nettles in roughly a tablespoon of olive oil (Use as many nettles as you like – like any leafy green, they cook down quite a bit).
  • When the nettles are wilted, squeeze the juice of one to 1 1/2 lemons into the hot pan.
  • Add a little more olive oil, along with chopped garlic (we used 2-3 cloves for just 2 1/2 people, but we love garlic).  Cook until the garlic smell hits you, just a minute or so.Lemon-Parmesan Pasta with Nettles
  • Drain the pasta, reserving about 1 tablespoon of the pasta water (you can save yourself the trouble of “reserving” boiling hot water by just draining the pasta lazily so a little of the water stays in the pot).  Add the pasta and reserved water to the frying pan, and mix.
  • Spread the pasta dish out in the frying pan to get the most surface area, and grate fresh parmesan on top.  Fold the pasta dish into the serving bowl as if it were an omelette – slide half in, then fold the other half on top – then toss immediately.  This gets the parmesan integrated into the food so you don’t just have hunks of parmesan in certain bites and none elsewhere.
  • Top with salt, pepper, and a little more parmesan if you like.

Next time, I’m making Dungeness Crab and Wild Nettle Frittata or Stinging Nettle and Asparagus Risotto.  They both sounded awesome, but I didn’t find the recipes until I’d already eaten my bunch.  But I’ll buy more.  They’re too tasty not to try again, and besides, I refuse to be intimidated by a vegetable.  I’ll brave you yet, nettle thorns!  Just not, you know, this season.

Stinging Nettle LeafTrim? You can trim a bit of the tough base and eat the rest, or trim off everything but the leaves – your choice.  But watch out for the stingers!  They’re most prevalent towards the tips, so you can grasp the bottoms without getting stung.  Use gloves, or my wimpy method as above.
Edible when raw?  No.  You will get stung, and possibly get burning welts in your mouth and throat, even if you puree them – it’s an acid that causes the burning, and it needs to be cooked to be deactivated.  Unless, of course, you’re part of a contest.
Worth the price of organic? Probably.  Though they’re basically a weed, so there’s no real reason someone should be using a bunch of sprays on them anyway, I’d still go for organic since you’re eating the leaves where the residue will sit.  If you can’t find them organic, I would definitely do the blanching technique and probably toss that water rather than using it for tea (as some people do).
Best with:  Frankly, kind of everything.  They’re such an ancient food and grow in so many places that recipes abound, from Italian pestos to Scottish soups to Indian curries.  I like to eat as seasonally as possible, so I like them with other spring flavors like young garlic ramps, lemon, fresh fennel, asparagus, peas (if you don’t hate them)…  Nettles are a bit more delicate than some other leafy greens, so I personally avoid stronger flavors like anchovies or my beloved bacon as well, but that’s only because nettles don’t need it the way bitter greens do.  It certainly would taste fine if you decided to go that route.
In Season:  In cooler climes, you can probably find them Spring into early Summer, maybe even again in fall, but here in Southern California, you’re looking at a window of just a few weeks in early Spring, so jump on them while you can.
How to Store: In the fridge, in a produce box or plastic bag,  they should keep for a week or more uncooked.  Once they’ve been blanched, use or freeze pretty quickly.
Note: If you get stung, dock leaves are the miracle cure, but since most people don’t have those lying around – make a paste of baking soda and water and apply to the area, and once the inflammation goes down, make sure there are no stingers stuck in your skin.  If so, remove with scotch tape.  There’s no danger in getting stung other than the pain, so it should go away with no ill effects in a couple of days regardless.
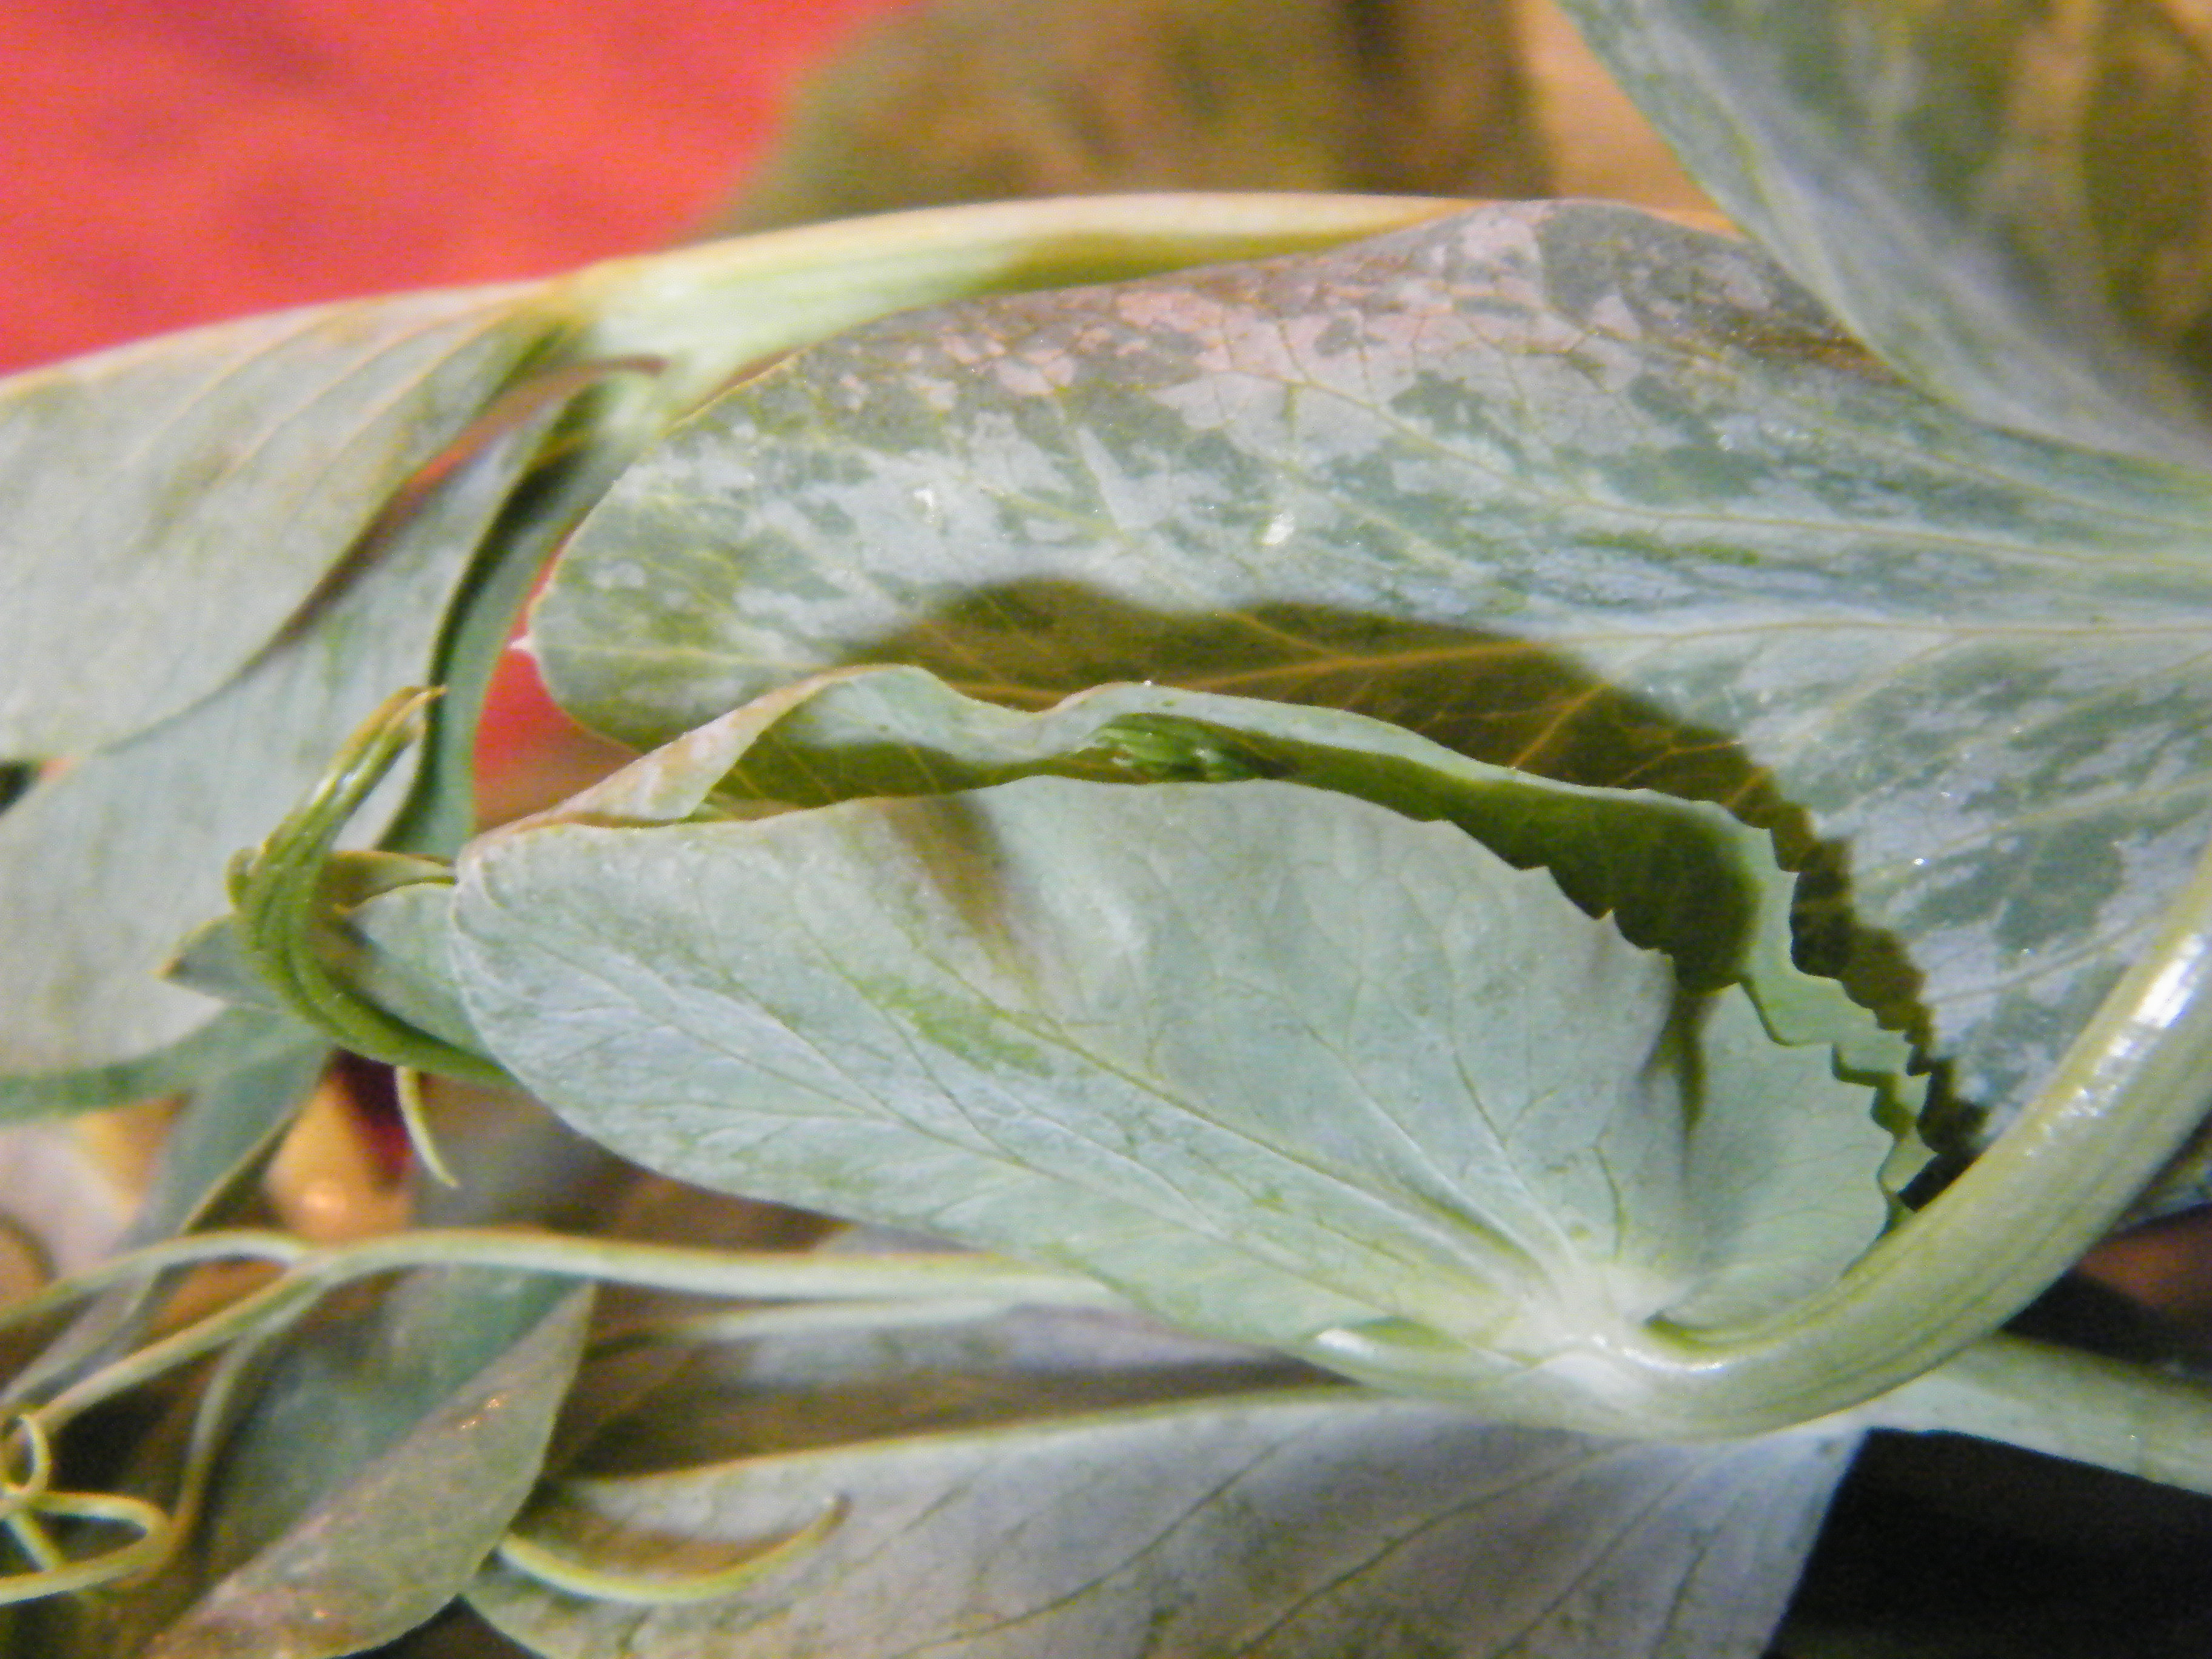
Share this:

  • Facebook
  • Pinterest
  • Twitter
  • Tumblr
  • Reddit
  • More
  • Email
  • Pocket
  • Print

Like this:

Like Loading...

Eating the Vines (aka Pea Tendrils)

27 Wednesday Mar 2013

Posted by strangeandyummy in Beans and Peas, Flowers, Green, Leafy, Miscellany, Spring, Vegetables

≈ 1 Comment

Tags

crunchy, curling, delicate, greens, nutty, pea shoots, pea tendrils, snow pea, sweet, vine

True Confessions time:pea tendrilsI despise peas.  They are the eyeballs of the vegetable world, quite literally – tiny, pasty eyeballs that show up to ruin pea plantotherwise lovely dishes, like carbonara and shrimp with lobster sauce and, worst of all, the ubiquitous fish and chips “with mushy minted peas.”  How on earth does anyone think that sounds the least bit appetizing???

But I digress.  Spring as they may hearken, it will be a long time before you see a post about English peas on this blog, which is why I felt something of a personal victory in purchasing pea tendrils at the market on Sunday.

I’m not sure if they’re the tendrils of shelling peas or pod peas (HUGE difference to pea haters, by the way – snap and sugar peas are just fine, thank you), or if they just mix them all in the bin and it doesn’t matter, but to purposefully (and rather expensively) purchase things that might have some connection to the peas I deplore is dedication to experimentation, my friends.

curling tendrilsIn short: slap my ass and call my Sally.  Or whatever the expression is.

Yup, you heard it here first: they’re delightful!  I assumed they would taste sort of like peas, so I mixed in the leftover nettle greens I had on hand as well just in case I hated them, but I needn’t have, and maybe even shouldn’t have, as the two greenspea tendrils vines have very different flavors and yes, my plate seriously resembled lawn clippings.  But the pea tendrils had a delicate nuttiness, a vegetative crunch without the grassy flavor so common in most greens, an underlying mild sweetness, and tasted just simply fresh.  It was spring on a plate.  Add to that the graceful curve of the vines’ tiny fingers flash-sauteed in hot oil and fresh garlic, the bright deep green, the shy head of a white flower poking out from a tiny swaddle of leaves and the entire thing took on something of a gentile air.  I wanted to slow sip pea flowera pale sparkling wine while discussing poetry in a cool mid-afternoon sun.  (Instead of shoveling food into my face before I pass out from exhaustion and drinking my wine like it’s shots of tequila while watching DVR’ed shows with closed captioning because the kids are asleep and my house is too small?  Yes.)

Pea tendrils are the young shoots of pea plants, which makes me so happy because snow peas are one of the few things that I have grown successfully more than once, except I forget to water them and they never produce pods.  But now I can just harvest the vines! pea vine climbing The older they get, the tougher, and some people say to ditch the thicker stems, but I used everything in the bag I bought and the thicker stems were simply slightly crispier – mine were probably young enough that nothing had gotten woody or chewy yet.

Look for young, spry-looking pea shoots without wilt or yellowing.  Many people chop them before cooking, and if you purchased long strings of them, you probably should, but my farmer sold them in roughly 3-inch long pieces, and they were perfectly manageable on a fork and retained their beautiful curls on the plate – half the fun in the first place.  The best method for cooking them seems to be exactly what I found:  very hot oil, throw them in for a quick saute and a minute later add garlic until you can smell it (the whole process goes fast – maybe even just three minutes start to finish), put on a plate with salt, and enjoy.  People that like spices add red pepper flakes, too.  I tossed mine with some pasta for a vegetarian dinner.  You might also serve them with a fried or poached egg.  You see what I’m going for here?  Keep it simple, folks.  Simple and spring-like.  And if you have time for a little poetry, let me know how that goes.  I’m jealous already.

curling tendrilsTrim? Conventional wisdom says that if you can see flowers, remove the stems nearby as they’ll be too thick to be appetizing, some even include the tendrils.  I think the tendrils are pretty and had no problem with thicker stems, but if you’re eating raw I would follow the advice.
Edible when raw?  Yes, but trim off the thicker stems.
Worth the price of organic? Hard to say.  Peas are traditionally considered a “clean” food, but I think that’s because you toss the pod.  I would definitely go organic for the tendrils – they just seem to invite pesticide residue based on how they grow.
Best with:  Simple, spring-like flavors – fresh garlic, lemon, radishes, eggs, plain grains – brown rice is as nutty as I’d go; heavy starches like bulgur or barley or beans would overpower the delicacy of the shoots, in my opinion.
In Season:   Spring
How to Store: They don’t keep well.  Use the day you buy them, the next day at the most.  Store in the fridge if you’re keeping them at all, but honestly, they wilt very fast.

Share this:

  • Facebook
  • Pinterest
  • Twitter
  • Tumblr
  • Reddit
  • More
  • Email
  • Pocket
  • Print

Like this:

Like Loading...

Swiss Chard (now with Sweet Potato! and of course bacon…)

16 Tuesday Oct 2012

Posted by strangeandyummy in Fall, Green, Leafy, Miscellany, Red, White, Winter, Yellow

≈ 3 Comments

Tags

bright, broad leaf, chard, dark, green, leafy, nutty, rainbow, stalk, swiss, veined, wide

There’s a lot of repetition in my recipes and posts, if you haven’t noticed already.  Greens are greens, and they all go nicely with bacon.  That’s not my fault.

Swiss chard is no exception.  Of all the bitter greens you’ll find at the market, swiss chard is the mildest and the prettiest.  Rainbow chard is the most common variety, simply because it’s so pretty.  Red, white and yellow stalks wink at you as they snake up the center of the phenomenonally large, deep green leaves.  Look for fresh looking leaves with slightly firm stalks – ignore a few rips, tears, or bug holes.  Chard leaves aren’t as hearty as something tougher like kale, so they do rip easily.  The stalks do bend a little, but they shouldn’t be bending on their own or wilting.  The leaves can range from almost purple in the red varieties to kelly green in the yellow or white, so look for those signature brightly colored veins, rhubarb-like stalks, and wide, soft leaves.

Wash well – I recommend at least 2 rinses – scrubbing the stalk with your thumb under the faucet.  They trap a lot of dirt.  

Chard is slightly sweet as greens go and a little nutty.  (I feel like I should make some sort of vaudevillian pun here.  I’ll resist the urge.)  Because it’s a little milder, it can sneak its way in to almost any recipe, though it really shines with other fall vegetables – winter squashes and pumpkins, walnuts, root vegetables.  I had planned to use this chard in a sneaky green way by slicing it up very fine, mixing with ricotta, stuffing it into giant pasta shells, covering with sauce and cheese, and baking.  But we had our very first fall day in Los Angeles last week – cold and rainy and absolutely delightful – and I wanted something far more Autumnal.  (I don’t think that word means what I think it means…  Autumn-y?  Sure.)  So instead, I made a Chard and Sweet Potato Gratin.  I made enough for the husband and I to have some for dinner, to save some for the toddler for tomorrow’s lunch, and maybe even a little leftover for my lunch.  No dice.  We ate the whole pan.  Oops.

Sweet Potato and Chard Gratin

This is not a real gratin because there’s no bechamel.  I like to think of it as lazy (wo)man’s gratin – mix ricotta with another soft cheese or a splash of whole milk and you have something not at all as rich and delicious as bechamel, but serviceable and super fast for a work night supper.

  • Sweet potatoes – I used 3 smallish/medium-sized for a 2 1/2 qt oval casserole dish, but if I’d used the giant ones in the bag I might have only used one.  You’ll have to eyeball.  And yes, botanically I think these orange ones are yams, but I call ’em like they’re labeled.
  • Swiss chard (I used 4 or 5 giant leaves)
  • Ricotta (I used about 1 cup)
  • Goat cheese (I used about 3 inches from a goat cheese log) – as above, if you don’t like goat cheese, you can sub in something else like farmer’s cheese – very mild – or just a splash of whole milk to thin it out
  • Cheddar or other melting cheese (I used about 2 oz)
  • 1-2 slices bacon (If you’re lucky enough to have a Trader Joe’s, get the bag of Ends and Pieces – a steal at something like $2.99 a pound and perfect for recipes in which you’re cutting up the bacon anyway.)
  • olive oil

Chop the bacon into bite-sized pieces and fry until almost crispy.  Preheat oven to 400.Slice the sweet potatoes into long, thin slices.  Drizzle a little olive oil on the bottom of your dish to coat.  Layer one layer of sweet potato into the dish.

Slice the chard into thin strips, discarding the bottom stalks. Layer half the chard on top of the sweet potatoes.

Place the goat cheese in a bowl in the microwave for 20-30 seconds to soften (not melt).  Mix thoroughly with ricotta.  Using about half the mixture, dollop spoonfuls on top of the chard and use the back of the spoon to spread them over the layer.

Sprinkle half the bacon on top.

Place the rest of the chard on top.  Layer another layer of sweet potatoes to cover.  Spread the remainder of the ricotta mixture on the sweet potatoes.  Sprinkle with the remaining bacon.  Grate the cheese or break into chunks and disperse over top to cover up any “holes.”  Bake at 400 until sweet potatoes are soft when stabbed with a fork and cheese is melted, about 20 minutes.

ugly but delicious!

For Chard:
Trim? Yes, at the bottom of the stalk where it gets tough and splintered, though some people lose the whole portion below the leaves as well.
Edible when raw?  Yes, when young.  It’s very chewy, however, so if you get large/older leaves, definitely cook the stalks, and probably the leaves as well.
Worth the price of organic? Yes.  Greens are generally considered high on the Organic Preferred list.
In season: Fall, Winter.
Best with: Fall foods – winter squashes, pumpkin, squash, sweet potato, even apples and dried fruit like raisins.  Walnuts, pecans, bacon or sausage for protein – earthy, smokier flavors do well.  Garlic, carmelized onions, goat cheese – sweeter flavors complement the greens’ slight sweetness.
How to Store: Like other greens, wash in warm water, give them a cold bath, and store in the fridge for a few days or possibly as long as a week, though that’s pushing it.

Share this:

  • Facebook
  • Pinterest
  • Twitter
  • Tumblr
  • Reddit
  • More
  • Email
  • Pocket
  • Print

Like this:

Like Loading...

Kale Chips

13 Saturday Oct 2012

Posted by strangeandyummy in Fall, Green, Leafy, Spring, Winter

≈ Leave a comment

Tags

bitter, dark, dinosaur, flat, greens, kale, lacinato, leafy, tuscan, veined

I was a little slow to the Kale Train, I think.  The only kale I’d ever seen or heard of prior to a year or so ago was Curly Kale, the green kind sold in supermarkets that looks a little like brain coral and gets chopped up very fine and stirred into Irish Champ.  Or at least, that’s the only thing I knew to do with it.

But kale comes in plenty of other varieties, and the one that was most revelatory to me was Tuscan Kale, also called lacinato kale or dinosaur kale.  Flat and deep green with a giant kale-like rib up the middle, Tuscan kale begs to be made into chips.  You can eat it any other way you like – sauteed into other dishes, or as a side, or my personal favorite, as with all bitter greens, prepared in any way, shape or form with bacon – but kale chips are really the perfect venue for this particular kind of kale to shine.  They’re quick, they’re easy to make, they keep for a good week if you can actually keep them around that long, and best of all:

My toddler loves them.  Ask any parent what they do to make their kids eat their veggies, and you’ll get various purees and promises and smothered in cheese and snuck into brownies, but my answer always is: Kale Chips.  On those days where he refuses everything, throws even fruit and generic O’s I bought because they were organic and it turns out they’re chock full of sugar, he’ll eat kale chips.  And for that, I love kale.

Look for dark, deep green leaves, ranging almost to a blackish-green in color, with a pale thick rib up the center.  The leaves look like they’re almost flat, though they do curl a bit at the edges, but up close you’ll see that the surface of the leaf rises and falls with the veins, like rolling hills.  Leaves can be smallish (4-6 inches), but usually range much larger than that, as much as a foot or two in length from stem to top.  Most recipes will tell you to remove the rib from all kale before eating, but we often don’t.  I usually get rid of the really tough splinter-y looking part at the bottom, but the rest can usually be sliced up small and tossed into whatever you’re putting the kale in.  Kale chips, however, are the exception to my lazy/cheap tendencies: lose the rib.  If you do plan on using the stem, be sure and scrub it with your thumb when washing – dirt tends to stick to the thicker part of the rib.

It seems like everyone has a recipe for kale chips out there, from Martha Stewart to Epicurious to Smitten Kitchen and thousands of other sites in between, but after making them week after week, I’ve discovered a few hints:

  • Lower temp is better.  I’ve seen 250, 275, 300 and 350 on different sites, and in my experience, anything over 300 ends up tasting burnt, even if they don’t look it.  Use an oven thermometer if you have an old gas contraption like mine, because the first time I made them, I made the 350 version, but it was pre-thermometer, so it turns out it may even have been more like 400.  That first batch was definitely burnt.  Subsequent attempts have taught me to dry them out rather than roast them.
  • Don’t use canola oil.  We don’t use canola oil for anything anymore, but when we first tried kale chips, we did and we did.  They were awful.  Canola can get a strange fishy taste to it (I read why once but I forget now) and it definitely came through on something as delicate and spare as kale chips.  If you like seaweed snacks, give the canola a try.  Otherwise, go for olive.  (Side note: I’m curious what sunflower seed oil would taste like – since nutty flavors go so well with bitter greens, I imagine it might be quite nice.  Anyone tried it?)
  • Spice it up.  As much as I try to eat greens at every dinner, I have to be honest: I don’t love them.  Hence the predominance of bacon in all my favorite bitter greens recipes.  Kale chips according to most recipes consist of olive oil, salt and kale.  And guess what?  They end up tasting like kale.  Crispy kale, sure.  Salty like a snack?  You betcha.  Kale?  Yup.  I prefer mine with garlic powder, but I’ve done them with garlic, ginger and a dash of soy in with the olive oil for an Asian-inspired version that were quite nice as well, and I imagine if you were someone that could handle spicy foods, some cayenne pepper or chili powder could be really interesting.  Definitely put something on there.  Weirdly, as an FYI, garlic and parmesan?  Not as good as I thought it would be.  It wasn’t BAD, they just taste better with straight garlic.

So my version in a nutshell:

Kale Chips
1 bunch Tuscan kale
olive oil
salt
spices of choice (garlic powder is my go-to)

Preheat oven to 275 or 300 – I usually just turn it on to somewhere in between.

Remove the rib from each leaf by flipping the leaf upside down and slicing on either side of it.  I often ignore this advice when cooking with kale, but with chips, you do not want it there.  Baby leaves or thinner rib near the top can be left alone if you’re feeling lazy, but you really want all leaf for these.

Slice the kale leaves into relatively uniform pieces.  You’ll have a few super skinny ones that were next to the rib and maybe some giant flat ones from the bigger leaves – that’s okay, you just want to try and get everything to be finished cooking at the same time.

Put all the kale leaves in a ziploc bag or bowl.  Add spices, and olive oil enough to coat – don’t be too stingy here, but don’t drown them.  I often go as much as a whole tablespoon, but I eyeball it – start with a little and if that’s not enough, add more.  They’re very flexible, but too much oil will make them begin to wilt.

Toss around the ziploc to coat the leaves, or toss gently with your hands if they’re in a bowl – do use your hands for the bowl.  Utensils tend to rip them to shreds.

On a large cookie sheet (I usually end up needing 2), lay down parchment paper or aluminum foil – this is not necessary, but it makes cleanup a breeze.  Spread out the leaves so nothing’s overlapping; but you can get them quite close to each other, like a game of Healthy Tetris.  Bake about 20 minutes or until crispy.  If they start to turn brown, your oven may be too hot or you’ve baked too long – they’re still edible, but they will taste more bitter.

Remove from the oven, and slip the parchment or foil off the pan with the leaves still on it onto a table, counter, or rack to cool.  Voila!  Clean cookie sheet and you don’t have to burn your fingers transferring leaf by leaf to a rack.  They’ll keep up to about a week in a jar or ziploc bag.  They don’t look pretty, but they sure taste awesome.

*Special Note for people with toddlers and/or people that are stronger than you think you are: You will accidentally crumble half of them into bits when you absentmindedly grab for one.  Save the bits!  They’re great hidden in a quick quesadilla or shaken into any pasta dish to get some quick extra greens that, at that point, just taste like garlic salt.

Looking for how to prepare Tuscan Kale?  Just like Frilly Purple Kale –

Share this:

  • Facebook
  • Pinterest
  • Twitter
  • Tumblr
  • Reddit
  • More
  • Email
  • Pocket
  • Print

Like this:

Like Loading...

Frilly Purple Kale

15 Sunday Jul 2012

Posted by strangeandyummy in Fall, Green, Leafy, Purple, Spring, Vegetables, Winter

≈ 5 Comments

Tags

bitter, curly, frilly, green, kale, leafy, raw, redbor kale

It’s a little annoying when I go to the Farmer’s Market and there are seven thousand and three varieties of kale, and they’re all very pretty but they all look a little like something greenspeople plant by the thousands at Disneyland in Autumn rather than something I want to put on my plate, and you ask the farmer, “How do I eat this?” and he replies, “Like any kind of kale!”  Yeah, thanks.

But I guess that’s why I started this blog in the first place.  I don’t have cookbooks full of kale recipes, and even if I did it’s unlikely I’d have tried enough of them to be able to speak nonchalantly about them, like, “oh, of course, I’ll just whip up my Kale a la Bligadibong.”

This guy:

is technically called Redbor Kale, I think, but I like to call it Frilly Purple Kale, for obvious reasons.  He’s not red, for starters.  But he was pretty, and I need more iron in my diet and it’s a little hot for Kale Chips (what are Kale Chips you say?  Glad you asked!  Post on them coming up shortly…  Posted!) so I figured, why not?  Let’s try something new.

I thought a kale slaw of some kind might be nice, since kale is related to cabbage after all, but I couldn’t decide whether to go traditional mayo-type, or interesting peanut dressing, or something else entirely.  Finally, I settled on modifying this one for the main reason that it contained no red peppers which I’m not a big fan of.  In addition to being a lovely little side salad, I very much like that it’s vegan, which makes no difference to a bacon-lover like myself, really, except that bacon is always my go-to for bitter greens, and probably isn’t the healthiest counterpart.  More importantly, though, since it’s vegan that means no dairy, which means it can sit outside at a barbecue most of the afternoon and not poison my friends.  Score!

Kale Slaw with Toasted Walnuts

My changes:  I used 1 bunch Frilly Purple Kale and then at the last minute threw in 1/3-1/2 bunch of Curly Kale because it was in the fridge about to go bad and I didn’t think I had enough salad.  As an added bonus, however, the salad turned out much prettier with a little more variety of color, so I think I’ll do this in the future as well.  The recipe calls for just one large carrot, but I had 3-5 medium (again, about to go bad – end of the week fridge clean-out here) so I went with those instead.  And again, I recommend a little heavier on the carrot – it gives it a nice crunch.  I also wasn’t about to take the time to mince walnuts, so I took my good ol’ trusty bag of Walnut Halves and Pieces and just sort of crumbled them into more uniform sizes with my hands.  I probably ended up using more than the 1/4 c called for, but I also liked that I could actually taste them.  Minced seems…picayune.  But do take the time to toast them – toasting nuts brings out the flavor so you can use less, and the bit of warmth when they’re fresh out helps wilt the kale a bit.

  • 1 1/2 bunches Kale, preferably Frilly types because they’re prettier
  • 3-4 medium carrots – I like  to use multi-colored instead of just orange, again, for looks
  • 1/3 cup red wine vinegar, separated into 2 tbs + what’s left
  • 1/3 cup extra virgin olive oil, separated into 1 tbs + leftover
  • 1 tablespoon honey
  • ½ teaspoon ground ginger
  • 1 clove garlic, minced
  • ½ teaspoon freshly ground black pepper
  • ¼ teaspoon sea salt, more to taste
  • 1/4 – 1/2 c crumbled walnuts (toasted)

First thing after washing, you’re going to want to get rid of this guy:That’s the center rib of each leaf.  I often skip this step when I’m cooking kale, but for raw kale salads, it’s just too fibrous and unappetizing.

The easiest way to remove that rib from Frilly Kale is to fold the leaf in half and just run the knife down the side of the stem.

Please don’t mock my knife skills.  I have none.  I’m amazed I haven’t lost a thumb yet.

Pull all the lovely leafy parts away and toss the ribs into the compost pile.

Line up your leaves and slice them into thin strips.  This will make a giant mess that will severely disappoint your dog when she races over to see what you are spilling all over the floor.

Now comes the kinky part.  Put your shredded greens (purples?) into a bowl, add 2 tbs red wine vinegar, 1 tbs olive oil, and some salt, and give it a massage.

That’s right, a massage.  Don’t just toss it people, rub it in.  That’s the key to eating raw kale.  Raw kale is a tough, somewhat bitter little bugger, and as a tough, somewhat bitter little bugger myself, I can tell you, the only thing that makes it palatable is softening it up through a good massage.  And doing dishes for it.  Oh wait, that’s just for me.

Give it a good 3 minutes of rubdown, working the dressing and salt in, and then let it sit.  Turn on some ocean sounds for it so it can really relax.

Meanwhile, start toasting walnuts on aluminum foil in toaster oven at 325 for 8-10 minutes.

Peel your carrots and remove the tough stem end and maybe a bit of the tip if your peeling skills stink and it’s got dirt on it still.  If you have a food processor, I recommend attempting to put your carrots through the grater because if it works it’s super-fast, looks much nicer, and gives you just a wee bit of crunch without making the salad all about the carrots.  But since my carrots were getting a little wiggly, it only worked on 2 of them, so I had to chop the last one into shredded carrot size by hand.  Pain in the patootie.  Lazy lazy people might just want to buy pre-shredded carrots from the grocery store and I wouldn’t blame you.

Toss the carrots with the now-placid kale.  With a whisk or blender, combine the remaining oil and vinegar, honey, ginger, S &P, and garlic – do use a fresh clove if you’ve got it instead of garlic powder; it makes a difference.  Toss the dressing into the salad.Take the toasty walnuts out of the oven and dump them into the salad – toss quickly and carefully – they will be hot.  You will accidentally burn your hands and may suck on your fingers on instinct and then have to remind yourself to wash your hands again before continuing to toss.  Not that I did that….  You may choose to let them cool first, like intelligent people probably do, but I actually like that the hot walnuts help the kale wilt just a little bit more – if you’re making this salad right before eating, that’s a good thing.  If it’s going in the fridge until tomorrow, it probably doesn’t matter.

I honestly love this salad – it’s good cold, it’s good room temp, it keeps well, and it’s a lot healthier than cole slaw or potato salad for summer barbecues.  Also, it’s pretty.  I like pretty.

Some General Kale Facts:

Trim? Not necessary if you’re cooking it, though often preferred – for this recipe, lose the center rib.
Edible when raw? Yes – it needs to be massaged or wilted slightly to reduce the toughness, but it’s lovely.
Worth the price of organic? Yes – greens are on most “Must Buy Organic” lists, kale in particular, frilly kales especially in particular because pesticides get trapped in the curves and frills.  Organic all the way.
Best with:  Kale in general is good with bacon, goat cheese, vinegars – strong flavors to help counteract the slightly bitter taste of the leaf.  I also like soy sauce, peanuts/peanut oil, teriyaki, and other Asian flavorings for the sweet/sour interplay.
In Season:  It likes a frost, so technically fall, winter and spring, but I’ve never NOT seen it for sale unless it’s been 100 degrees for a straight month.  If one variety of kale is gone, you can usually swap in another.
How to Store: A trick I learned from an Internet stranger on a forum for all greens – as soon as you get home, fill your sink with warmish water.  Soak your greens as you scrub them with your fingers to get the dirt off the stems.  Drain the sink, then refill with cold water – the warm water opens the plant pores so they’ll absorb more water; the cold closes them to prevent wilting.  Pat dry with paper towels or spin in a spinner and put in the fridge.  Kale is a nice hearty green that we’ve been able to keep around for as long as 2 weeks, but I wouldn’t count on longer than a week if you want to be able to use the whole thing without yellowing bits.

Share this:

  • Facebook
  • Pinterest
  • Twitter
  • Tumblr
  • Reddit
  • More
  • Email
  • Pocket
  • Print

Like this:

Like Loading...

Purslane Makes You Peaceful

07 Saturday Jul 2012

Posted by strangeandyummy in Fall, Green, Herbs, Leafy, Summer

≈ 8 Comments

Tags

citrus, fleshy, leaf, oval, pigweed, purslane, smooth, succulent, verdolagas, weed

I had never even heard of purslane until about 6 months ago, which is surprising because I’ve always been pretty into herbs.  I thought maybe it was a new name that’s making the rounds or something, because when I googled it, it also came up as pigweed.  Now THAT I’ve heard of.  I think Thoreau ate it at some point in Walden, and what a horrible name for such a cute little plant.  I’m sticking with purslane.

Apparently, purslane, pigweed, verdolaga, whatever you call it, is a notorious weed that runs rampant all over the place.  I’m clearly in the world minority for thinking this is a new thing.  Frankly, I feel a little stupid, but there you go.  Everyone recommends you just pick it out of your own sidewalk if there’s no pesticides around, but for the life of me I can’t figure out which of the myriad of weeds in my backyard might be purslane, so I will buy mine at the farmer’s market for now, thank you very much.  I’m 98% sure we have some lovely patches of it growing where the grass died, but that leaves me about 89% sure it has dog pee on it, since it’s growing where, you know, the grass died.

It’s a green, low-growing succulent, which means it’s leaves and stems are a bit on the fleshy side, but for some reason I just think it’s adorable.  It’s leaves branch off from the fleshier stems – either green or a darkish red – and each little branch ends in a miniature nosegay of flat, happy, oval leaves with the thinnest amount of red or golden piping around each one.  Both stems and leaves are edible, and they have a slightly sour, slightly lemony flavor with a texture somewhere in between lettuce leaves and lettuce stem.  It’s definitely chewier or juicier than a regular old lettuce leaf, but it’s not quite crunch (not like a carrot; more like cucumber crunch), and not really as watery as you might imagine.  Purslane’s big appeal, other than being able to harvest out of your yard if you don’t have a dog, is that it is chock full of omega-3s.  It’s got the highest concentration of omega-3s of any plant, say some, so salmon-haters (talking to you, sis) and vegetarians, rejoice!  You too can get your omega-3s, and for way cheaper than wild sockeye.  It also has very high levels of vitamins A, B (pretty much all the variations), C and E, though apparently it’s also higher in oxalic acid than even spinach, which means very little to most people, but if you’ve ever had a kidney stone, your hackles probably just went up.  So if you’re worried about that stuff, don’t overindulge.  But in addition to Thoreau trying it out, Gandhi practically lived off the stuff.  He called it luni; most sources credit its origins in India, though it grows worldwide.  So if those two guys can eat it, I hereby decree purslane as the Harbinger of Peace and Harmony.

We tried our purslane two ways.  The easiest way is to simply chop into bite-sized pieces and toss it in among the rest of your greens in a lovely salad.  It lends a nice bite and an interesting addition, and goes very nicely with a simple oil and vinegar dressing (balsamic works better than red wine vinegar here – the purslane is a bit too sour for a sour vinegar.  I imagine sherry vinegar might be lovely as well, but I ain’t splurging on sherry vinegar to dress 50 cents worth of weed.)  This salad sounds awesome, but we didn’t have any zucchini on hand.

We also tried “Huevos con verdolagas” which is to saute purslane and onion, then scramble in some eggs, and wrap the creation in a tortilla.  I think corn tortillas are traditional, but all we had was whole wheat with flax seeds, so that’s what our huevos got. 

Honestly, I was only trying this recipe because of this blog.  The salad seemed a fine way to eat it, and the rumors of leaking mucilage when you cook this succulent skeeved me out.  But Huevos con Verdolagas was something of a revelation.

Chop up equal parts onion and purslane, stems and all.

Saute in butter until the onion starts to soften, about 3-5 minutes.Scramble eggs in a separate bowl and add to the sautee.  Scramble until the eggs are cooked, just a couple of minutes.  Wrap in a tortilla and eat.

So why was this such a revelation?  Because I really want to like purslane since it’s so good for me, and the salad was good, but the purslane works better as an addition there rather than the main event.  It’s a little too lemony/sour to be the only green in the show.  But this dish was an easy way to use a lot of purslane, and frankly, was surprisingly delicious.  The smell of the onions and purslane cooking reminded me of the smell of green pepper, which always smells great but ends up tasting like bile and old burps – sorry – so I was nervous.  But the taste!  It did taste like a bell pepper, but like the best parts of them without the bitterness.  It was sharp and acidic and had a little bite but not enough to be in the least bit harsh.  There was a little sourness and a bit of citrus, and I have to admit, I added some cheese because cheese makes everything better, but it didn’t need it.  I even forgot to add salt, and didn’t notice until I’d finished it.  THIS is how I’m going to eat my purslane.  In less than 10 minutes, wrapped to go, and chock full of yummy vitamins.

Many people recommend wilting it, boiling it, putting it in soups to thicken things, and in innumerable other dishes, but we only were able to procure a small bunch at the farmer’s market and it’s 100 degrees out, so doing anything involving soups or long prep time wasn’t going to happen this post.  But if you have a favorite way you like it, please post!

Trim? Not necessary.
Edible when raw? Yes, edible in all forms, though you either want it raw, or you want it cooked down to nothing – Since it’s a succulent, a medium amount of cooking (5 mins+) will release its mucilage, which is as gross as it sounds.  It means it will get slimy.  That slime will thicken soups and things, so you can let it cook a good long while and it won’t be so icky/you won’t even notice, but anything in between “raw” and “cooked to death” is probably going to ruin the dish for you.
Worth the price of organic?  I think so.  You’re eating the whole plant, so there’s no place for those pesticides to hide, and since it is considered a pest among gardeners, I imagine non-organic will be chock full of pesticides since it grows just everywhere and is so hard to eradicate.  I have no evidence for that last bit, it just seems to make sense in my head.  On the other hand, it’s classified as a “noxious weed” by the Dep’t of Agriculture, which means most people that routinely eat purslane probably think I’m nutso for purchasing it at all.  Just pluck it out of your sidewalk, I guess.
Best with: fish, cucumbers, garlic, feta – anything that goes well with a little lemony flavor.  Also, olives, anchovies, avocado, or other oily foods where the sour citrus cuts the grease nicely.  Avoid sour vinegars or other sour accompaniments – they’ll highlight the sour notes of the purslane and make everything taste ‘off’.
How to Store: In the fridge, washed, it should keep about 2 days.  Try placing the stems in water if your bunch came pre-tied stems down.  It gets slimy pretty quickly, so try to eat it as freshly picked as possible.

Share this:

  • Facebook
  • Pinterest
  • Twitter
  • Tumblr
  • Reddit
  • More
  • Email
  • Pocket
  • Print

Like this:

Like Loading...

Those Are Some Pretty Ferocious Greens….

03 Sunday Jun 2012

Posted by strangeandyummy in Green, Leafy, Spring, Vegetables

≈ Leave a comment

Tags

bitter, dandelion, greens, jagged, raw, sharp, wild

Yowzas!

Those dandelion greens are strong stuff.

Dandelion greens are excellent for you – they’re nature’s answer to winter’s famine, chock full of potassium and calcium and vitamins K and C and A.  They’re also the food of fools, fools I tell you! Or at least fools that shop at farmer’s markets, because we looked at their gorgeous display and said, “Ooo!  Those look interesting!  Let’s try some, shall we?” Wherein we proceeded to pay $2 for a bunch, and then got home and weeded $40 worth (at farmer’s market prices) out of our overgrown, pesticide-free lawn and threw them in the yard bin.  Sigh.  We ain’t so bright.

The ones at the market are toothier than the ones in your lawn, though:

and at least we know (or can hope) they don’t have dog pee on them.  If you’re picking them yourself, also be aware that they seriously resemble another plant called sowthistle, especially when young.  Sowthistle’s leaves are wider than dandelion’s and often have a bit of purple in them, but they’re almost identical in a young plant – in older plants, the flowers even look almost the same, but sowthistle will grow a huge leaf-lined stalk up the center (as high as six feet in our untended garden) where dandelions will stay pretty low to the ground and just grow their flowers in the center.  Dandelion leaves sprout up in a little circle, with bright green toothy leaves and a very tough root that can run very deep.  Roots and flowers are edible as well, but not in this post.

But wow are they bitter.  Some people describe them as peppery, which I suppose they are, but I find them more straight up bitter than spicy or peppery.  It’s a little like when you take a bite of walnut shell accidentally, but not nutty.  Of all things, there’s a plastic undertone to the bitterness, like you’ve eaten something that just came off an industrial belt.  I’m really selling these, aren’t I?

Yeah, well, they’re not my favorite.  Cooked, they do become a more interesting thing.  They add a nice sharpness to bland dishes, and I imagine they’d be stellar in some sort of soup or spicy dish, but here’s where a confession needs to take place: I can’t eat spicy foods.  Red pepper flakes? Out.  Chili powder?  Nope.  Indian food?  Hahahahahahahaha!  I like horseradish and garlic and a lot of root-based ingredients that add a little strength, but I can’t take the heat, people.  (Exit the kitchen jokes here.)  So my choices are limited in terms of recipes to try, since there seems to be a bit of a spice consensus in the canon.

We tried them two ways.  First, we followed the “always wilt them” advice some experts touted, which involves cooking them in boiling water for about 5 minutes.  This leaches out a lot of the bitterness.  They were then sauteed in garlic and olive oil, tossed with pasta, olive oil, balsamic, and, because it makes all bitter greens better, bacon.  Delicious!  As I said, they add a nice sharpness and a good counterpunch to the smoky, slightly sweet bacon.  I imagine a vegetarian option without bacon would be just as nice if you used a balsamic glaze rather than straight vinegar – something a bit thick and syrupy to play off the greens.

We also shredded them up and tossed them with regular spring greens into a regular salad with tomato and avocado.  That’s where the yowza comes in.  I repeat, yowza!  That’s some bitter stuff for you right there.  Frankly, they ruined the salad.  We picked out the tomato and avocado and couldn’t even eat the regular greens anymore because we were so scared of spearing a dandelion green accidentally.  Supposedly really young dandelion leaves are much nicer raw, which makes sense, and I vaguely recall trying a dandelion green salad recipe in the past, I think something like Dandelion Salad with Warm Hazelnut Vinaigrette that was edible at least, helped by the hot dressing, but yeah.  Raw is out for me from now on.

Trim? The stems can get a little tough when the leaves are old, but in general, especially if you’re cooking them, they’ll soften up when you cook them, so most trimming is unnecessary.
Edible when raw?  If you like the taste of ear wax, baking soda, or aluminum foil…  Young leaves might not be so bad, and old leaves certainly won’t kill you, but if you’re hesitant about trying new foods, definitely start with cooking them.
Worth the price of organic?  Probably.  I can’t imagine someone who sells dandelion greens (a specialty item to be sure) being crazy heavy on the pesticides, and they’re tough little suckers, as anyone with a yard knows, but on the other hand, you’re eating nothing but the greens which means you’re getting nothing but the surface area that’s been sprayed.  I’d go organic, or at least “No Spray.”
In season: Spring through early summer.
Best with: Garlic, bacon, red pepper flakes, balsamic – preferably strong flavors with a sweet edge that can counterbalance the greens’ bitterness.
How to Store: In the fridge, washed, they should keep for about a week or even longer.  They’re quite hardy.

Share this:

  • Facebook
  • Pinterest
  • Twitter
  • Tumblr
  • Reddit
  • More
  • Email
  • Pocket
  • Print

Like this:

Like Loading...

That’s Not Kale!

13 Friday Jan 2012

Posted by strangeandyummy in Green, Leafy, Purple, Spring, Vegetables, Winter

≈ 1 Comment

Tags

bitter, frilly, greens, mustard, sharp

I was duped!  Duped I tell you!

I purchased this beautiful bunch of leaves at the farmer’s market this weekend.  They were labeled kale.  Another purchaser told her son, “Look!  They have dinosaur kale!”  I believed them all, like the fool I am.

After getting home and quickly realizing it was too fragile and purple to be dinosaur kale, and hours of googling images of various other kinds of kale, I finally asked around online.   It’s not kale.  It’s Purple Mustard Greens.  

Alrighty then, kale chips will have to wait until next week.  Maybe I’ll try Mustard Green chips, but I think they’ll be too bitter.  They are gorgeous, however.   They have a broad flattish leaf that’s a bit frilly on the edges that’s a really bright shade of purple.  The backside of the leaf is a rich green color that makes a beautiful contrast when they’re raw.  When they’re cooked, everything just looks dark green and relatively slimy, so admire them raw.  I want to have fancy parties with platters just so I can line up tiny appetizers on top of one of these bright purple leaves. 

They have a VERY sharp flavor when raw, like horseradish, or, dare I say it? spicy mustard, but if you slice them into thin strips they’re a nice addition to a salad.  When they’re cooked, they mellow out a lot and just add a interesting tang. 

Most people recommend a little pre-cooking for bitter greens.  A nice quick way to prepare them is to throw your greens into a pot of boiling water.  While they’re wilting (about 5 minutes), heat a little olive oil or butter on the stove, then toss in the wilted greens (you can drain them in a colander so they’re not so watery) and as much garlic as you like (or, in our case, can stand – we toss in whole heads.  No one likes to come over for dessert.) and eat when the garlic smells delicious, about 2 minutes.  I really wanted to try this recipe for Mustard Greens Salad with Gruyere and Anchovy Croutons (my mother just went slack-jawed.  “Mustard Greens?  with Anchovies?? Who is this??”  But it sounds yummy!  What can I say, I’m all growed up.) but was afraid the greens were going to go bad before I got a chance.  There are lots of varieties of mustard greens out there, so I’ll try it next time. 

They also go nicely tossed into soups or random meals.  We made a very bland dinner of white beans and parnsip circles and a little ground beef we’d bought for hamburgers that we didn’t get around to grilling and instead just cooked up the ground beef real fast so it wouldn’t go bad – not exactly a meal worth polishing the silver for.  But we threw these mustard greens in the skillet and let them wilt, and it turned out delicious.  It tasted like we’d spent hours simmering things in a complex herbal sauce, when it was just some wilted sharp mustard greens tossed in at the end.  Some people think the stalks are too tough and send them to the compost pile, but if you’re cooking it down anyway, they’ll soften up.  Do cut your greens into bite-sized pieces, however.  I kept stealing my husband’s fork to shred my big greens into more manageable sizes.  What, get up and get a knife?  You people have way too much energy.

Trim? You can cut off the tougher ends of the stalks if you’re eating raw or don’t like them, but they’re edible and soften when you cook them.
Edible when raw?  Yes, though the flavor is much sharper.
Worth the price of organic?  Yes.  Leafy greens tend to soak up pesticides pretty well, and conventional farmers tend to use pesticides pretty heavily on them because consumers don’t like bug holes in their leaves.  Love the bugs!  It just means another species likes it too.
In season: Winter and Spring – they like cold weather.  Heat waves make them bolt, which makes them bitter.
Best with: Bland dishes to give them bite or one additional strong flavor they can stand up to, like garlic, anchovy, bacon, chile peppers, or vinegar.  Good in soups and Asian stir-fries.
How to Store: They should keep in the fridge for three to four days, preferably in a crisper, produce box, or plastic bag.

Share this:

  • Facebook
  • Pinterest
  • Twitter
  • Tumblr
  • Reddit
  • More
  • Email
  • Pocket
  • Print

Like this:

Like Loading...

Welcome!

  • About
  • Contact
  • Sites I Like

Recent Posts

  • With Every Beet of My Heart
  • Teeny Tiny Prune Plums
  • You Can’t Go Wrong with a Name Like Candy Roaster
  • Figs in a Blanket
  • Fava Beans, and the Spring-iest Salad that Ever Was Sprung

Categories

Browse By Color or Season

  • Spring
  • Summer
  • Fall
  • Winter
  • Red
  • Orange
  • Yellow
  • Green
  • Blue
  • Purple
  • White
  • Brown
  • Black

What Is That and How Do I Eat It?

What Is That and How Do I Eat It?

Archives

  • February 2016
  • January 2015
  • June 2013
  • May 2013
  • March 2013
  • October 2012
  • September 2012
  • July 2012
  • June 2012
  • May 2012
  • January 2012

Meta

  • Register
  • Log in
  • Entries feed
  • Comments feed
  • WordPress.com

Blog at WordPress.com.

Privacy & Cookies: This site uses cookies. By continuing to use this website, you agree to their use.
To find out more, including how to control cookies, see here: Cookie Policy
  • Follow Following
    • What is That and How Do I Eat It?
    • Join 31 other followers
    • Already have a WordPress.com account? Log in now.
    • What is That and How Do I Eat It?
    • Customize
    • Follow Following
    • Sign up
    • Log in
    • Report this content
    • View site in Reader
    • Manage subscriptions
    • Collapse this bar
 

Loading Comments...
 

    %d bloggers like this: