• Spring
  • Summer
  • Fall
  • Winter
  • Red
  • Orange
  • Yellow
  • Green
  • Blue
  • Purple
  • White
  • Brown
  • Black

What is That and How Do I Eat It?

~ strangeandyummy farmer's market finds

Tag Archives: bitter

Brussels Sprouts

12 Tuesday Mar 2013

Posted by strangeandyummy in Fall, Green, Miscellany, Spring, Vegetables, Winter

≈ Leave a comment

Tags

bitter, brussels sprouts, crunchy, earthy, green, nutty, tiny cabbages

This is how pathetic my life has become: when my husband goes out of town, I live it up by eating brussels sprouts.  Seriously. (Did you know there was an ‘s’ on the end?  No?  Me neither.  I mean, I know they were named for the city, but I always assumed the vegetable was “brussel sprouts.”  Ah the wonders of google’s super-condescending Did you mean brussels sprouts? as if google was channeling the annoying grammar kid in grade school…)brussels sproutsBut they’re lovely little nuggets of nutty vegetable goodness and he hates them, or did.  Conventional wisdom (read: the label on the bag when you buy them at the store) suggests popping them in the microwave for a few minutes with a hole cut in the corner for venting, and voila! Delicious veggies!  So here’s a tip: NEVER TAKE COOKING ADVICE FROM A PLASTIC BAG.  Even if it does have halved sproutfriendly-looking exclamation points and promising adjectives.

Brussels sprouts microwaved in the bag taste like, well, vegetables microwaved in a bag.  They’re sorta steamed and sorta healthy-tasting and sorta mushy and definitely edible and definitely fast, but when all is said and done they taste a little…sad.  And definitely need to be smothered in soy sauce.

Like any somewhat tough, somewhat bitter vegetable, the key to brussels sprouts is to roast them.  Sweeter roots and tubers like sweet potatoes and beets can be cut thin and survive a quick 20 minute roast and come out just fine, but with brussels sprouts?  You’ve got to roast the crap out of them.
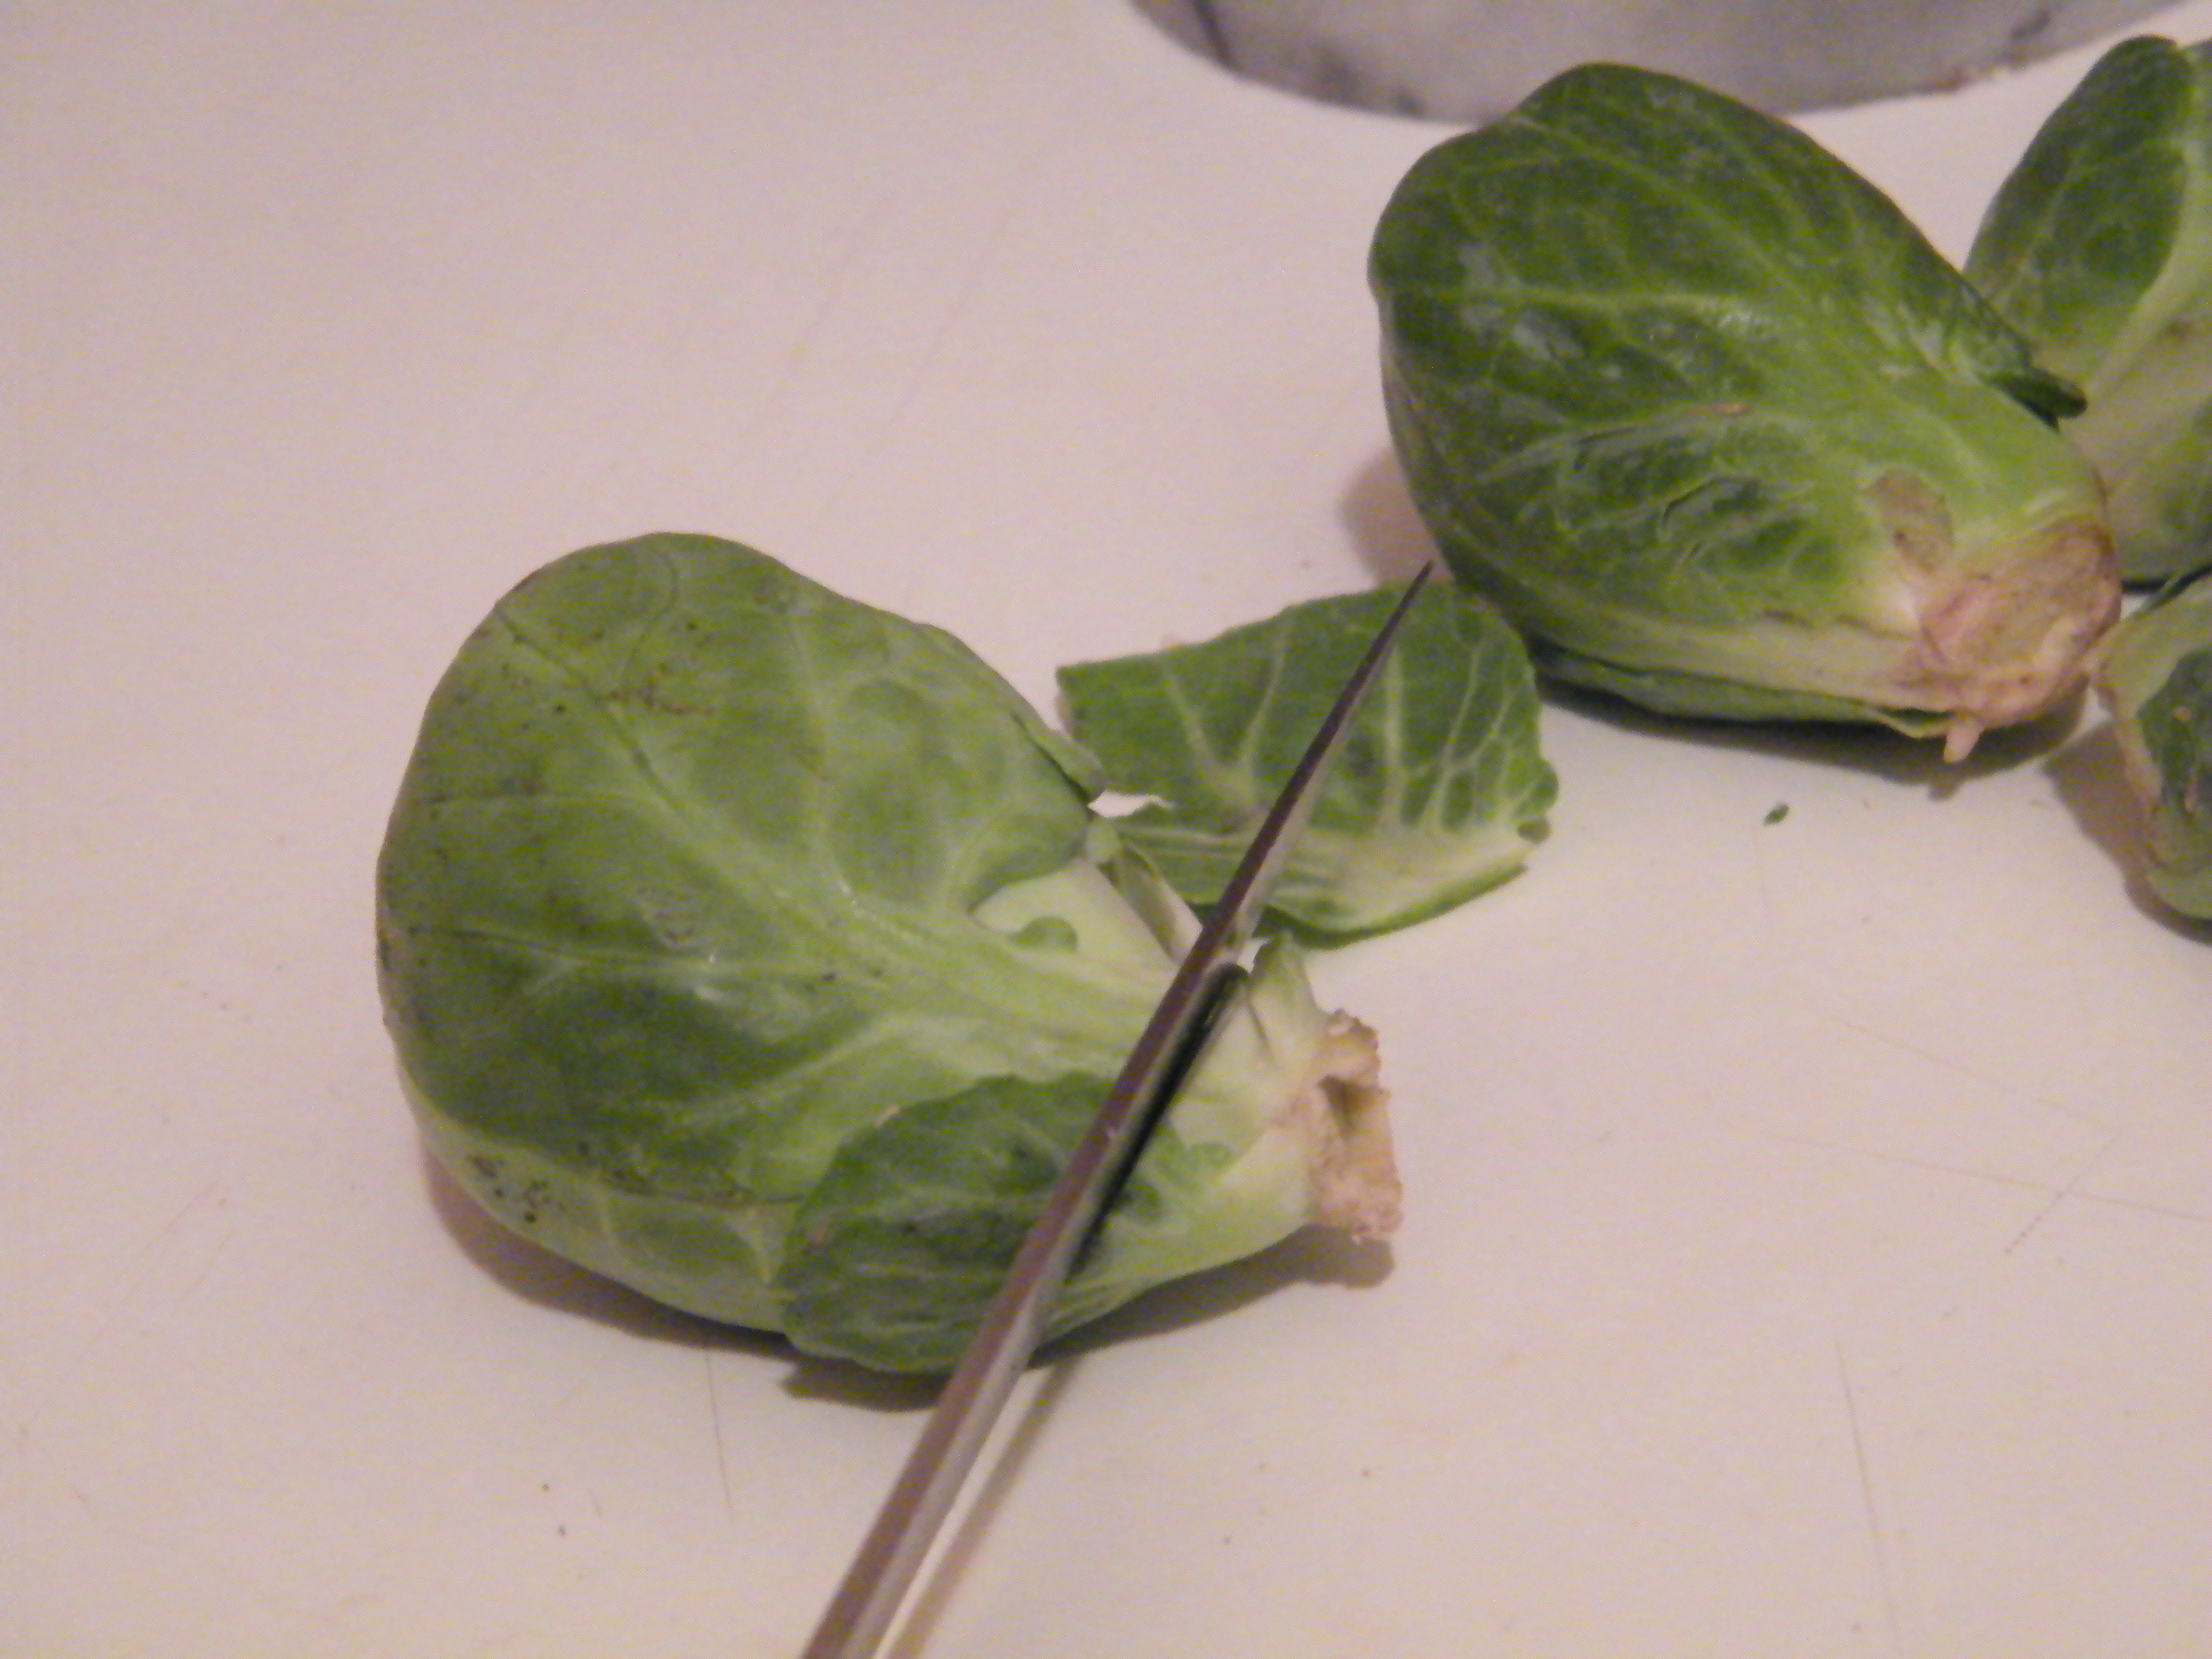
  trim


Cut off the ends,
trimmed v untrimmed
half sprout


Cut in half,


toss with a bit of olive oil, and pop them in a 400 oven for at least 30 minutes.  About halfway through cooking time, shake the pan to toss them around a bit, and then back in they go.  When they’re done, they’ll be absolute mush in the center, which sounds really unappetizing, but what happens is that all the bitterness dissolves away and the residual sugars caramelize in the heat and the mush you’re left with is a little sweet and a little caramelly and a little nutty and tastes awesome with anything with a little strength behind its flavor – red onion, goat cheese, walnuts, steak, or just very nice sea salt.  They’re very earthy when they’re left almost whole like this, and would probably be wonderful smoked.

shredded brussels sproutsBut if you don’t have time for a long oven roast, there’s another secret that we only recently discovered that makes them even better, and way faster and easier: shred them.  If you have a food processor, run them through the slicing blade.  The resulting pieces are thin enough to pop into any pan for a quick saute or stir-fry with whatever else you’re serving, or even edible raw.  I’ve swapped them out for the kale in my raw kale salad with fantastic results, used them in place of the cabbage in a cole slaw (since brussels sprouts are really baby cabbages anyway), and tossed the shreds into a spinach salad with warm bacon dressing for a little vegetable variety.  When shredded, the natural bitterness is not nearly as noticeable, and just lends a little sharpness; if you’re cooking, you’ll get to that sweet nutty flavor ASAP instead of waiting for the slow roast.

A quick recipe:  Throw some sprouts and a shallot through the processor, and into a pan with a little olive oil.  Cook until everything is soft.  Feel free to leave it without turning much, ‘cuz you know I like my bitter things a little burned.  Splash some champagne vinegar on there if you have it, or cooking sherry, or rice vinegar, or apple cider vinegar.  Sprinkle with salt.  Eat by the panful because it really is that good.tiny cabbages

Look for tight sprouts without yellowing or curling on the outer leaves and few spots.  If you’re buying them from the market instead of the store, you may see them in their natural state, which is attached to a giant stalk, which looks bizarrely attractive but is inedible.  If you do buy them on the stalk, you can cut each sprout off with a knife, or just twist and pull each one off – the little stems that sometimes come off too are edible, but will need to be steamed or roasted very well first.  You get a lot more bang for your buck when you buy on the stalk, but a lot more work, and frankly, my fridge isn’t big enough to hold it…so no pics.  Sorry.  When we move to a bigger house and get a bigger kitchen, I swear I’ll buy a giant specimen just for you.

Trim? Yes.  Slice off the bottom brown edge.  Some people say to just put an ‘x’ in the base, but that seems like more work to me and I don’t like tough stems.  Remove any wilted leaves.
Edible when raw?  Yes, but better sliced thin or shredded first.
Worth the price of organic? Apparently not, though I would have thought otherwise.  Organic brussels sprouts are particularly hard to grow, so they’re not that common, and because each little sprout is packed so tightly, they don’t harbor a lot of bad stuff.  So give ’em a good wash and save your pennies.
Best with:  Strong flavors with a little sweetness that can stand up to the bitter earthiness but bring out the sweetness of the sprout – shallots, lemon, soft cheeses, pine nuts, walnuts, bacon/ham/piggies…  Strong flavors that have a bitter edge, like marjoram, turmeric, or even my beloved garlic, can heighten the sulfuric edge, making them taste a little like rotten eggs if you’re not careful.
In Season:  Fall through Spring.
How to Store: In the fridge, in a produce box or loosely sealed plastic bag, they should keep for ten days to 2 weeks.  If they start to yellow at the edges, peel off the outer leaves and eat within the next day or two.

Share this:

  • Facebook
  • Pinterest
  • Twitter
  • Tumblr
  • Reddit
  • More
  • Email
  • Pocket
  • Print

Like this:

Like Loading...

Kale Chips

13 Saturday Oct 2012

Posted by strangeandyummy in Fall, Green, Leafy, Spring, Winter

≈ Leave a comment

Tags

bitter, dark, dinosaur, flat, greens, kale, lacinato, leafy, tuscan, veined

I was a little slow to the Kale Train, I think.  The only kale I’d ever seen or heard of prior to a year or so ago was Curly Kale, the green kind sold in supermarkets that looks a little like brain coral and gets chopped up very fine and stirred into Irish Champ.  Or at least, that’s the only thing I knew to do with it.

But kale comes in plenty of other varieties, and the one that was most revelatory to me was Tuscan Kale, also called lacinato kale or dinosaur kale.  Flat and deep green with a giant kale-like rib up the middle, Tuscan kale begs to be made into chips.  You can eat it any other way you like – sauteed into other dishes, or as a side, or my personal favorite, as with all bitter greens, prepared in any way, shape or form with bacon – but kale chips are really the perfect venue for this particular kind of kale to shine.  They’re quick, they’re easy to make, they keep for a good week if you can actually keep them around that long, and best of all:

My toddler loves them.  Ask any parent what they do to make their kids eat their veggies, and you’ll get various purees and promises and smothered in cheese and snuck into brownies, but my answer always is: Kale Chips.  On those days where he refuses everything, throws even fruit and generic O’s I bought because they were organic and it turns out they’re chock full of sugar, he’ll eat kale chips.  And for that, I love kale.

Look for dark, deep green leaves, ranging almost to a blackish-green in color, with a pale thick rib up the center.  The leaves look like they’re almost flat, though they do curl a bit at the edges, but up close you’ll see that the surface of the leaf rises and falls with the veins, like rolling hills.  Leaves can be smallish (4-6 inches), but usually range much larger than that, as much as a foot or two in length from stem to top.  Most recipes will tell you to remove the rib from all kale before eating, but we often don’t.  I usually get rid of the really tough splinter-y looking part at the bottom, but the rest can usually be sliced up small and tossed into whatever you’re putting the kale in.  Kale chips, however, are the exception to my lazy/cheap tendencies: lose the rib.  If you do plan on using the stem, be sure and scrub it with your thumb when washing – dirt tends to stick to the thicker part of the rib.

It seems like everyone has a recipe for kale chips out there, from Martha Stewart to Epicurious to Smitten Kitchen and thousands of other sites in between, but after making them week after week, I’ve discovered a few hints:

  • Lower temp is better.  I’ve seen 250, 275, 300 and 350 on different sites, and in my experience, anything over 300 ends up tasting burnt, even if they don’t look it.  Use an oven thermometer if you have an old gas contraption like mine, because the first time I made them, I made the 350 version, but it was pre-thermometer, so it turns out it may even have been more like 400.  That first batch was definitely burnt.  Subsequent attempts have taught me to dry them out rather than roast them.
  • Don’t use canola oil.  We don’t use canola oil for anything anymore, but when we first tried kale chips, we did and we did.  They were awful.  Canola can get a strange fishy taste to it (I read why once but I forget now) and it definitely came through on something as delicate and spare as kale chips.  If you like seaweed snacks, give the canola a try.  Otherwise, go for olive.  (Side note: I’m curious what sunflower seed oil would taste like – since nutty flavors go so well with bitter greens, I imagine it might be quite nice.  Anyone tried it?)
  • Spice it up.  As much as I try to eat greens at every dinner, I have to be honest: I don’t love them.  Hence the predominance of bacon in all my favorite bitter greens recipes.  Kale chips according to most recipes consist of olive oil, salt and kale.  And guess what?  They end up tasting like kale.  Crispy kale, sure.  Salty like a snack?  You betcha.  Kale?  Yup.  I prefer mine with garlic powder, but I’ve done them with garlic, ginger and a dash of soy in with the olive oil for an Asian-inspired version that were quite nice as well, and I imagine if you were someone that could handle spicy foods, some cayenne pepper or chili powder could be really interesting.  Definitely put something on there.  Weirdly, as an FYI, garlic and parmesan?  Not as good as I thought it would be.  It wasn’t BAD, they just taste better with straight garlic.

So my version in a nutshell:

Kale Chips
1 bunch Tuscan kale
olive oil
salt
spices of choice (garlic powder is my go-to)

Preheat oven to 275 or 300 – I usually just turn it on to somewhere in between.

Remove the rib from each leaf by flipping the leaf upside down and slicing on either side of it.  I often ignore this advice when cooking with kale, but with chips, you do not want it there.  Baby leaves or thinner rib near the top can be left alone if you’re feeling lazy, but you really want all leaf for these.

Slice the kale leaves into relatively uniform pieces.  You’ll have a few super skinny ones that were next to the rib and maybe some giant flat ones from the bigger leaves – that’s okay, you just want to try and get everything to be finished cooking at the same time.

Put all the kale leaves in a ziploc bag or bowl.  Add spices, and olive oil enough to coat – don’t be too stingy here, but don’t drown them.  I often go as much as a whole tablespoon, but I eyeball it – start with a little and if that’s not enough, add more.  They’re very flexible, but too much oil will make them begin to wilt.

Toss around the ziploc to coat the leaves, or toss gently with your hands if they’re in a bowl – do use your hands for the bowl.  Utensils tend to rip them to shreds.

On a large cookie sheet (I usually end up needing 2), lay down parchment paper or aluminum foil – this is not necessary, but it makes cleanup a breeze.  Spread out the leaves so nothing’s overlapping; but you can get them quite close to each other, like a game of Healthy Tetris.  Bake about 20 minutes or until crispy.  If they start to turn brown, your oven may be too hot or you’ve baked too long – they’re still edible, but they will taste more bitter.

Remove from the oven, and slip the parchment or foil off the pan with the leaves still on it onto a table, counter, or rack to cool.  Voila!  Clean cookie sheet and you don’t have to burn your fingers transferring leaf by leaf to a rack.  They’ll keep up to about a week in a jar or ziploc bag.  They don’t look pretty, but they sure taste awesome.

*Special Note for people with toddlers and/or people that are stronger than you think you are: You will accidentally crumble half of them into bits when you absentmindedly grab for one.  Save the bits!  They’re great hidden in a quick quesadilla or shaken into any pasta dish to get some quick extra greens that, at that point, just taste like garlic salt.

Looking for how to prepare Tuscan Kale?  Just like Frilly Purple Kale –

Share this:

  • Facebook
  • Pinterest
  • Twitter
  • Tumblr
  • Reddit
  • More
  • Email
  • Pocket
  • Print

Like this:

Like Loading...

Frilly Purple Kale

15 Sunday Jul 2012

Posted by strangeandyummy in Fall, Green, Leafy, Purple, Spring, Vegetables, Winter

≈ 5 Comments

Tags

bitter, curly, frilly, green, kale, leafy, raw, redbor kale

It’s a little annoying when I go to the Farmer’s Market and there are seven thousand and three varieties of kale, and they’re all very pretty but they all look a little like something greenspeople plant by the thousands at Disneyland in Autumn rather than something I want to put on my plate, and you ask the farmer, “How do I eat this?” and he replies, “Like any kind of kale!”  Yeah, thanks.

But I guess that’s why I started this blog in the first place.  I don’t have cookbooks full of kale recipes, and even if I did it’s unlikely I’d have tried enough of them to be able to speak nonchalantly about them, like, “oh, of course, I’ll just whip up my Kale a la Bligadibong.”

This guy:

is technically called Redbor Kale, I think, but I like to call it Frilly Purple Kale, for obvious reasons.  He’s not red, for starters.  But he was pretty, and I need more iron in my diet and it’s a little hot for Kale Chips (what are Kale Chips you say?  Glad you asked!  Post on them coming up shortly…  Posted!) so I figured, why not?  Let’s try something new.

I thought a kale slaw of some kind might be nice, since kale is related to cabbage after all, but I couldn’t decide whether to go traditional mayo-type, or interesting peanut dressing, or something else entirely.  Finally, I settled on modifying this one for the main reason that it contained no red peppers which I’m not a big fan of.  In addition to being a lovely little side salad, I very much like that it’s vegan, which makes no difference to a bacon-lover like myself, really, except that bacon is always my go-to for bitter greens, and probably isn’t the healthiest counterpart.  More importantly, though, since it’s vegan that means no dairy, which means it can sit outside at a barbecue most of the afternoon and not poison my friends.  Score!

Kale Slaw with Toasted Walnuts

My changes:  I used 1 bunch Frilly Purple Kale and then at the last minute threw in 1/3-1/2 bunch of Curly Kale because it was in the fridge about to go bad and I didn’t think I had enough salad.  As an added bonus, however, the salad turned out much prettier with a little more variety of color, so I think I’ll do this in the future as well.  The recipe calls for just one large carrot, but I had 3-5 medium (again, about to go bad – end of the week fridge clean-out here) so I went with those instead.  And again, I recommend a little heavier on the carrot – it gives it a nice crunch.  I also wasn’t about to take the time to mince walnuts, so I took my good ol’ trusty bag of Walnut Halves and Pieces and just sort of crumbled them into more uniform sizes with my hands.  I probably ended up using more than the 1/4 c called for, but I also liked that I could actually taste them.  Minced seems…picayune.  But do take the time to toast them – toasting nuts brings out the flavor so you can use less, and the bit of warmth when they’re fresh out helps wilt the kale a bit.

  • 1 1/2 bunches Kale, preferably Frilly types because they’re prettier
  • 3-4 medium carrots – I like  to use multi-colored instead of just orange, again, for looks
  • 1/3 cup red wine vinegar, separated into 2 tbs + what’s left
  • 1/3 cup extra virgin olive oil, separated into 1 tbs + leftover
  • 1 tablespoon honey
  • ½ teaspoon ground ginger
  • 1 clove garlic, minced
  • ½ teaspoon freshly ground black pepper
  • ¼ teaspoon sea salt, more to taste
  • 1/4 – 1/2 c crumbled walnuts (toasted)

First thing after washing, you’re going to want to get rid of this guy:That’s the center rib of each leaf.  I often skip this step when I’m cooking kale, but for raw kale salads, it’s just too fibrous and unappetizing.

The easiest way to remove that rib from Frilly Kale is to fold the leaf in half and just run the knife down the side of the stem.

Please don’t mock my knife skills.  I have none.  I’m amazed I haven’t lost a thumb yet.

Pull all the lovely leafy parts away and toss the ribs into the compost pile.

Line up your leaves and slice them into thin strips.  This will make a giant mess that will severely disappoint your dog when she races over to see what you are spilling all over the floor.

Now comes the kinky part.  Put your shredded greens (purples?) into a bowl, add 2 tbs red wine vinegar, 1 tbs olive oil, and some salt, and give it a massage.

That’s right, a massage.  Don’t just toss it people, rub it in.  That’s the key to eating raw kale.  Raw kale is a tough, somewhat bitter little bugger, and as a tough, somewhat bitter little bugger myself, I can tell you, the only thing that makes it palatable is softening it up through a good massage.  And doing dishes for it.  Oh wait, that’s just for me.

Give it a good 3 minutes of rubdown, working the dressing and salt in, and then let it sit.  Turn on some ocean sounds for it so it can really relax.

Meanwhile, start toasting walnuts on aluminum foil in toaster oven at 325 for 8-10 minutes.

Peel your carrots and remove the tough stem end and maybe a bit of the tip if your peeling skills stink and it’s got dirt on it still.  If you have a food processor, I recommend attempting to put your carrots through the grater because if it works it’s super-fast, looks much nicer, and gives you just a wee bit of crunch without making the salad all about the carrots.  But since my carrots were getting a little wiggly, it only worked on 2 of them, so I had to chop the last one into shredded carrot size by hand.  Pain in the patootie.  Lazy lazy people might just want to buy pre-shredded carrots from the grocery store and I wouldn’t blame you.

Toss the carrots with the now-placid kale.  With a whisk or blender, combine the remaining oil and vinegar, honey, ginger, S &P, and garlic – do use a fresh clove if you’ve got it instead of garlic powder; it makes a difference.  Toss the dressing into the salad.Take the toasty walnuts out of the oven and dump them into the salad – toss quickly and carefully – they will be hot.  You will accidentally burn your hands and may suck on your fingers on instinct and then have to remind yourself to wash your hands again before continuing to toss.  Not that I did that….  You may choose to let them cool first, like intelligent people probably do, but I actually like that the hot walnuts help the kale wilt just a little bit more – if you’re making this salad right before eating, that’s a good thing.  If it’s going in the fridge until tomorrow, it probably doesn’t matter.

I honestly love this salad – it’s good cold, it’s good room temp, it keeps well, and it’s a lot healthier than cole slaw or potato salad for summer barbecues.  Also, it’s pretty.  I like pretty.

Some General Kale Facts:

Trim? Not necessary if you’re cooking it, though often preferred – for this recipe, lose the center rib.
Edible when raw? Yes – it needs to be massaged or wilted slightly to reduce the toughness, but it’s lovely.
Worth the price of organic? Yes – greens are on most “Must Buy Organic” lists, kale in particular, frilly kales especially in particular because pesticides get trapped in the curves and frills.  Organic all the way.
Best with:  Kale in general is good with bacon, goat cheese, vinegars – strong flavors to help counteract the slightly bitter taste of the leaf.  I also like soy sauce, peanuts/peanut oil, teriyaki, and other Asian flavorings for the sweet/sour interplay.
In Season:  It likes a frost, so technically fall, winter and spring, but I’ve never NOT seen it for sale unless it’s been 100 degrees for a straight month.  If one variety of kale is gone, you can usually swap in another.
How to Store: A trick I learned from an Internet stranger on a forum for all greens – as soon as you get home, fill your sink with warmish water.  Soak your greens as you scrub them with your fingers to get the dirt off the stems.  Drain the sink, then refill with cold water – the warm water opens the plant pores so they’ll absorb more water; the cold closes them to prevent wilting.  Pat dry with paper towels or spin in a spinner and put in the fridge.  Kale is a nice hearty green that we’ve been able to keep around for as long as 2 weeks, but I wouldn’t count on longer than a week if you want to be able to use the whole thing without yellowing bits.

Share this:

  • Facebook
  • Pinterest
  • Twitter
  • Tumblr
  • Reddit
  • More
  • Email
  • Pocket
  • Print

Like this:

Like Loading...

Those Are Some Pretty Ferocious Greens….

03 Sunday Jun 2012

Posted by strangeandyummy in Green, Leafy, Spring, Vegetables

≈ Leave a comment

Tags

bitter, dandelion, greens, jagged, raw, sharp, wild

Yowzas!

Those dandelion greens are strong stuff.

Dandelion greens are excellent for you – they’re nature’s answer to winter’s famine, chock full of potassium and calcium and vitamins K and C and A.  They’re also the food of fools, fools I tell you! Or at least fools that shop at farmer’s markets, because we looked at their gorgeous display and said, “Ooo!  Those look interesting!  Let’s try some, shall we?” Wherein we proceeded to pay $2 for a bunch, and then got home and weeded $40 worth (at farmer’s market prices) out of our overgrown, pesticide-free lawn and threw them in the yard bin.  Sigh.  We ain’t so bright.

The ones at the market are toothier than the ones in your lawn, though:

and at least we know (or can hope) they don’t have dog pee on them.  If you’re picking them yourself, also be aware that they seriously resemble another plant called sowthistle, especially when young.  Sowthistle’s leaves are wider than dandelion’s and often have a bit of purple in them, but they’re almost identical in a young plant – in older plants, the flowers even look almost the same, but sowthistle will grow a huge leaf-lined stalk up the center (as high as six feet in our untended garden) where dandelions will stay pretty low to the ground and just grow their flowers in the center.  Dandelion leaves sprout up in a little circle, with bright green toothy leaves and a very tough root that can run very deep.  Roots and flowers are edible as well, but not in this post.

But wow are they bitter.  Some people describe them as peppery, which I suppose they are, but I find them more straight up bitter than spicy or peppery.  It’s a little like when you take a bite of walnut shell accidentally, but not nutty.  Of all things, there’s a plastic undertone to the bitterness, like you’ve eaten something that just came off an industrial belt.  I’m really selling these, aren’t I?

Yeah, well, they’re not my favorite.  Cooked, they do become a more interesting thing.  They add a nice sharpness to bland dishes, and I imagine they’d be stellar in some sort of soup or spicy dish, but here’s where a confession needs to take place: I can’t eat spicy foods.  Red pepper flakes? Out.  Chili powder?  Nope.  Indian food?  Hahahahahahahaha!  I like horseradish and garlic and a lot of root-based ingredients that add a little strength, but I can’t take the heat, people.  (Exit the kitchen jokes here.)  So my choices are limited in terms of recipes to try, since there seems to be a bit of a spice consensus in the canon.

We tried them two ways.  First, we followed the “always wilt them” advice some experts touted, which involves cooking them in boiling water for about 5 minutes.  This leaches out a lot of the bitterness.  They were then sauteed in garlic and olive oil, tossed with pasta, olive oil, balsamic, and, because it makes all bitter greens better, bacon.  Delicious!  As I said, they add a nice sharpness and a good counterpunch to the smoky, slightly sweet bacon.  I imagine a vegetarian option without bacon would be just as nice if you used a balsamic glaze rather than straight vinegar – something a bit thick and syrupy to play off the greens.

We also shredded them up and tossed them with regular spring greens into a regular salad with tomato and avocado.  That’s where the yowza comes in.  I repeat, yowza!  That’s some bitter stuff for you right there.  Frankly, they ruined the salad.  We picked out the tomato and avocado and couldn’t even eat the regular greens anymore because we were so scared of spearing a dandelion green accidentally.  Supposedly really young dandelion leaves are much nicer raw, which makes sense, and I vaguely recall trying a dandelion green salad recipe in the past, I think something like Dandelion Salad with Warm Hazelnut Vinaigrette that was edible at least, helped by the hot dressing, but yeah.  Raw is out for me from now on.

Trim? The stems can get a little tough when the leaves are old, but in general, especially if you’re cooking them, they’ll soften up when you cook them, so most trimming is unnecessary.
Edible when raw?  If you like the taste of ear wax, baking soda, or aluminum foil…  Young leaves might not be so bad, and old leaves certainly won’t kill you, but if you’re hesitant about trying new foods, definitely start with cooking them.
Worth the price of organic?  Probably.  I can’t imagine someone who sells dandelion greens (a specialty item to be sure) being crazy heavy on the pesticides, and they’re tough little suckers, as anyone with a yard knows, but on the other hand, you’re eating nothing but the greens which means you’re getting nothing but the surface area that’s been sprayed.  I’d go organic, or at least “No Spray.”
In season: Spring through early summer.
Best with: Garlic, bacon, red pepper flakes, balsamic – preferably strong flavors with a sweet edge that can counterbalance the greens’ bitterness.
How to Store: In the fridge, washed, they should keep for about a week or even longer.  They’re quite hardy.

Share this:

  • Facebook
  • Pinterest
  • Twitter
  • Tumblr
  • Reddit
  • More
  • Email
  • Pocket
  • Print

Like this:

Like Loading...

That’s Not Kale!

13 Friday Jan 2012

Posted by strangeandyummy in Green, Leafy, Purple, Spring, Vegetables, Winter

≈ 1 Comment

Tags

bitter, frilly, greens, mustard, sharp

I was duped!  Duped I tell you!

I purchased this beautiful bunch of leaves at the farmer’s market this weekend.  They were labeled kale.  Another purchaser told her son, “Look!  They have dinosaur kale!”  I believed them all, like the fool I am.

After getting home and quickly realizing it was too fragile and purple to be dinosaur kale, and hours of googling images of various other kinds of kale, I finally asked around online.   It’s not kale.  It’s Purple Mustard Greens.  

Alrighty then, kale chips will have to wait until next week.  Maybe I’ll try Mustard Green chips, but I think they’ll be too bitter.  They are gorgeous, however.   They have a broad flattish leaf that’s a bit frilly on the edges that’s a really bright shade of purple.  The backside of the leaf is a rich green color that makes a beautiful contrast when they’re raw.  When they’re cooked, everything just looks dark green and relatively slimy, so admire them raw.  I want to have fancy parties with platters just so I can line up tiny appetizers on top of one of these bright purple leaves. 

They have a VERY sharp flavor when raw, like horseradish, or, dare I say it? spicy mustard, but if you slice them into thin strips they’re a nice addition to a salad.  When they’re cooked, they mellow out a lot and just add a interesting tang. 

Most people recommend a little pre-cooking for bitter greens.  A nice quick way to prepare them is to throw your greens into a pot of boiling water.  While they’re wilting (about 5 minutes), heat a little olive oil or butter on the stove, then toss in the wilted greens (you can drain them in a colander so they’re not so watery) and as much garlic as you like (or, in our case, can stand – we toss in whole heads.  No one likes to come over for dessert.) and eat when the garlic smells delicious, about 2 minutes.  I really wanted to try this recipe for Mustard Greens Salad with Gruyere and Anchovy Croutons (my mother just went slack-jawed.  “Mustard Greens?  with Anchovies?? Who is this??”  But it sounds yummy!  What can I say, I’m all growed up.) but was afraid the greens were going to go bad before I got a chance.  There are lots of varieties of mustard greens out there, so I’ll try it next time. 

They also go nicely tossed into soups or random meals.  We made a very bland dinner of white beans and parnsip circles and a little ground beef we’d bought for hamburgers that we didn’t get around to grilling and instead just cooked up the ground beef real fast so it wouldn’t go bad – not exactly a meal worth polishing the silver for.  But we threw these mustard greens in the skillet and let them wilt, and it turned out delicious.  It tasted like we’d spent hours simmering things in a complex herbal sauce, when it was just some wilted sharp mustard greens tossed in at the end.  Some people think the stalks are too tough and send them to the compost pile, but if you’re cooking it down anyway, they’ll soften up.  Do cut your greens into bite-sized pieces, however.  I kept stealing my husband’s fork to shred my big greens into more manageable sizes.  What, get up and get a knife?  You people have way too much energy.

Trim? You can cut off the tougher ends of the stalks if you’re eating raw or don’t like them, but they’re edible and soften when you cook them.
Edible when raw?  Yes, though the flavor is much sharper.
Worth the price of organic?  Yes.  Leafy greens tend to soak up pesticides pretty well, and conventional farmers tend to use pesticides pretty heavily on them because consumers don’t like bug holes in their leaves.  Love the bugs!  It just means another species likes it too.
In season: Winter and Spring – they like cold weather.  Heat waves make them bolt, which makes them bitter.
Best with: Bland dishes to give them bite or one additional strong flavor they can stand up to, like garlic, anchovy, bacon, chile peppers, or vinegar.  Good in soups and Asian stir-fries.
How to Store: They should keep in the fridge for three to four days, preferably in a crisper, produce box, or plastic bag.

Share this:

  • Facebook
  • Pinterest
  • Twitter
  • Tumblr
  • Reddit
  • More
  • Email
  • Pocket
  • Print

Like this:

Like Loading...

Welcome!

  • About
  • Contact
  • Sites I Like

Recent Posts

  • With Every Beet of My Heart
  • Teeny Tiny Prune Plums
  • You Can’t Go Wrong with a Name Like Candy Roaster
  • Figs in a Blanket
  • Fava Beans, and the Spring-iest Salad that Ever Was Sprung

Categories

Browse By Color or Season

  • Spring
  • Summer
  • Fall
  • Winter
  • Red
  • Orange
  • Yellow
  • Green
  • Blue
  • Purple
  • White
  • Brown
  • Black

What Is That and How Do I Eat It?

What Is That and How Do I Eat It?

Archives

  • February 2016
  • January 2015
  • June 2013
  • May 2013
  • March 2013
  • October 2012
  • September 2012
  • July 2012
  • June 2012
  • May 2012
  • January 2012

Meta

  • Register
  • Log in
  • Entries feed
  • Comments feed
  • WordPress.com

Create a free website or blog at WordPress.com.

Privacy & Cookies: This site uses cookies. By continuing to use this website, you agree to their use.
To find out more, including how to control cookies, see here: Cookie Policy
  • Follow Following
    • What is That and How Do I Eat It?
    • Join 31 other followers
    • Already have a WordPress.com account? Log in now.
    • What is That and How Do I Eat It?
    • Customize
    • Follow Following
    • Sign up
    • Log in
    • Report this content
    • View site in Reader
    • Manage subscriptions
    • Collapse this bar
 

Loading Comments...
 

    %d bloggers like this: